Changing IP by CLI


Changing IP by CLI |
|
| Trading and C&C > Turret Proxy To Open communication (TPO) > DDI Sharing > DDI Lines & Private Wires > Configure > TPO Configuration > Vega 400G & Vega400G V2 > Getting Started |
The CLI is accessible by the using a serial Terminal Console. Here are the steps to connect a Console:
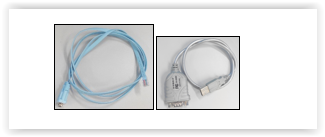
1.Plug the console cable into the console port and a suitable laptop or PC using USB. Then Power on the gateway.
2.Use a Terminal emulator (PuTTY) and Log on to the Terminal by using the following Serial data: •115200 bits per second •8 data bits •No parity •1 stop bit data
3.The command prompt appears, the default login details are admin for the username and admin for the password.
4.Set Static IP address by typing the following command: •show banner •set lan.if.1.use_dhcp=0 This command disables DHCP on LAN 1 •set lan.if.1.ip=aaa.bbb.ccc.ddd This command sets the IP Address on LAN 1, please replace aaa.bbb.ccc.ddd with the IP Address you want the gateway to use. •set lan.if.1.subnet=eee.fff.ggg.hhh This command sets the subnet to use on LAN 1, please replace eee.fff.ggg.hhh with the subnet that you need to use for the IP Address you have set in the previous step. •set lan.gateway.ip=iii.jjj.kkk.lll This command sets the default gateway for outgoing IP traffic, please replace iii.jjj.kkk.lll with the IP Address of the default gateway IP Address.
•save •reboot
|