Without replication


Without replication |
|
| Solution Installation > TSS Installation > Install TSS on a standard server > Install new TSS/Console |
OverviewThis section describes how to install a new version of the software on a fresh system. No SQL data replication system is used.
TSS application redundancy can be used by installing several TSS instances on different machines. This can provide: •Either more robustness by having several TSS applications on which IP Trade devices can switch to in case of failure; •Or a greater distribution of the load by splitting the IP Trade devices into sub groups, each connecting to their own TSS server, but all accessing the same database.
Here is an overview of installation procedure:
RedundancyRedundancy can be used to connect several TSS/Console instances (maximum 6) to one database. Each TSS/Console instance will use its own range of uids.
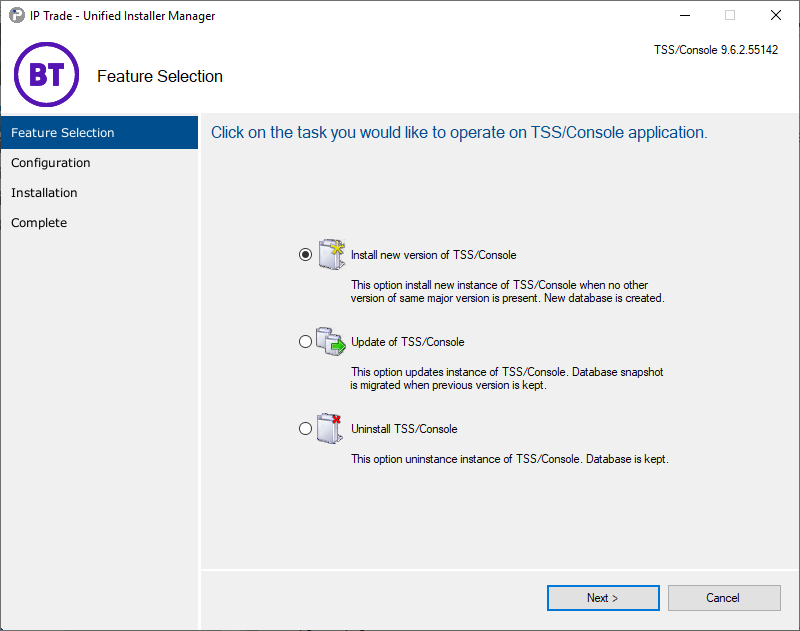
Here is a brief description of different configuration available: •No redundancy: Only one TSS/Console instance is connected to database. Select 'Type=New database' and 'No of TSS/Console = 1' during TSS/Console installation •Redundancy: Several TSS/Console instances are connected to one database. oFirst TSS/Console instance: Select 'Type=New database' and 'No of TSS/Console = 2 to 6' (this gives the total number of TSS/Console instances that will connect to the database). oFollowing instances: Select 'Type=Existing database' and 'No of TSS/Console = 2 to 6' (this gives the id of the current TSS/Console. If an id has already been used during a previous instance installation, it cannot be chosen anymore). Install first instance of TSS/ConsoleProceed as follows: Extract the archive TSS-Console-10.1.Y.Z.cab. Start the application UIM.exe. Select option Install new version of TSS/Console and press Next button.
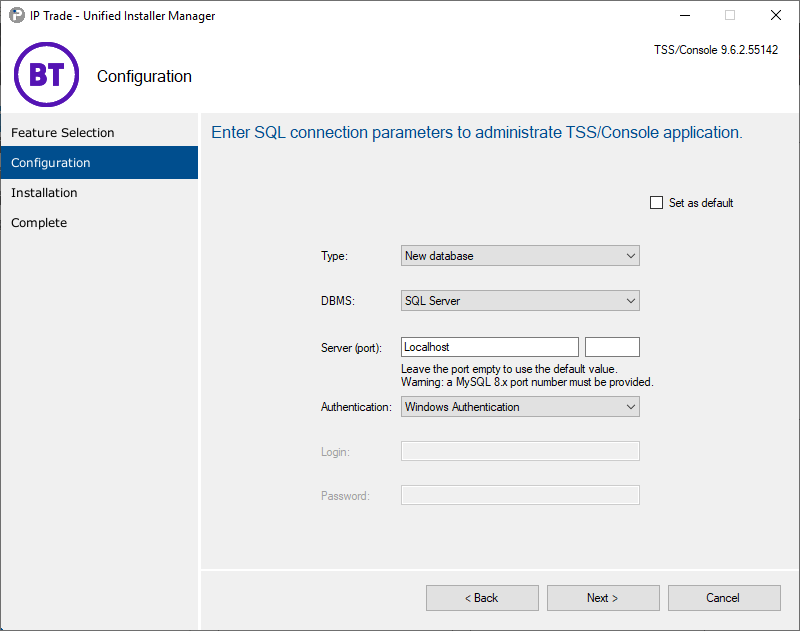
Next step ask you to choose some options: •Type: Type of new installation in redundancy. oNew database: TSS/Console is the first instance. oExisting database: An another instance of TSS/Console has been installed previously on another server. You can press 'Search' button to find all existing database installed on mentioned server. •DBMS: Type of database management system oMicrosoft SQL Server : You can use Windows Authentication (logged user must have full control on SQL DATA and must have permission db_owner on master database) or use sa user to connect with SQL Server Authentication. Choose this option as you are in SQL Server section. oMySQL : Enter login (root) and password (same used during MySQL installation). You can also select an another user that you especially created in MySQL to connect to IP Trade database. •Server: Server where database is stored. If you have choosen option 'Existing database' select server mentioned during first instance TSS/Console installation. •Authentication: Type of authentication to connect to SQL Server (not used with mySQL). oWindows Authentication oSQL Server Authentication oAzure managed identities •Login: Login to connect to DBMS. In the case where we use Azure managed identites, the client ID. •Password: Password to connect to DBMS. •Database: Existing database created on first TSS/Console install. Press Next button.
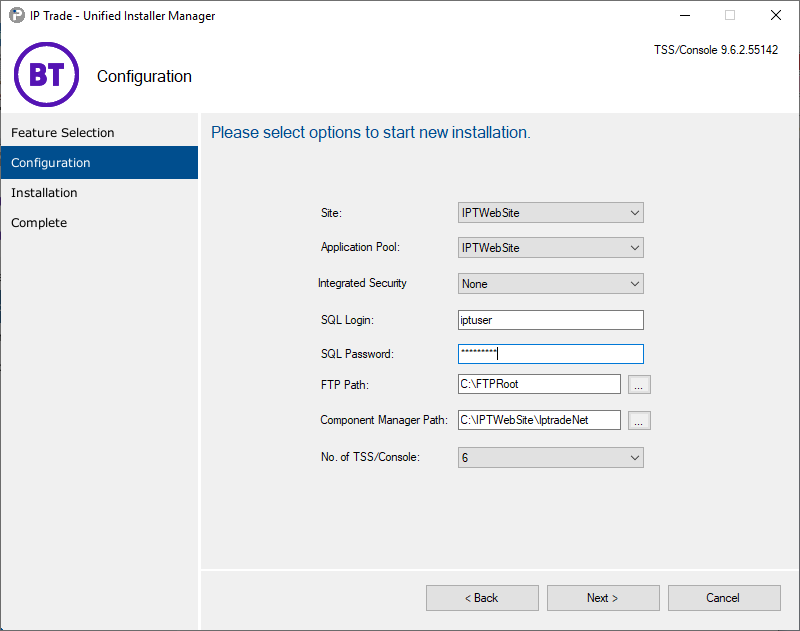
Next step ask you to choose some options: •Site: HTTP site that will be used. Choose your recently created Site. •Application Pool: application pool will be used to install application on. Choose your recently created Pool. •Integrated Security: security mode used to connect to the SQL database. If Domain Authentication is selected, the TSS will use the Application Pool virtual account. •SQL Login: login application will use to connect to SQL Server or mySQL. The client ID when using UAMI. The login is not required with Domain Authentication. •SQL Password: password application will use to connect to SQL Server or mySQL. The password is not required with Domain Authentication nor Azure managed identities. •FTP Path: the local directory of the FTP site (used for devices upgrades and configuration). •No of TSS/Console: Redundancy instance. Depending of previous selected option it has a different meaning: oNew database: Determine number of instance used in redundancy. Choose 1 if you do not want to use renduncy. Instance number is always 1 for first installed TSS/Console. oExisting database: Determine the instance number to install (it is not possible to select used instance). Press Install button.
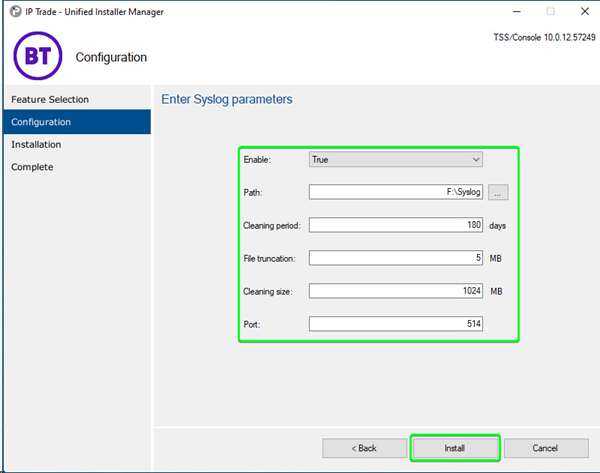
Next step ask you to choose some options about Syslog configuration: •Enable: Enable syslog log •Path: Path of syslog log •Cleaning period: Delete syslog files that are older than this value (in day) •File truncation: Maximum file size (in mo) of each syslog log •Cleaning size: Maximum total file size (in mo) of all syslog log •Port: Port of syslog log
Next step is status step. If database already exists a confirmation message is displayed to ask you the confirmation to overwrite the database.
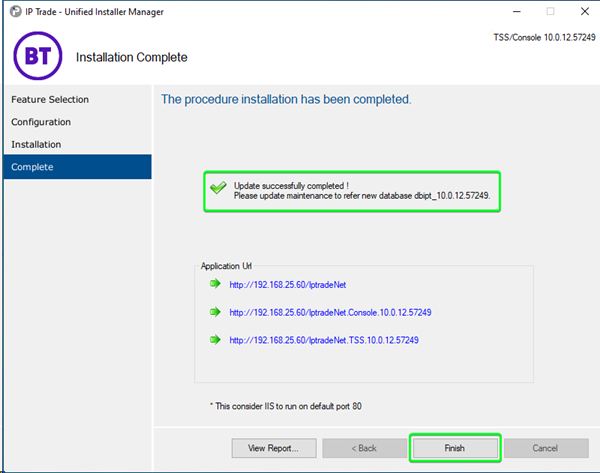
At the end of the process the following screen is displayed:
The application is now installed in the displayed location and ready to be used. Note the displayed URL for future use.
For more information about IptradeNet application see corresponding section: IptradeNet/TSS/Console: Quick Start Guide.
Install other instance of TSS/ConsoleThis section is optional - it is only used when you are using redundancy. See section Install first instance of TSS/Console to install other instances TSS/Console. Choose option 'Type=Existing database' during installation for other instances of TSS/Console. UI will then ask to select the database to use. This section can be executed several time depending of number or instance of TSS/Console using redundancy.
Update Component Manager URLs for Secure AccessAs part of the TSS Server Install Operating System > Configuring IIS guide, you were instructed To Configure TLS on IIS
All TSS Servers should be secured with certificates. By default the UIM installer will create Console and TSS links with HTTP and the IP address of the server.
To update these links to use HTTPS and FQDN follow this guide: Update Component Manager URLs
|