Configuring IIS


Configuring IIS |
|
| Solution Installation > TSS Installation > Install TSS on a standard server > Install Operating System > Windows Server 2022 |
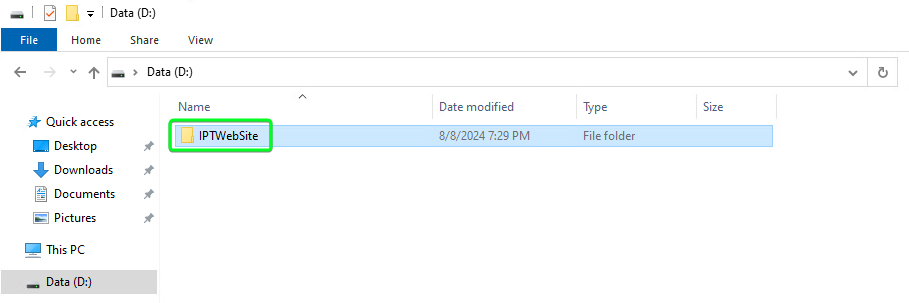
OverviewThis section explains how to configure the Web server and Virtual Directory on Internet Information Services (IIS). Configuring IPTWebSite in IISProceed as follows: •Create a folder "D:\IPTWebSite"
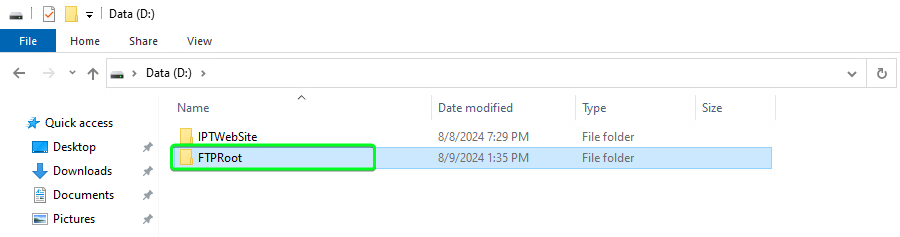
•Create a folder "D:\FTPRoot"
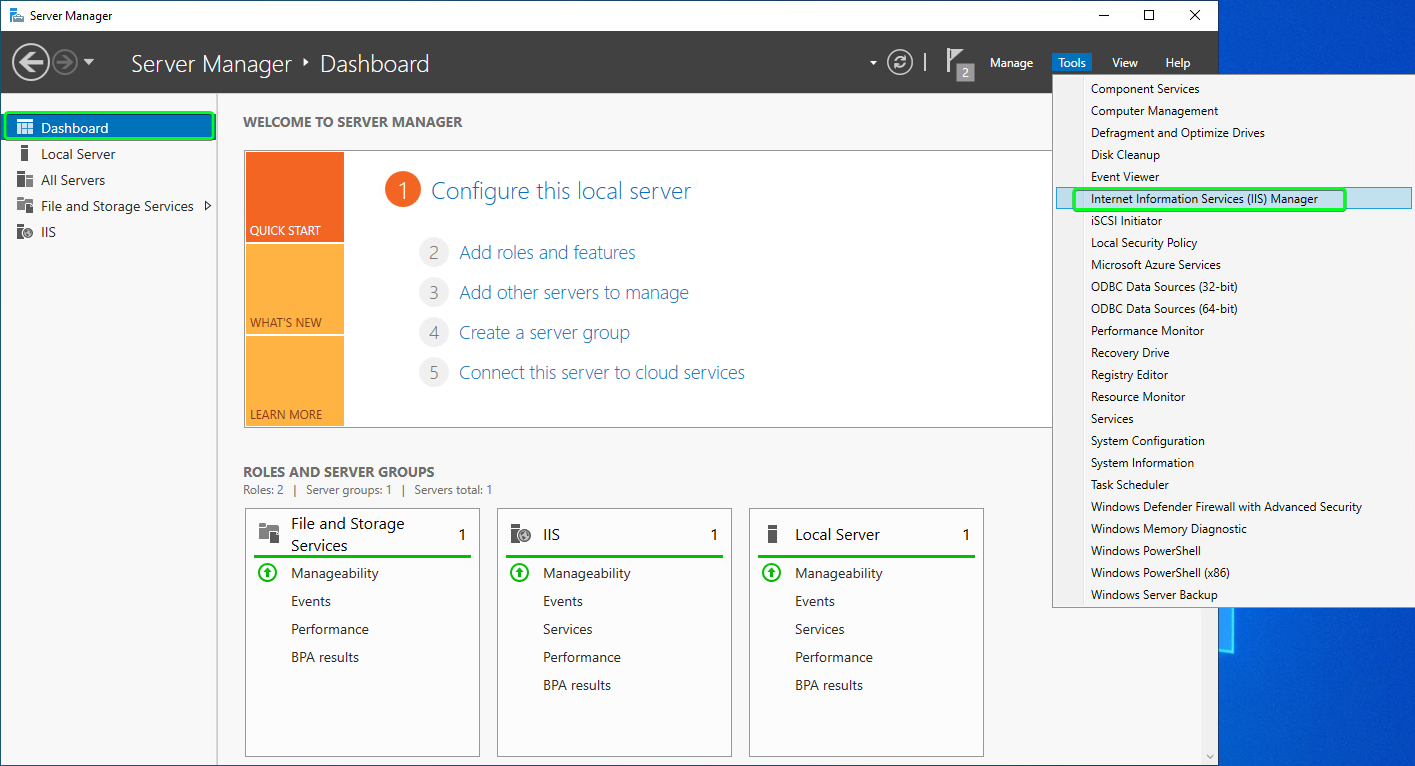
•On the Server Manager, open "Tools > Internet Information Services (IIS) Manager"
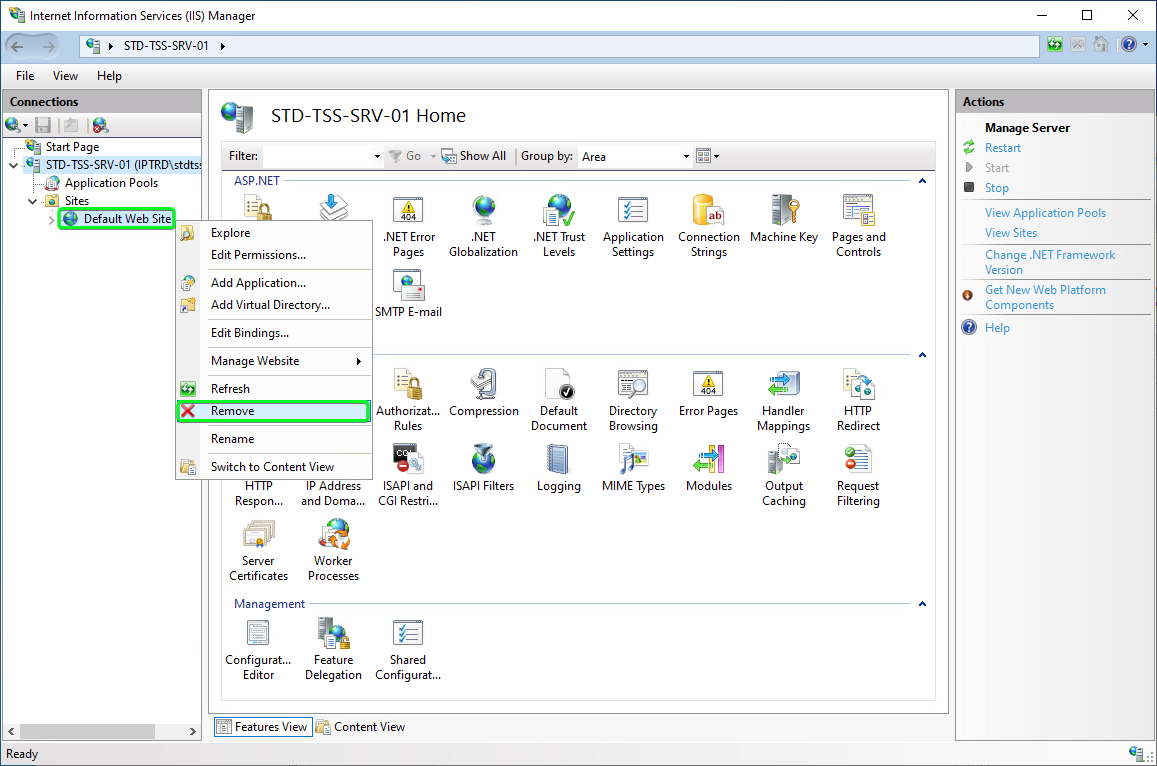
•Go to the folder Internet Information Services > {Computer name} (local computer) > Sites •Right-click "Default Web Site" and select "Remove" •Click "Yes" on the confirmation pop-up
Application Pool Configuration
Create a custom Application Pool to use with the TSS Web Sites
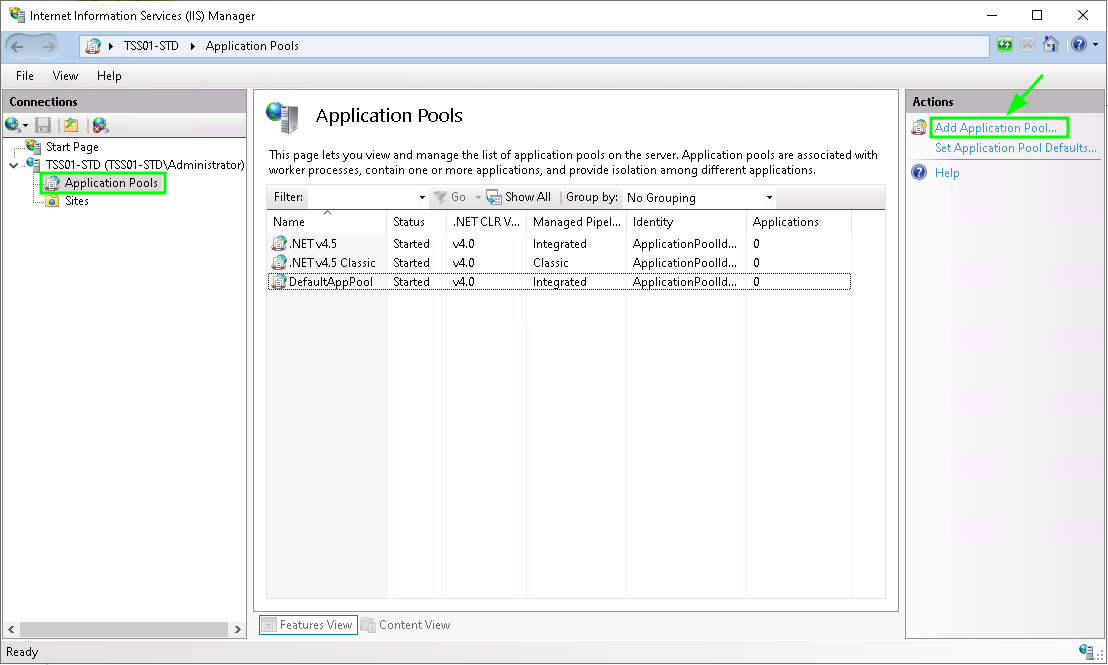
•Click on "Application Pools" and on the right hand side menu, click on "Add Application Pool.."
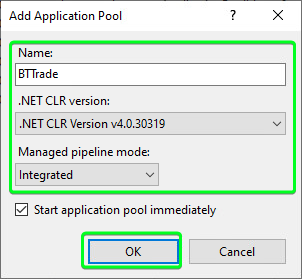
•Fill in the Name: "BTTrade" •.NET CLR Version: ".NET CLR Version v4.0.30319" •Managed pipeline mode: "Integrated" •Then click on "OK"
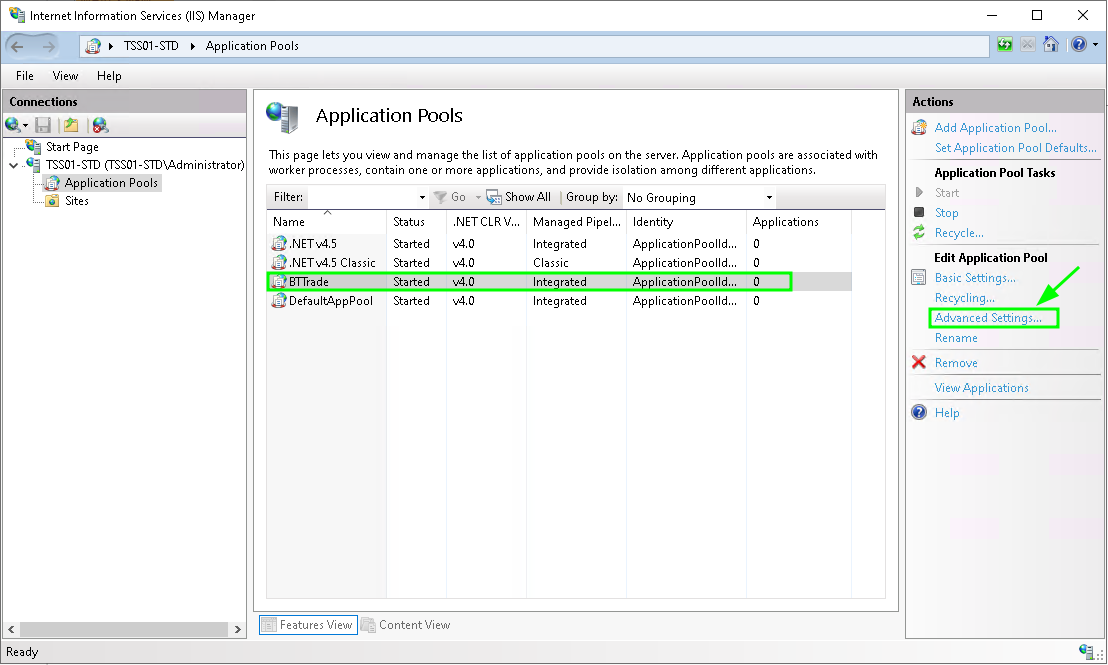
•Highlight the new "BTTrade" Application Pool, then on the right side menu click on "Advanced Settings..."
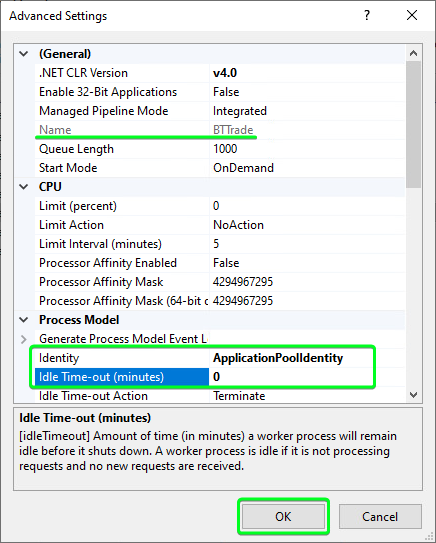
•Ensure Identity field is: "ApplicationPoolIdentity" •Change Idle-Timeout field (minutes) from 20 to "0".
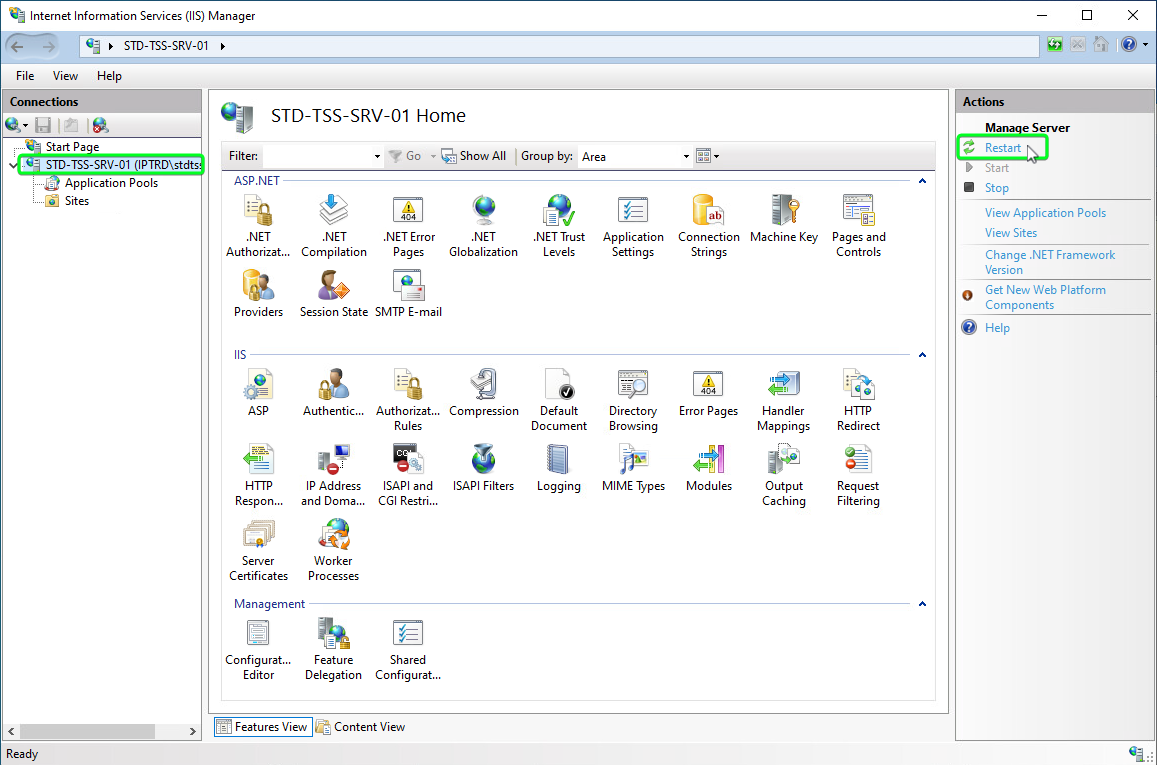
•Restart the IIS Server, by clicking on the Computer Name in the left menu and then on the Right side menu click on "Restart"
Configure directory access permissions for custom Application Pool (BTTrade)
We need to edit folder permissions on "D:\FTPRoot" and "D:\IPTWebSite" to provision the correct access rights for the custom Application Pool "BTTrade", created earlier. This is due to the Application Pool being configured to use the "Identity = ApplicationPoolIdentiy"
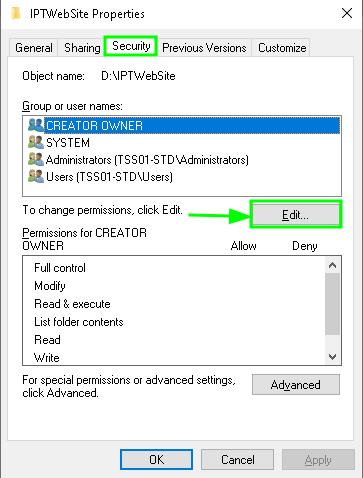
•Open File Explorer and browse to "D:\" then Right Click on "D:\IPTWebSite" and select "Properties"
•Select the "Security" tab then Click on "Edit"
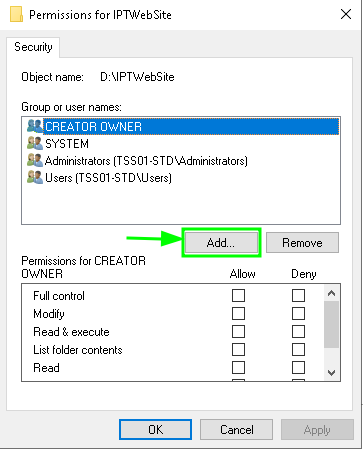
•Then Click "Add..."
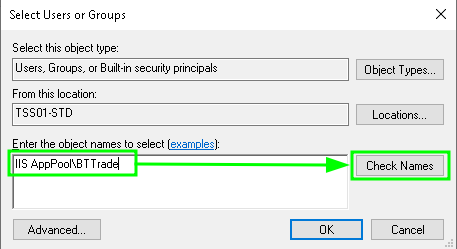
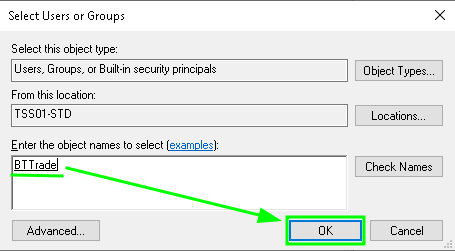
•In the box type "IIS AppPool\BTTrade" then Click on "Check Names"
•Once successfully checked (without errors) the name shows "BTTrade", then Click on "OK"
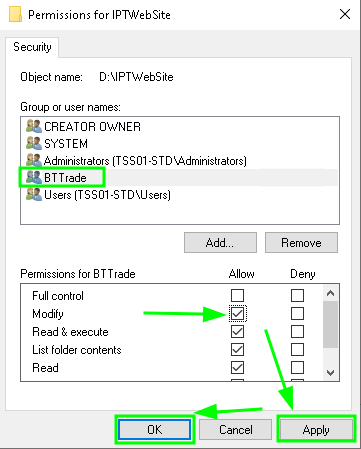
•With "BTTrade" highlighted in the "Group or user names" section, Click to add the "Modify" Permission as seen below
•Make sure to repeat all the above steps to set the same permission on the "D:\FTProot" folder
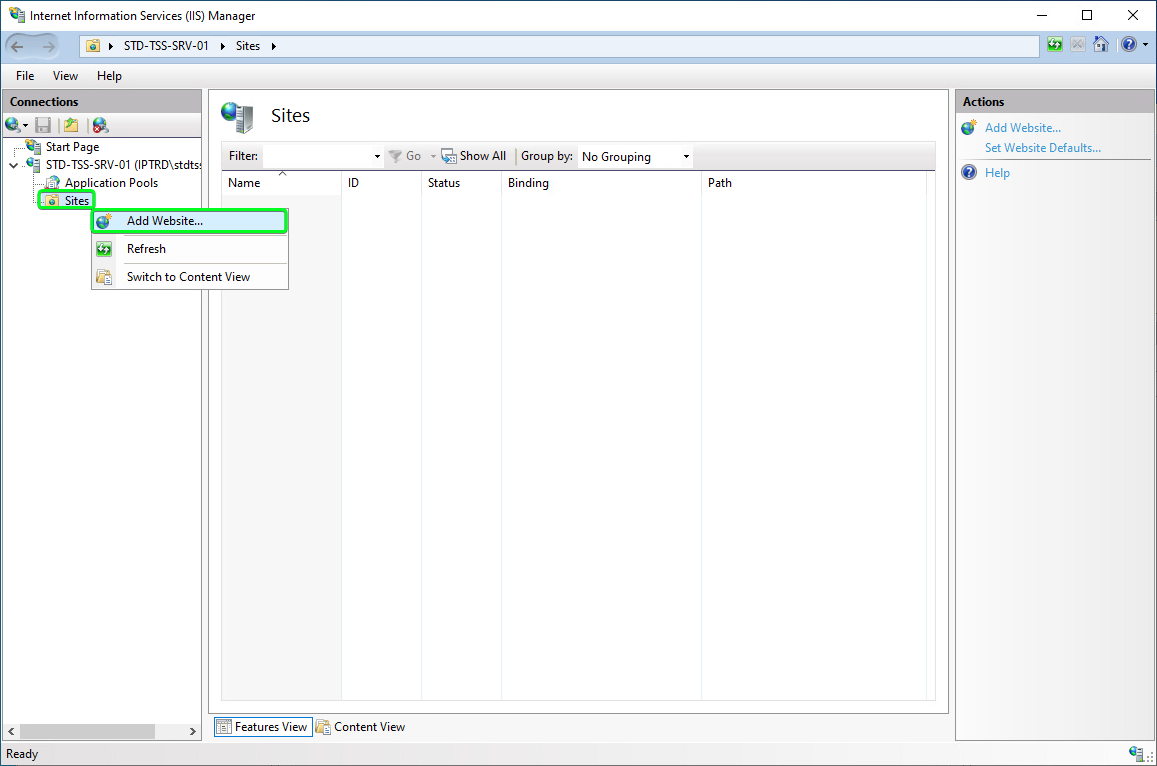
Configure IPTWebSite•Right-click the node Sites and select "Add Website...".
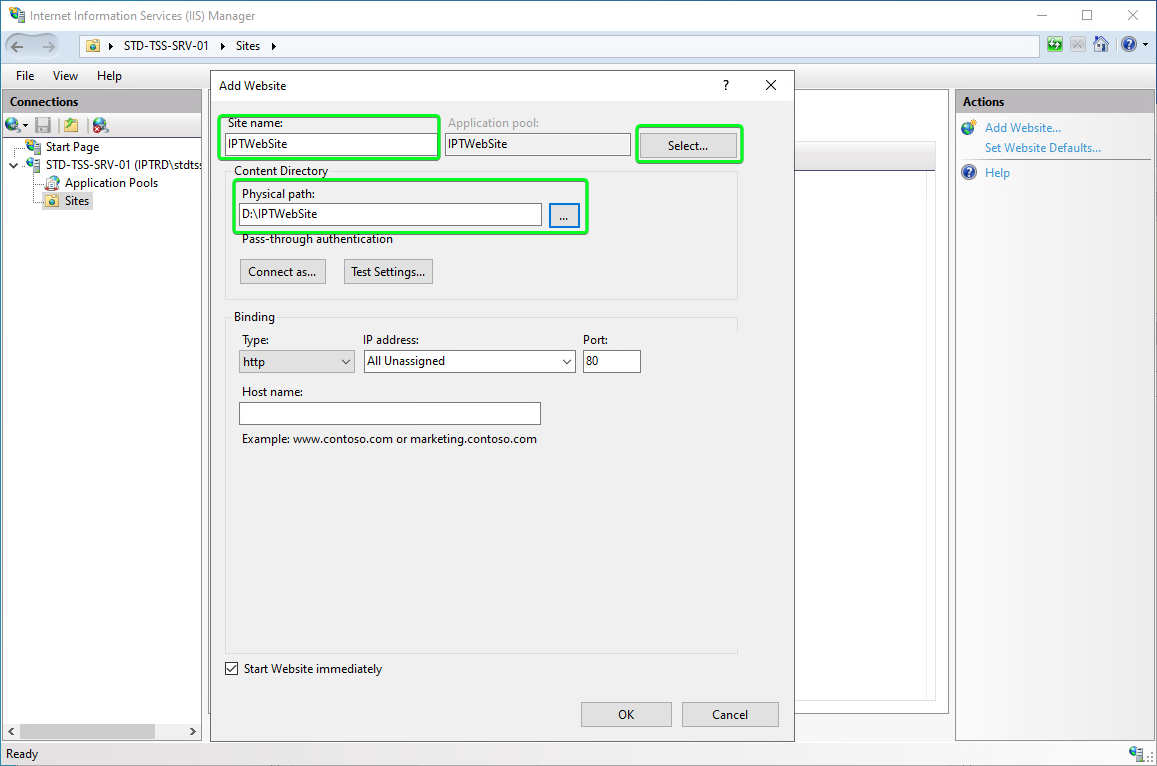
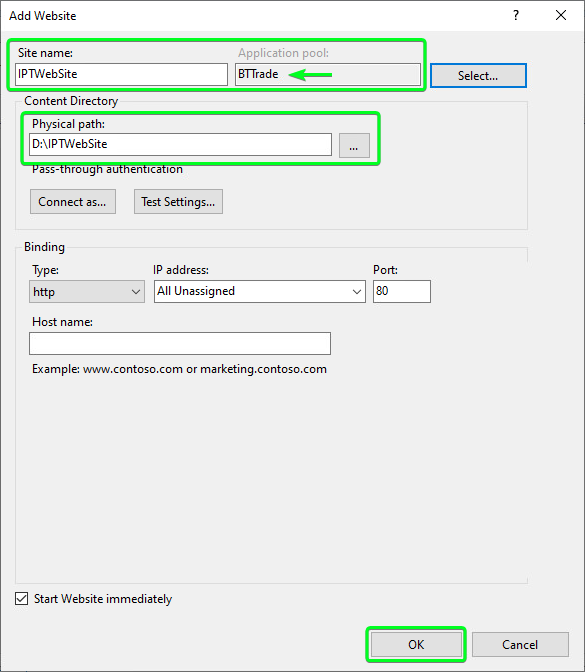
•Enter site name: "IPTWebSite" •Select: "D:\IPTWebSite" as physical path. •Leave binding mode with default value. •Click "Select" button for Application pool
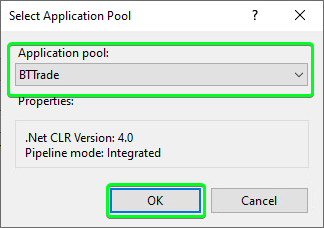
•In the drop-down select "BTTrade" Application pool created earlier, then click on "OK"
•Once all items are correctly filled in, select "OK" to create the new site using the custom "BTTtrade" Application Pool
Configure HTTP(S) access via Virtual "conf" Directory
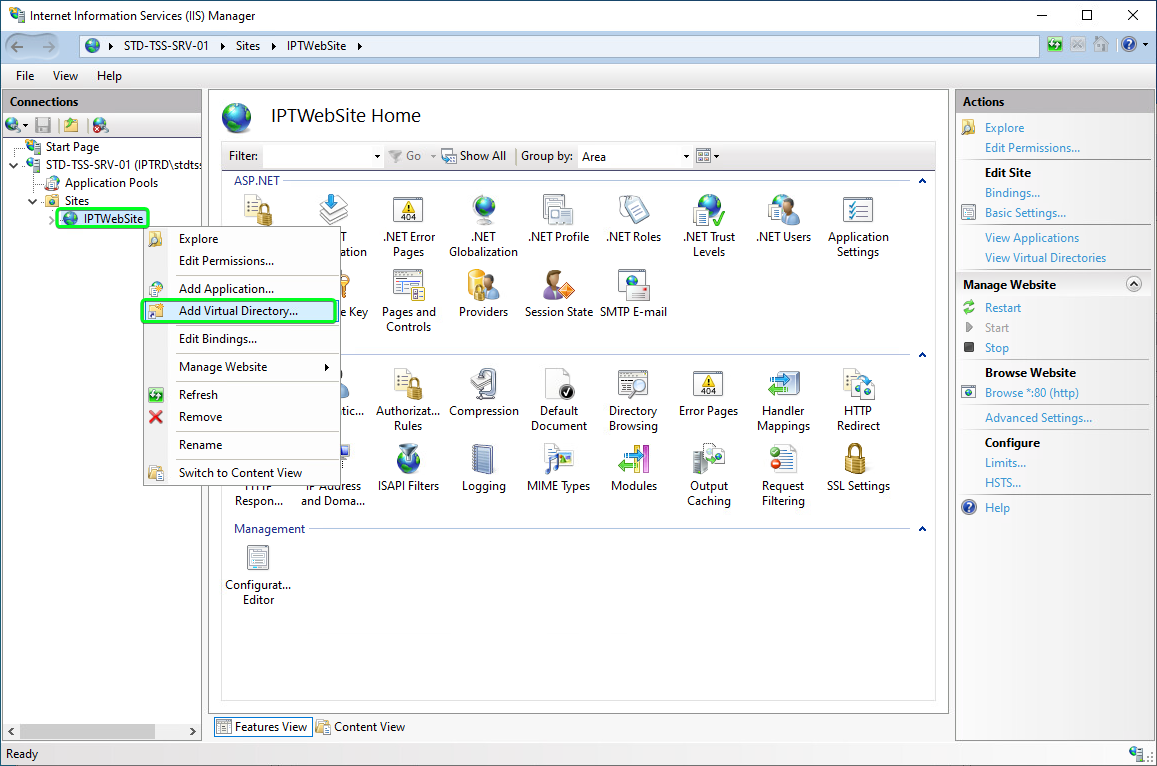
•In IIS Manager, Right click on "IPTWebSite" and select "Add Virtual Directory"
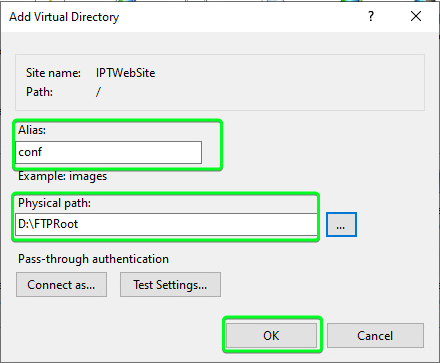
•Name the Virtual Directory "conf" and set the path to the FTPRoot folder "D:\FTPRoot" and click "OK"
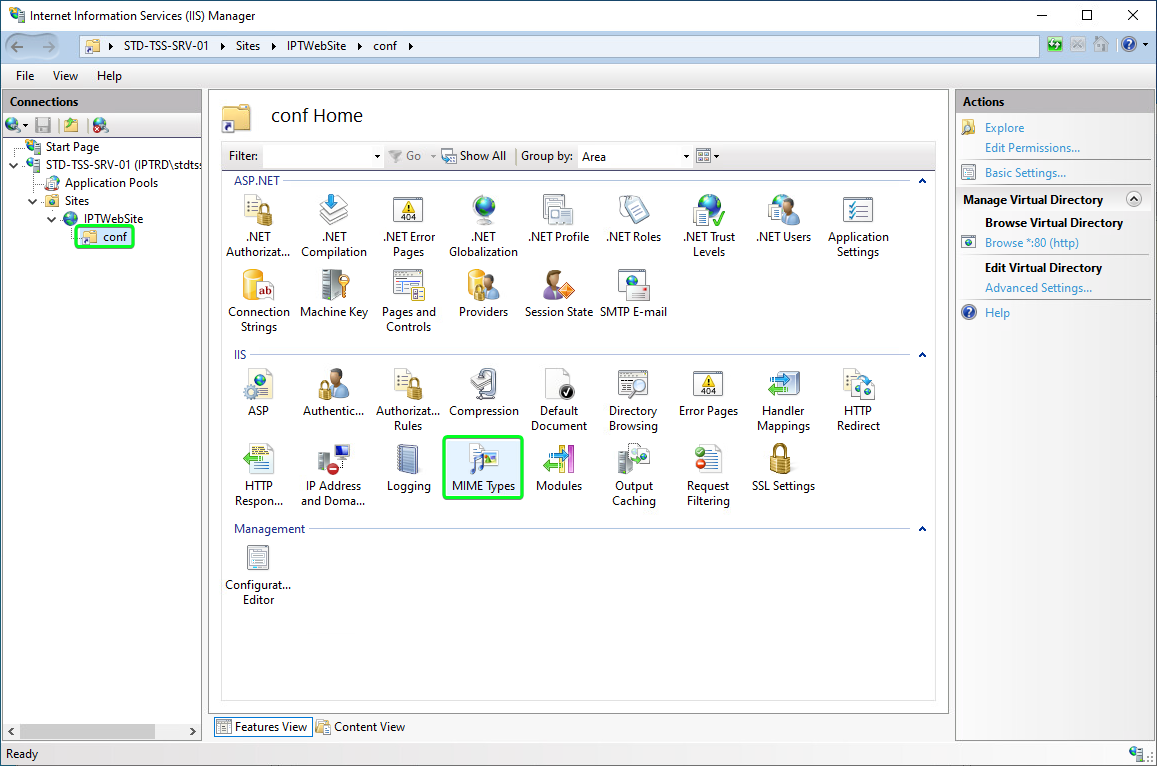
•Click on the Virtual directory and then double click on "Mime Types"
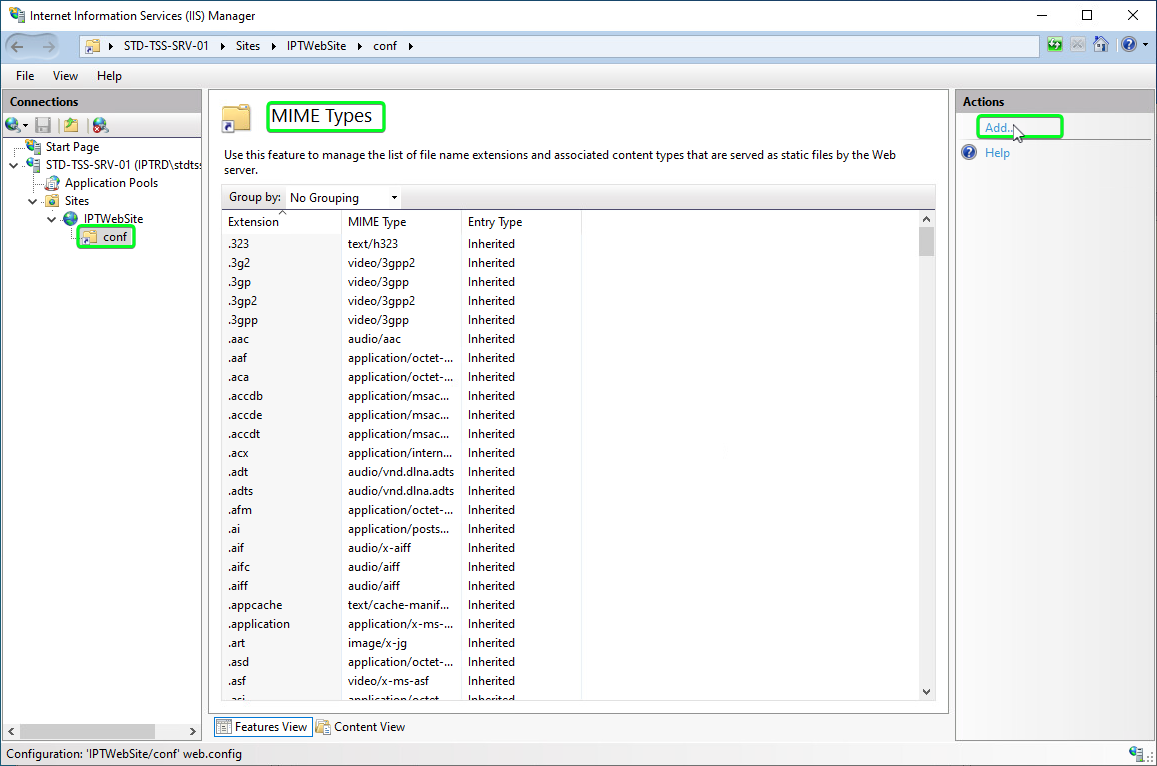
•Click on "Add"
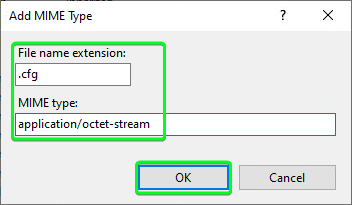
•Set the file name extension to ".cfg" and the MIME Type to "application/octet-stream" then click on "OK" •Click again on "Add"
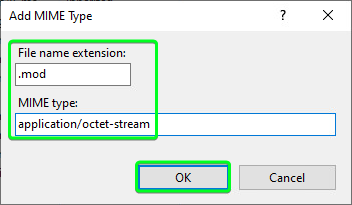
•Set the file name extension to ".mod" and the MIME Type to "application/octet-stream" then click on "OK" •Click again on "Add"
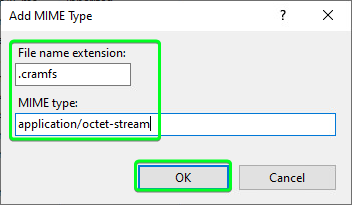
•Set the file name extension to ".cramfs"and the MIME Type to "application/octet-stream" then click on "OK" •Click again on "Add"
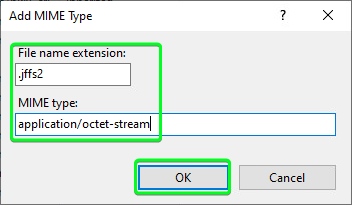
•Set the file name extension to ".jffs2" and the MIME Type to "application/octet-stream" then click on "OK" •Click again on "Add"
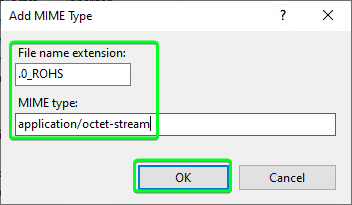
•Set the file name extension to ".0_ROHS" and the MIME Type to "application/octet-stream" then click on "OK" •Click again on "Add"
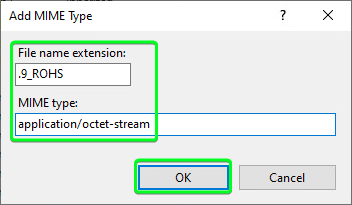
•Set the file name extension to ".9_ROHS" and the MIME Type to "application/octet-stream" then click on "OK" •Click again on "Add"
It's now possible to access the FTPRoot through HTTP(S) To Configure TLS on IIS
By default, IIS is not secured with certificates, and uses the HTTP protocol.
To configure TLS on IIS, follow: Install Certificates
|