Vega configuration


Vega configuration |
|
| Trading and C&C > Turret Proxy To Open communication (TPO) > DDI Sharing > DDI Lines & Private Wires > Configure > TPO Configuration > Vega 400G & Vega400G V2 > Configuration > SIP over TLS and SRTP |
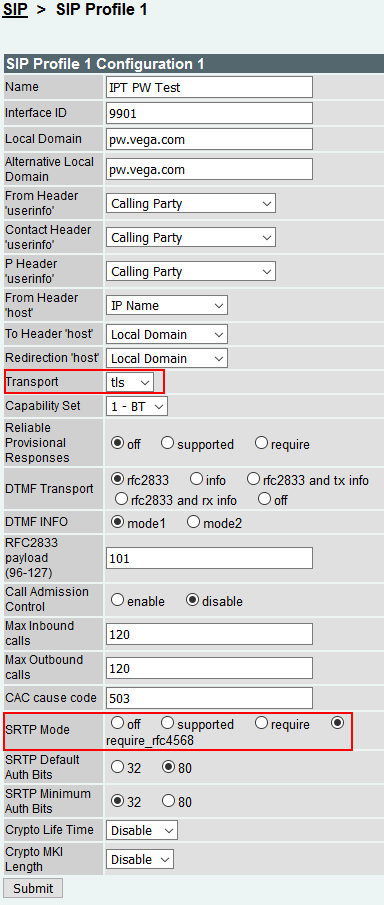
SettingsHere are the settings that need to be set in "SIP Configuration -> SIP Profile" in order to enable SIPS and SRTP .
The transport must be set to "tls".
The SRTP mode must be set to "require_rfc4568". CertificatesA server certificate must be generated and uploaded to the Vega gateway.
Different tools can be used to generate a certificate, the method explained here uses openSSL. A computer with OpenSSL installed is required. 1. Generate the private keyThe first step is to generate the private key.
Open a command prompt and enter the command : "openssl genrsa -out vega.key 2048" This will generate a file named "vega.key" which contains the private key. This key must be kept secret. 2. Generate the certificate request string (CSR)Enter the command : "openssl req -new -key vega.key -out vega.csr"
You will be asked to enter some information that will be present in the final certificate. Some fields are required, while others are optional and can be left blank. 3. Issue the certificateOpen the generated file "vega.csr" with a text editor and copy the content in the clipboard.
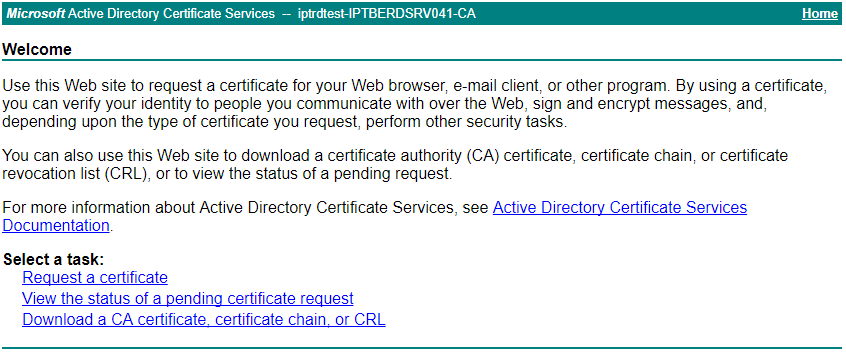
Open the Certificate Manager web application.
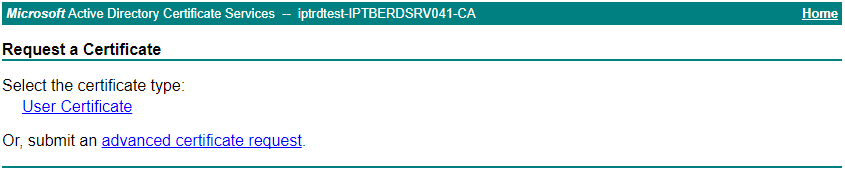
Click on "Request a certificate"
Then on "advanced certificate request"
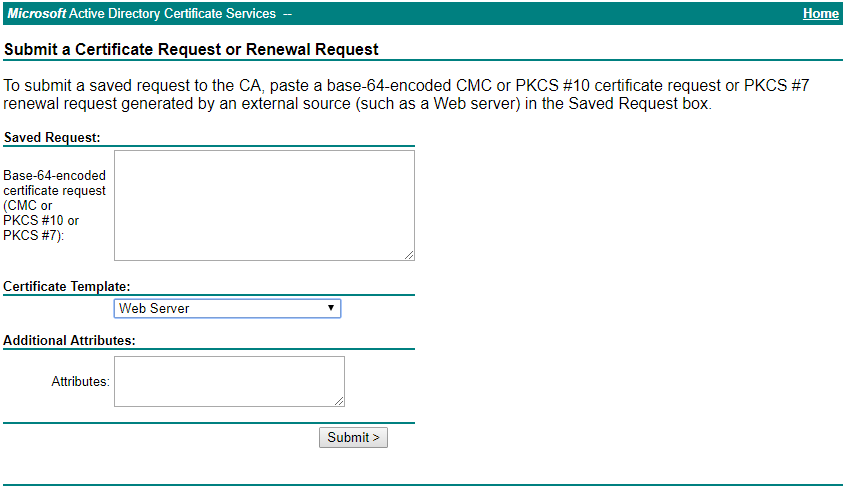
Paste the request string in the field provided. Select Web Server as Certificate Template and submit.
The certificate MUST be downloaded in base64 format. 3bis. Create the certificate chain in one fileAll the certificate chain except the root CA have to be exchanged during the TLS handshake, so the remote endpoint (the TPO) is able to trust the Vega server certificate. If we want the Vega to exchange all the certificate chain during the TLS handshake, this certificate chain needs to be present in the certificate file that will be uploaded to the Vega gateway.
This step is only required if the Vega server certificate is not issued directly by the root CA, but by an intermediate certificate.
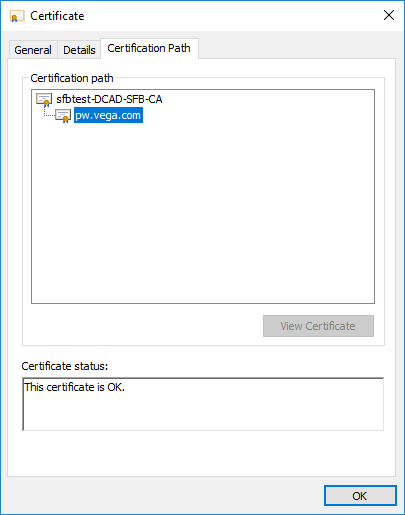
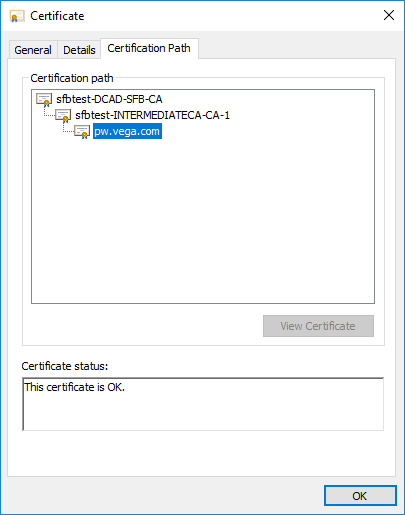
To check that, open the certificate obtained at step 3 and go to the "Certification Path" tab. If there is no certificate between the server certificate and the root certificate, go to step 4.
If there is at least one intermediate certificate between the server certificate and the root certificate, follow the steps here below.
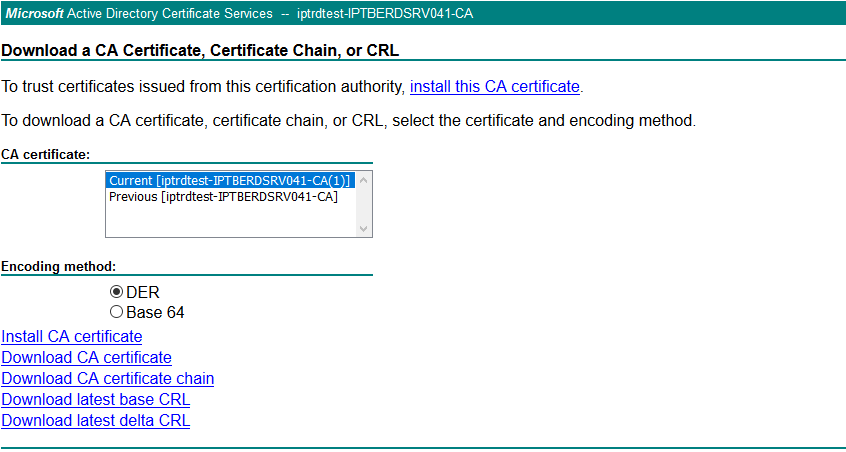
Obtain all the chain in a P7B formatted fileFirst, we need to obtain all the chain. The easiest way is to go to the "Certificate Manager web application" used to issue the server certificate at step 3.
Click on "Download a CA certificate, certificate chain, or CRL".
Then click on "Download CA certificate chain"
The obtained file is in P7B format Extract all intermediate certificates in Base64 formatWe will now extract all certificates of the chain one by one. We don't need to extract the root CA.
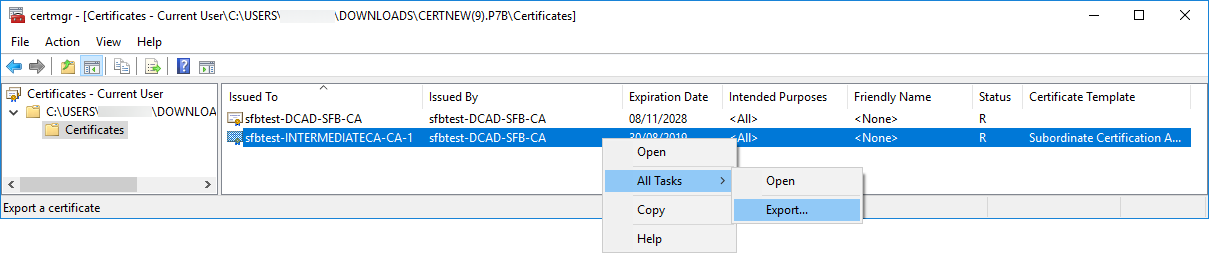
Open the P7B file and go to "Certificates" in the tree at the left. Right click on the first intermediate certificate -> All Tasks -> Export... .
Click on Next in the "Certificate Export Wizard" that just opened.
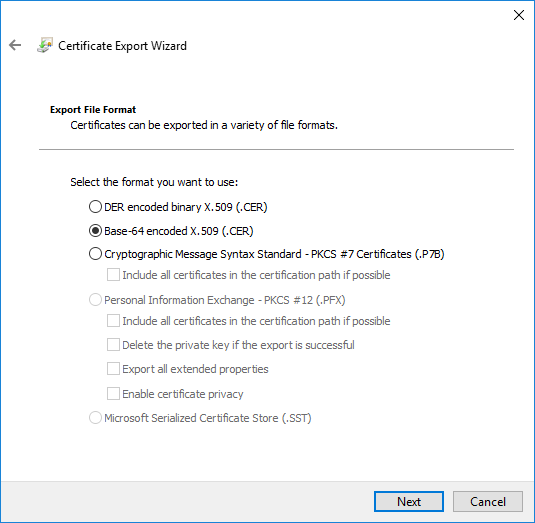
Select "Base-64 encoded X.509 (.CER)" and click on next.
Select where you want to export your certificate and click on Next.
Click on Finish. You will have to repeat this operation for each intermediate certificate. (Don't do this operation for the root CA.) Add the chain in the Vega server certificateWe will now copy the content of all intermediate certificates into the server certificate file obtained at step 3.
Open the certificate obtained at step 3 in a text editor. Open each intermediate certificate freshly extracted in a text editor.
Paste the content of all intermediate certificates into the certificate obtained at step 3.
The file should look like this :
-----BEGIN CERTIFICATE----- (Your Server certificate: the certificate obtained a step 3) -----END CERTIFICATE----- -----BEGIN CERTIFICATE----- (Your Intermediate certificate 2) -----END CERTIFICATE----- -----BEGIN CERTIFICATE----- (Your Intermediate certificate 1) -----END CERTIFICATE-----
Make sure certificates are in the right order : the server certificate first, then intermediate certificates in the order of the chain. In this example, Server certificate is issued by Intermediate certificate 2, Intermediate certificate 2 is issued by Intermediate certificate 1 and Intermediate certificate 1 is issued by the root CA.
Don't add the content of the root CA in this file.
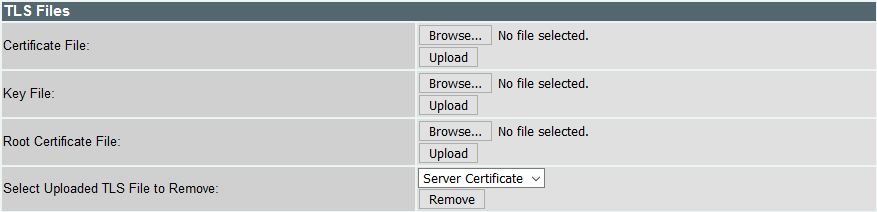
Save this file, it will be uploaded into the Vega gateway. 4. Upload the certificate, the key, and the root certificate in the Vega gatewayGo to the Vega Web administration page then select "Expert Config -> System". The certificate, the key and the root certificate needs to be uploaded in the "TLS Files" section.
For the "Certificate File" : click on "Browse", select the certificate obtained at step 3 (or step 3bis if there is at least one intermediate certificate) and then click on "Upload".
For the "Key File" : click on "Browse", select the key obtained at step 1 and then click on "Upload".
For the "Root Certificate File" : click on "Browse", select your root certificate (it can be obtained from the "Certificate Manager web application") and then click on "Upload".
Reboot the Vega gateway.
|