Install Certificates


Install Certificates |
|
| IT&Operations > Security > Windows Server |
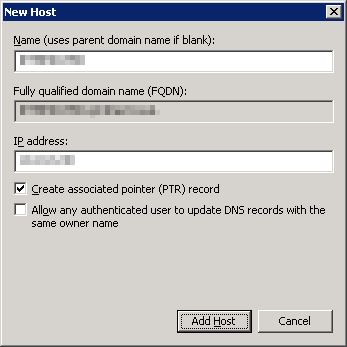
Register machine name on DNSYou need to register machine name where is installed the web application.
•Connect to DNS server •Open DNS Manager •Right click on proper zone and click on New host (A or AAAA)… •Enter machine name, the IP address •Press Add Host button
Create and install CA certificate
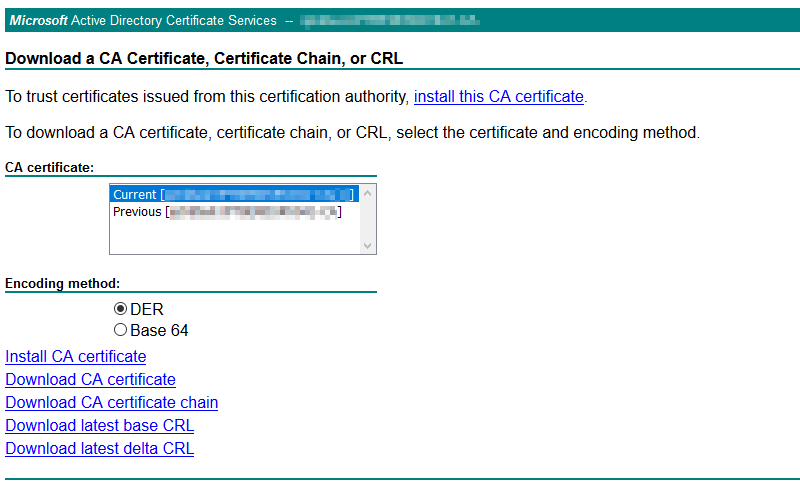
•Open the Certificate Manager application •Press Download a CA certificate, certificate chain, or CRL link •Select the Current certificate, DER encoding and press the Download CA Certificate link
The CA certificate is saved on disk...
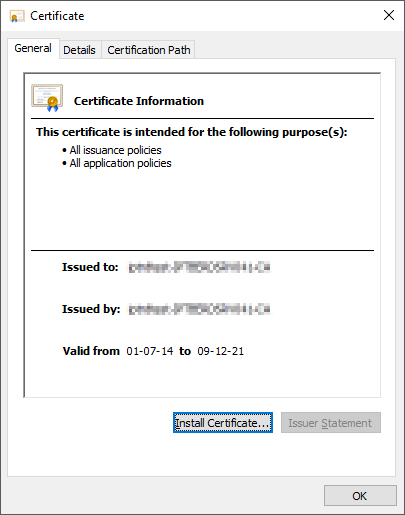
•Copy the CA certificate on the machine where it needs to be installed •Double click on the CA certificate •Press Install Certificate button
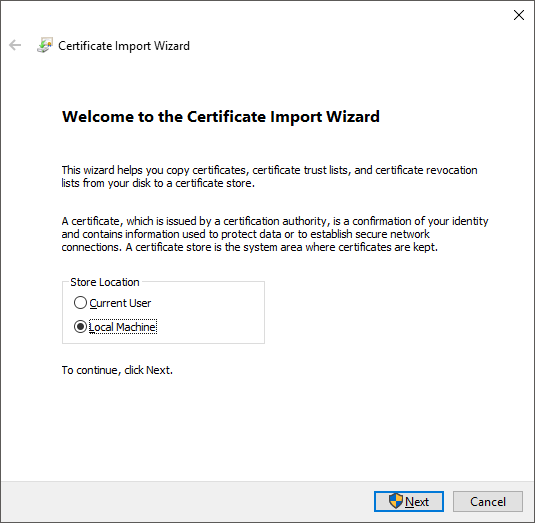
•Select option Local Machine •Press Next button
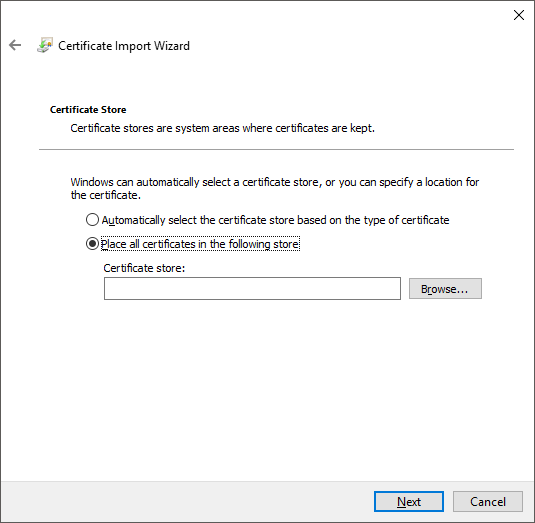
•Select option Place all certificates in the following store •Press Browse button
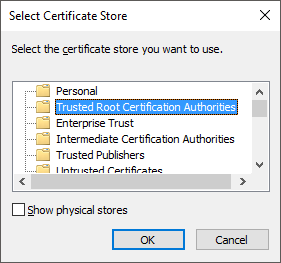
•Select Trusted Root Certification Authorities folder •Press OK button
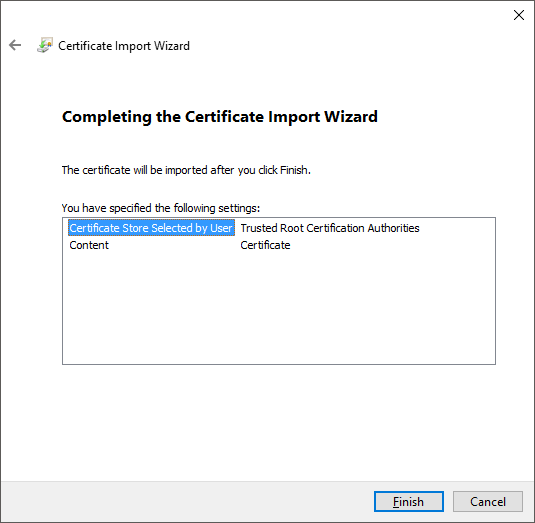
•Press Finish button
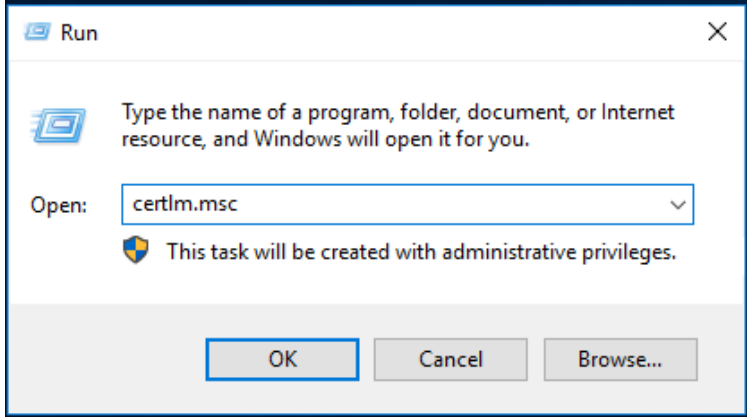
•Open the Windows Run windows and type in certlm.msc and click OK
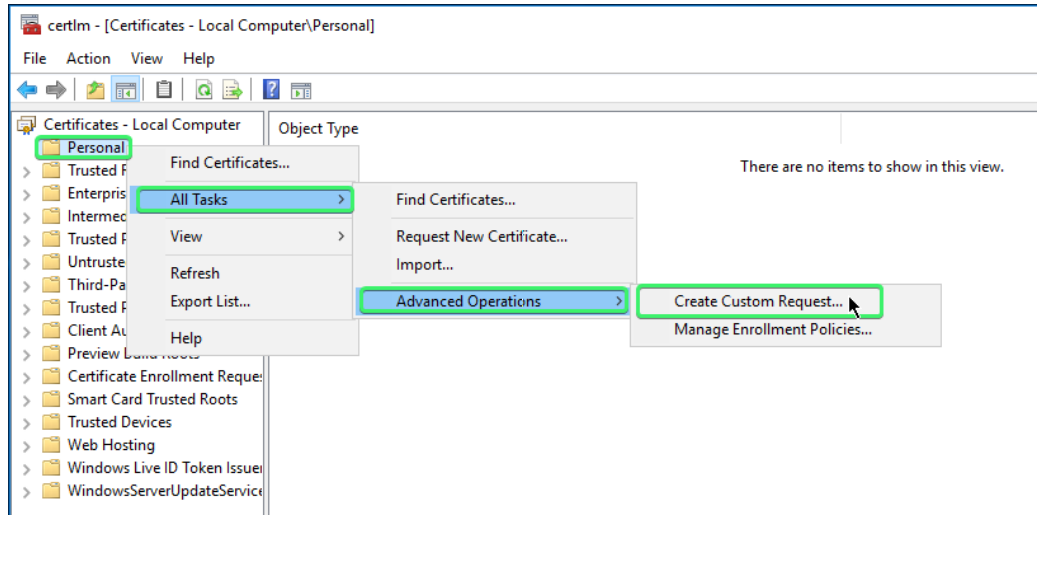
•Right Click > Personal > All Tasks > Advanced Operations > Create Custom Request
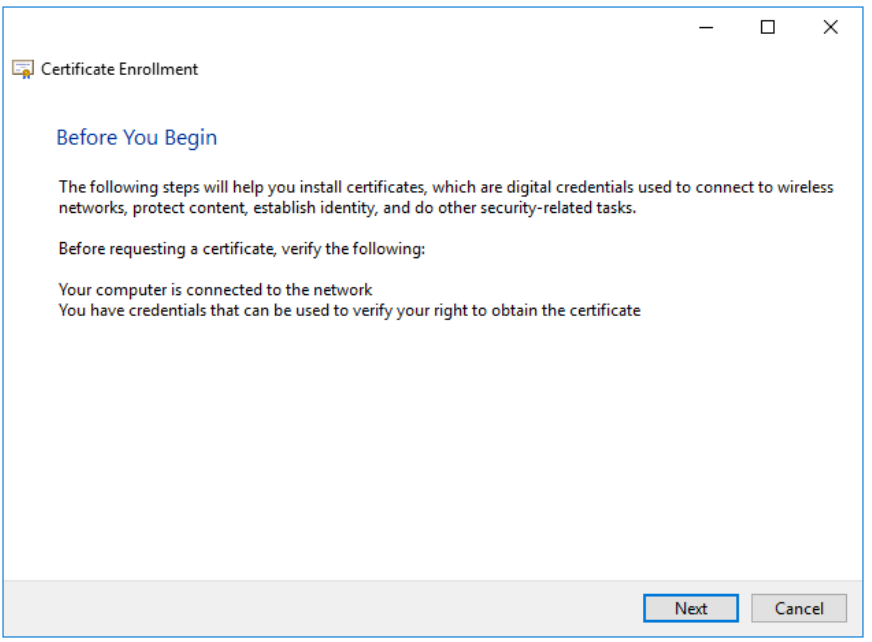
•Press Next button
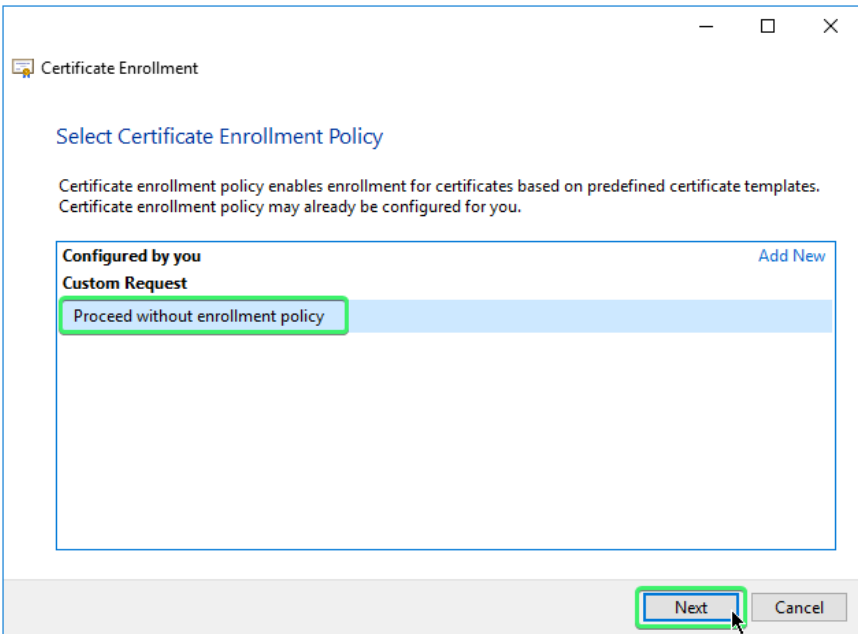
•Press Next button
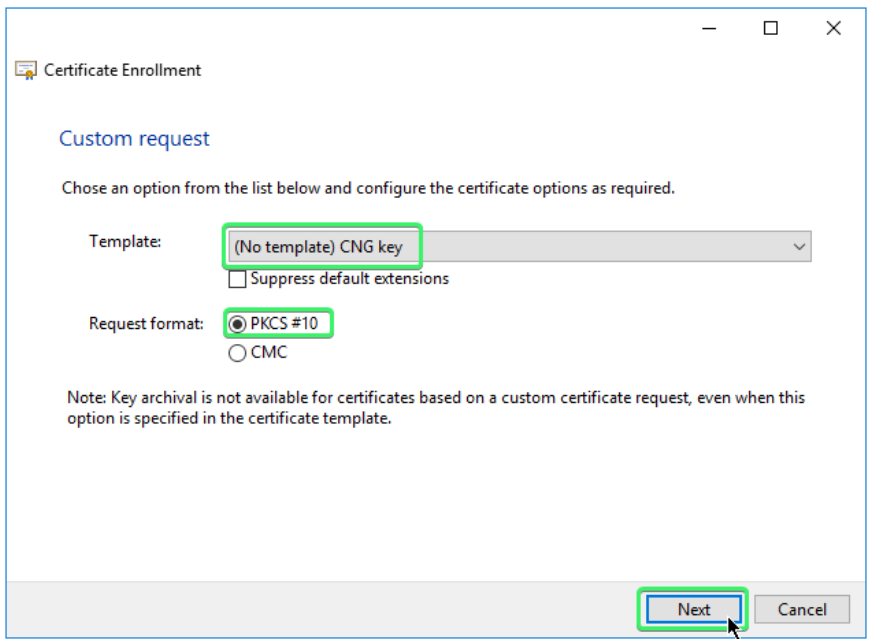
•This window can be left as seen (ensuring the selections are the same) •Press Next button
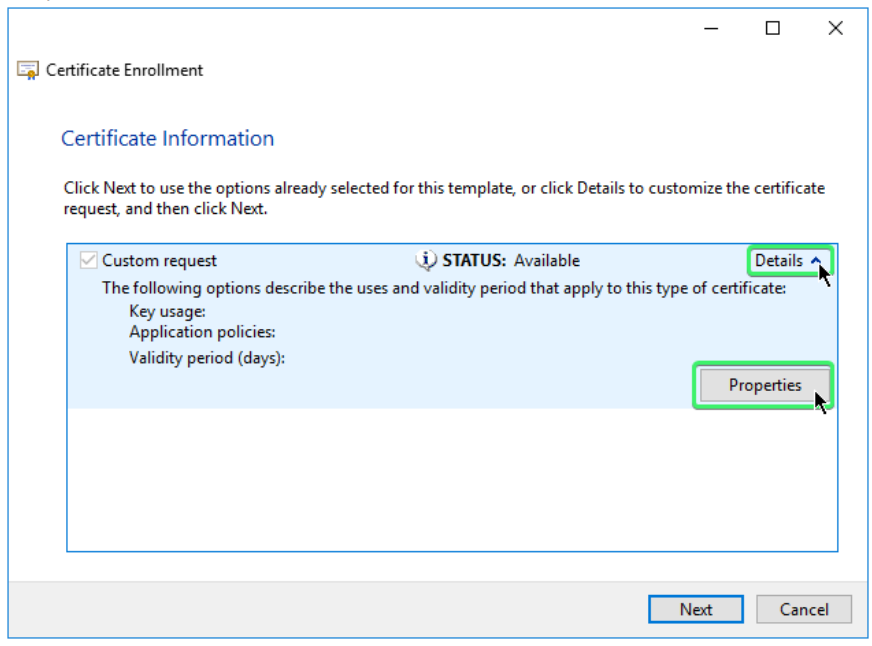
•On the next windows “Certificate Information” •Expand the “Details” section •Click on “Properties”
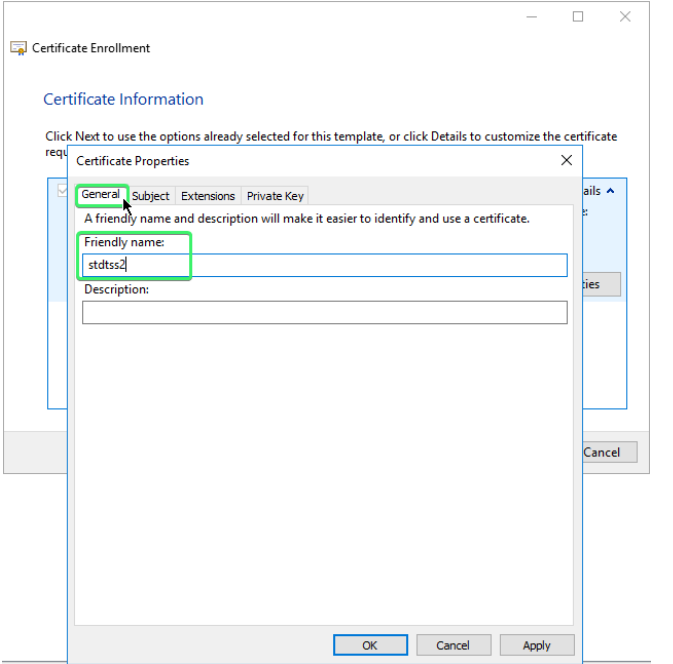
• On the “General” tab, put in a Friendly name (its only a name and not important) and click Apply • Do NOT click OK until we get to the last tab “Private Key” which is still coming up.
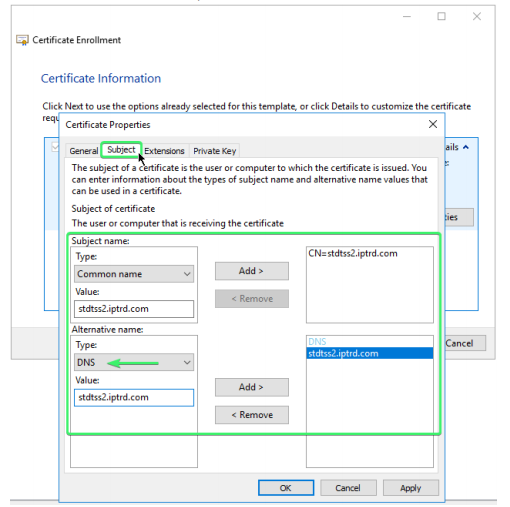
•Click on the “Subject” tab. •Under the section “Subject name:”, please repeatedly select all your Type's and enter their matching Value's and click the “Add” button each time •Under the section “Alternative name:”, select the “Type=DNS ” and “Value=FQDN” as seen in the example and click the “Add” button
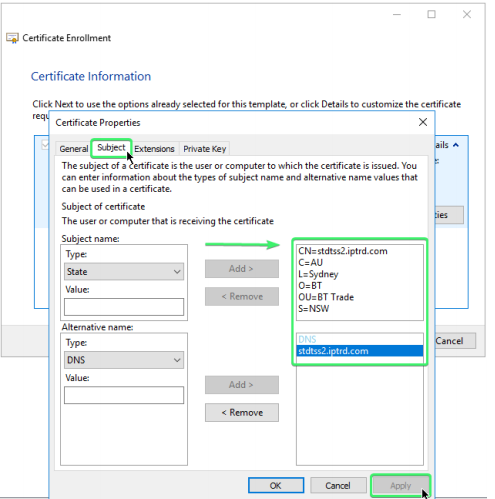
•Here is look at the “Subject” tab after all values have been “Added” , •Please make sure to now click the "Apply" button at the bottom •Do NOT click OK until we get to the last tab “Private Key” which is still coming up.
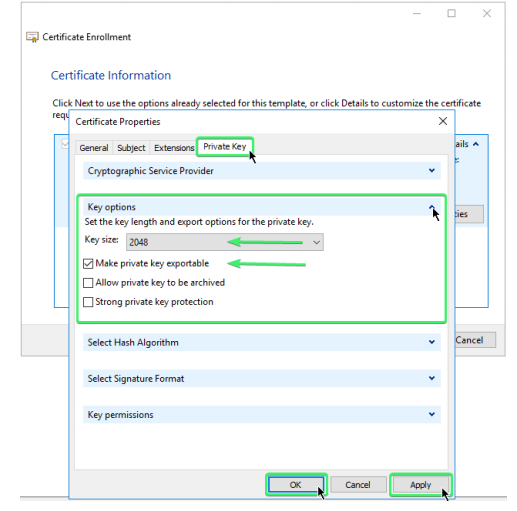
•Move to the “Private Key” tab •Click the arrow to expand the section “Key Options” •Make sure the values are entered as below Key size=2048 •Click the checkbox for “Make private key exportable" •Click the “Apply” button followed by the “OK” button.
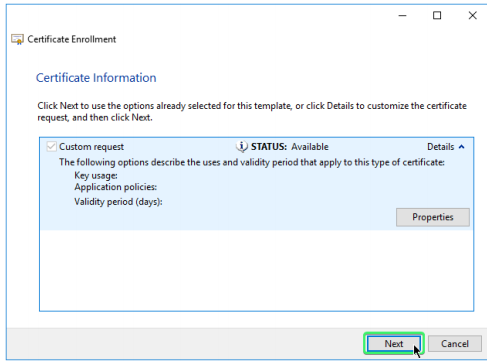
•Click “Next”
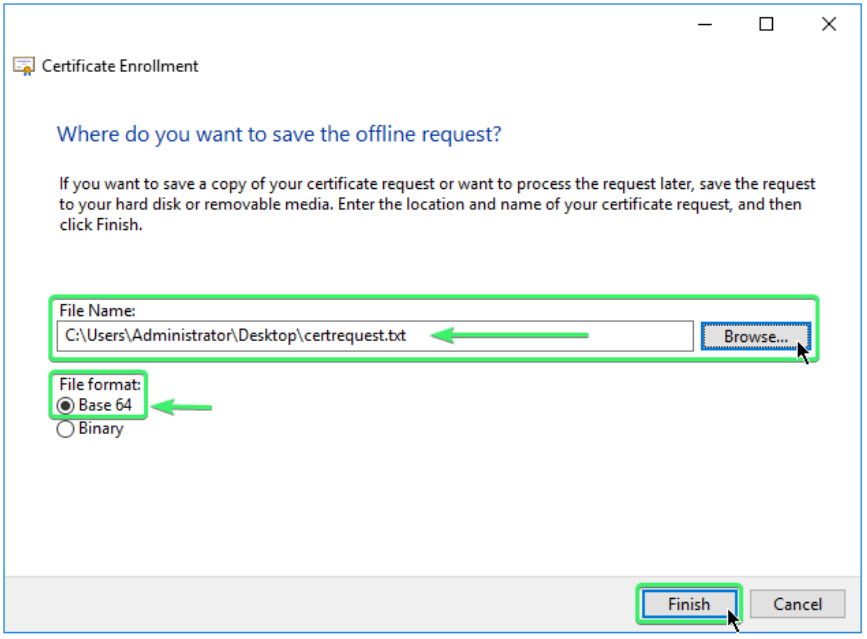
•Please choose CSR for “File Name”, browse to a path of your choosing and add a file name with the extension of .txt, •Ensure that the File Format is selected on “Base64” •Click “Finish”
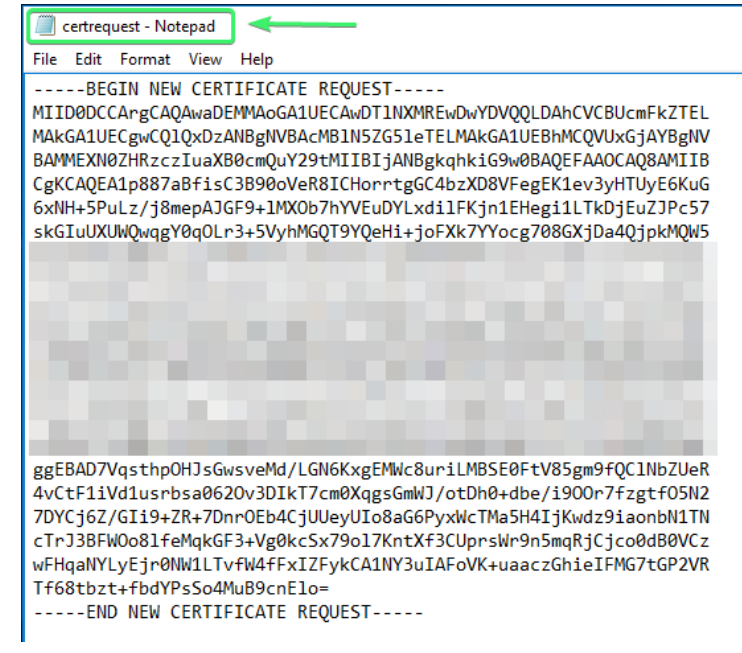
•Navigate the path saved the CSR •Open the .txt file and copy all the contents
Request Certificate
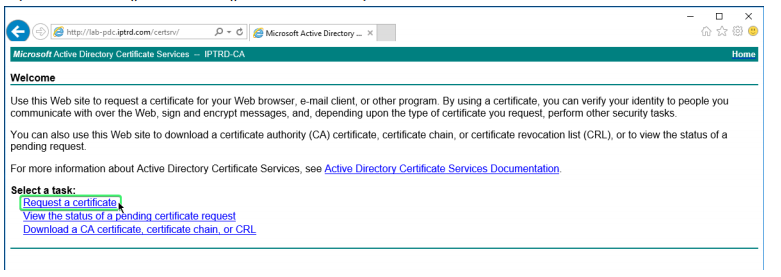
•Go to the Certificate server (or CA ). Request the Certificate Below are instructions for a Microsoft AD Cert Server. •Open the URL to the CA , and click “Request a certificate”
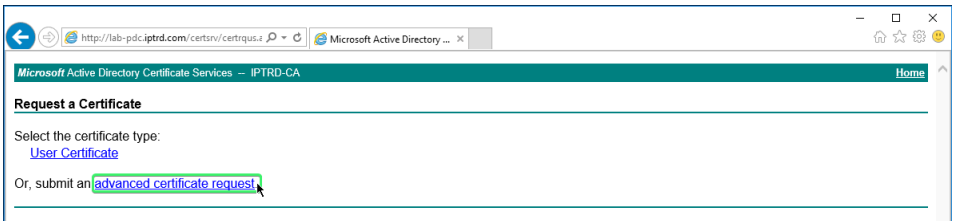
•Click “advanced certificate request”
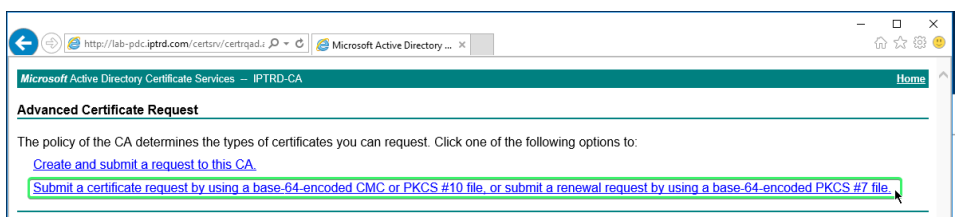
•Click the link shown
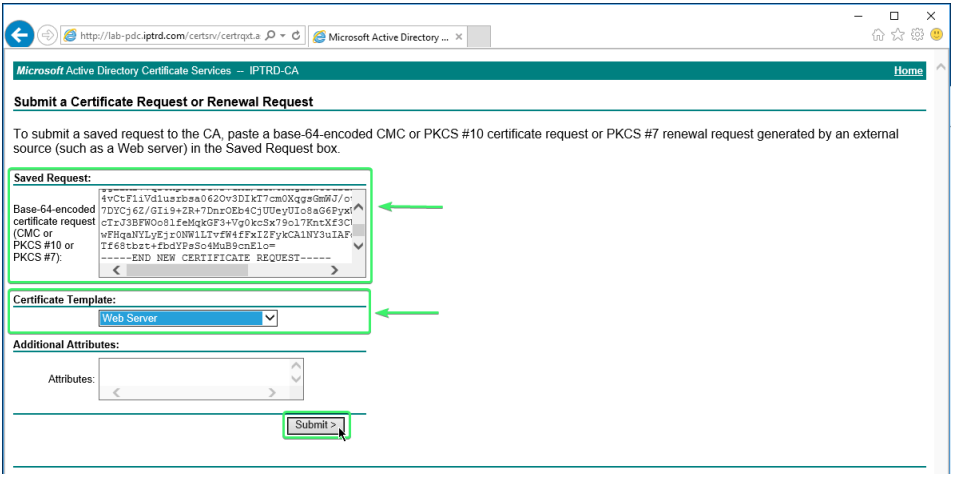
•Paste the contents of the CSR txt file into the “Saved Request” section as seen For Certificate Template, •Select “Web Server” •Click “Submit”
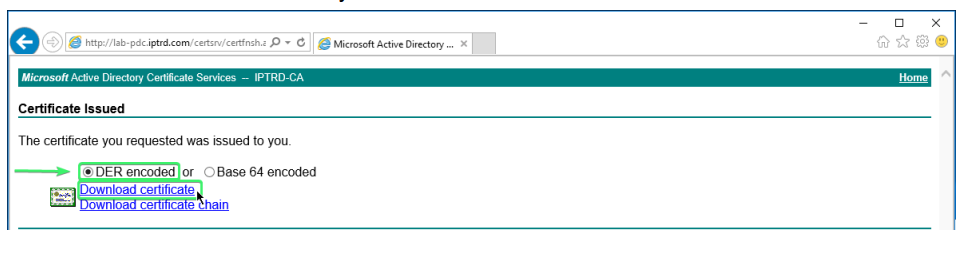
•Ensure that “DER encoded” is selected •Click on “Download certificate”
Apply Certificate to IIS
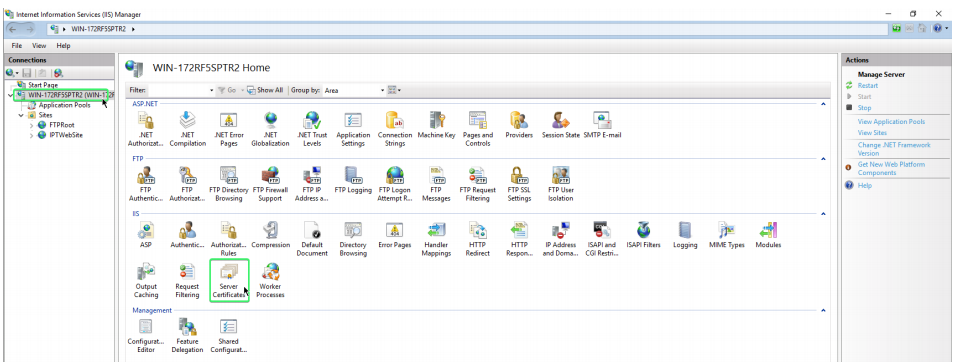
•Open up IIS Manager •Click on the server on the left pane •Double click on “Server Certificates”
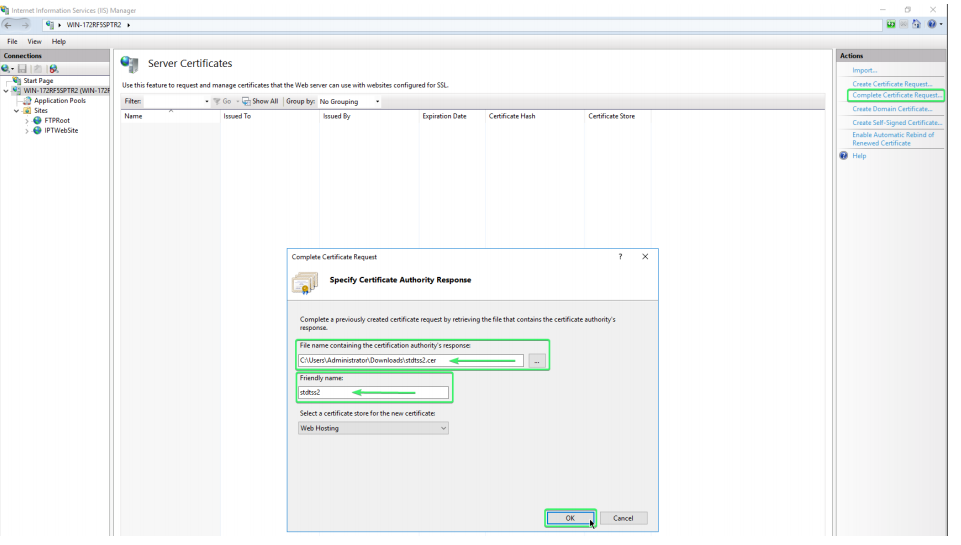
•Click on “Complete Certificate Request” on the right hand side panel •Browse to the location of the saved Certificate which was previously generated by the CA •Input a “Friendly Name” and Select “Web Hosting” for the certificate store.
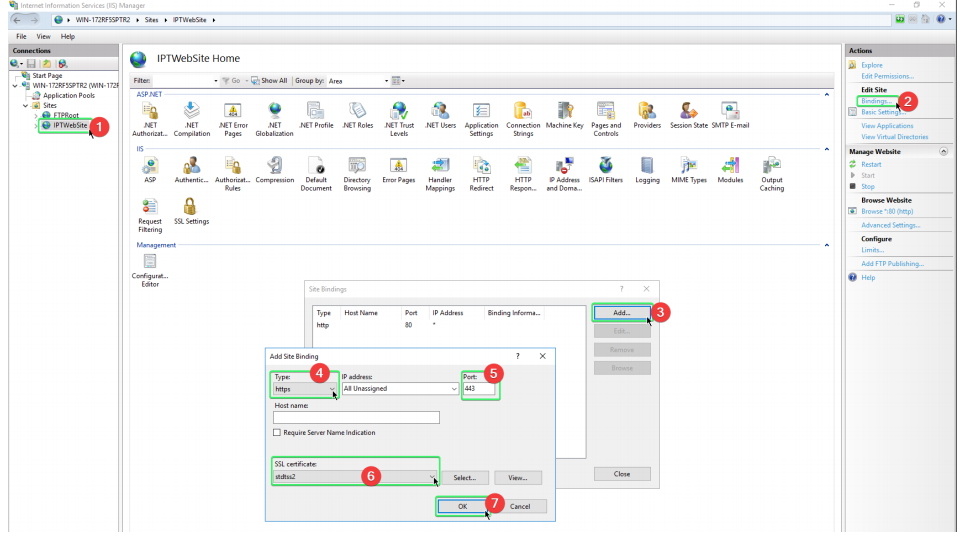
•Follow all the onscreen instructions below to complete the bindings for HTTPs and the new Certificate
At this point you could restart the IIS server from the IIS Manager if you like and test HTTPS access to the TSS.
|