Configure Server

Top  Previous  Next
Solution Installation > TSS Installation > Install TSS on a standard server > Install Operating System > Windows Server 2022

Overview

After performing the basic Windows 2022 Server installation, additional steps are required.


Configure local server

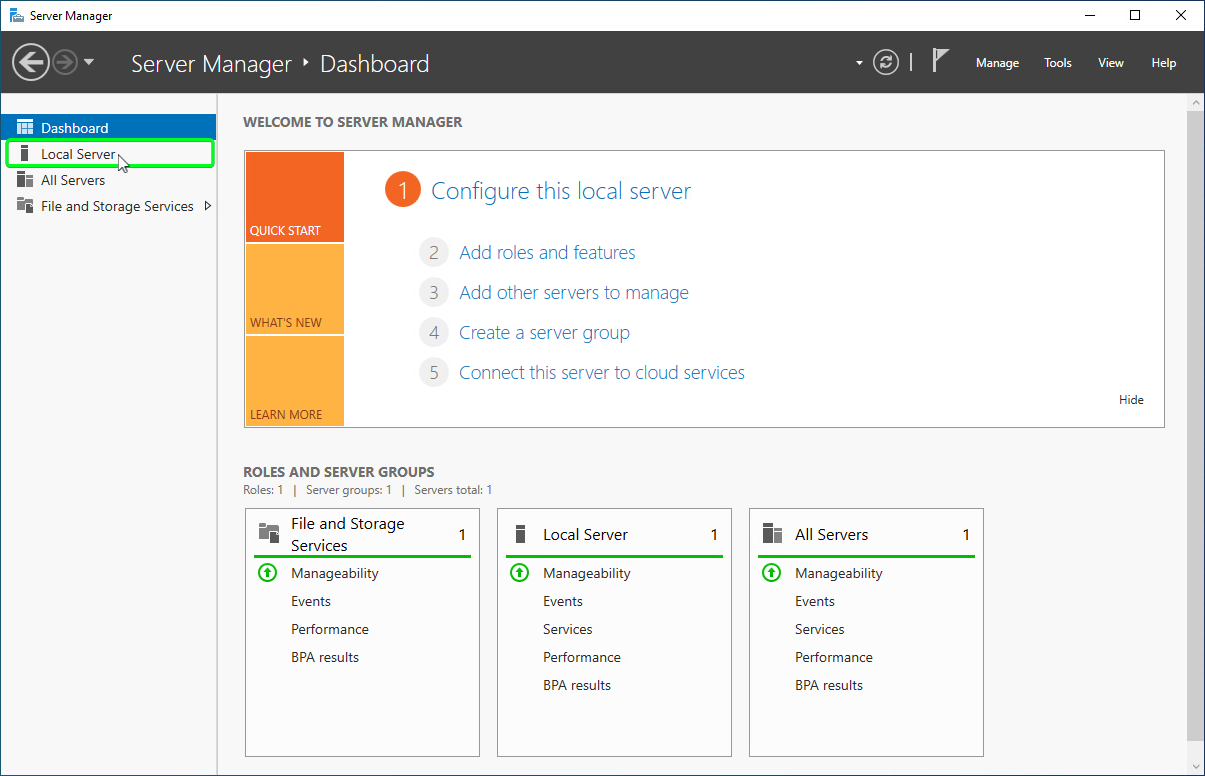
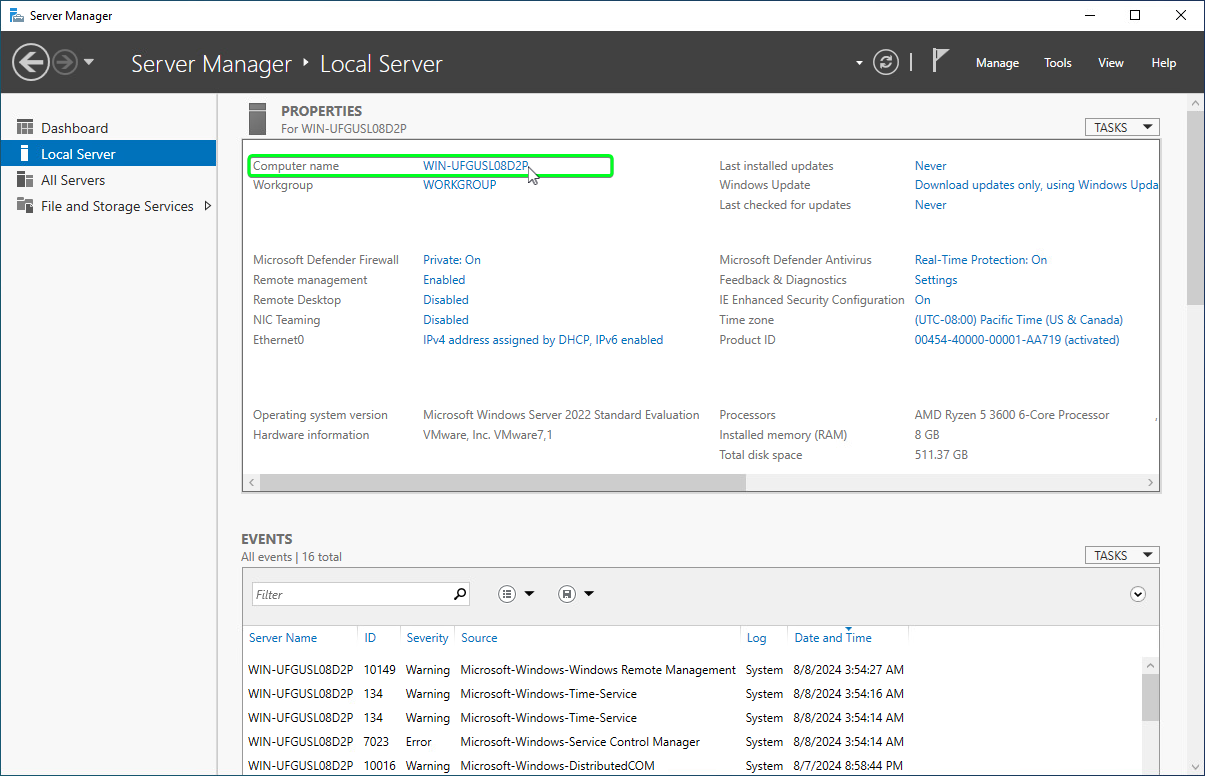
•In Server Manager, Click on "Local Server"


configure_01


Change Computer name and domain

•Click on the Computer name link as shown


configure_02


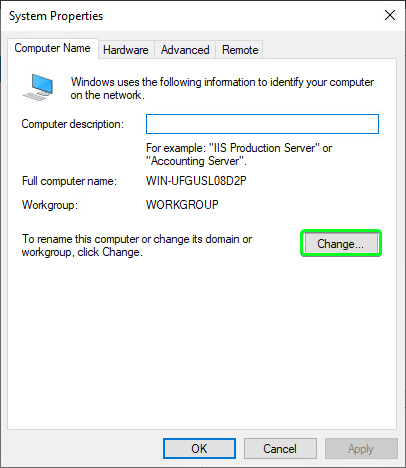
•Click on "Change..."


configure_03


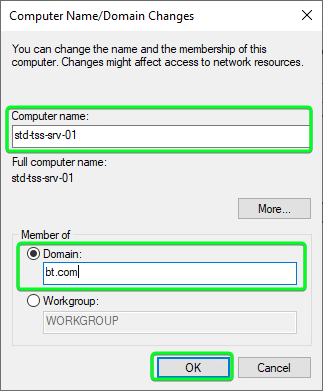
•Set the "Computer name" and "Domain" name (if joining a domain) and press "OK"


configure_04


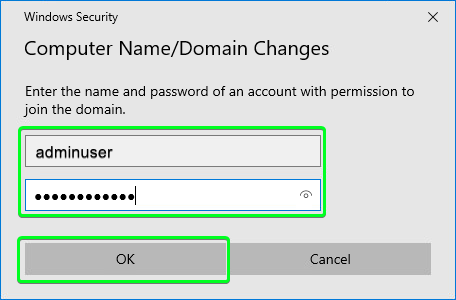
•If joining a domain, you need to provide credentials with permission to join the domain and Click "OK"


configure_05


TableCornerTopLeftA

IPT_Empty

IPT_Empty

TableCornerTopRightA

IPT_Empty

ImportantNote_Icon

If server is domain joined, make sure the domain user used to log in on the server has been granted full administrative rights to make system changes and install all required software.

IPT_Empty

TableCornerBottomLeftA

IPT_Empty

IPT_Empty

TableCornerBottomRightA


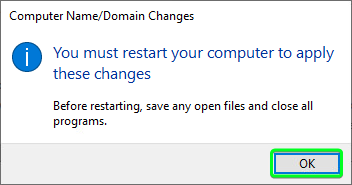
•The computer needs to be restarted. Click on "OK"


configure_06


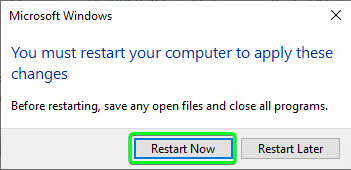
•Once you close the window  to change computer name and domain, Click "Restart Now"


configure_07

Set time zone

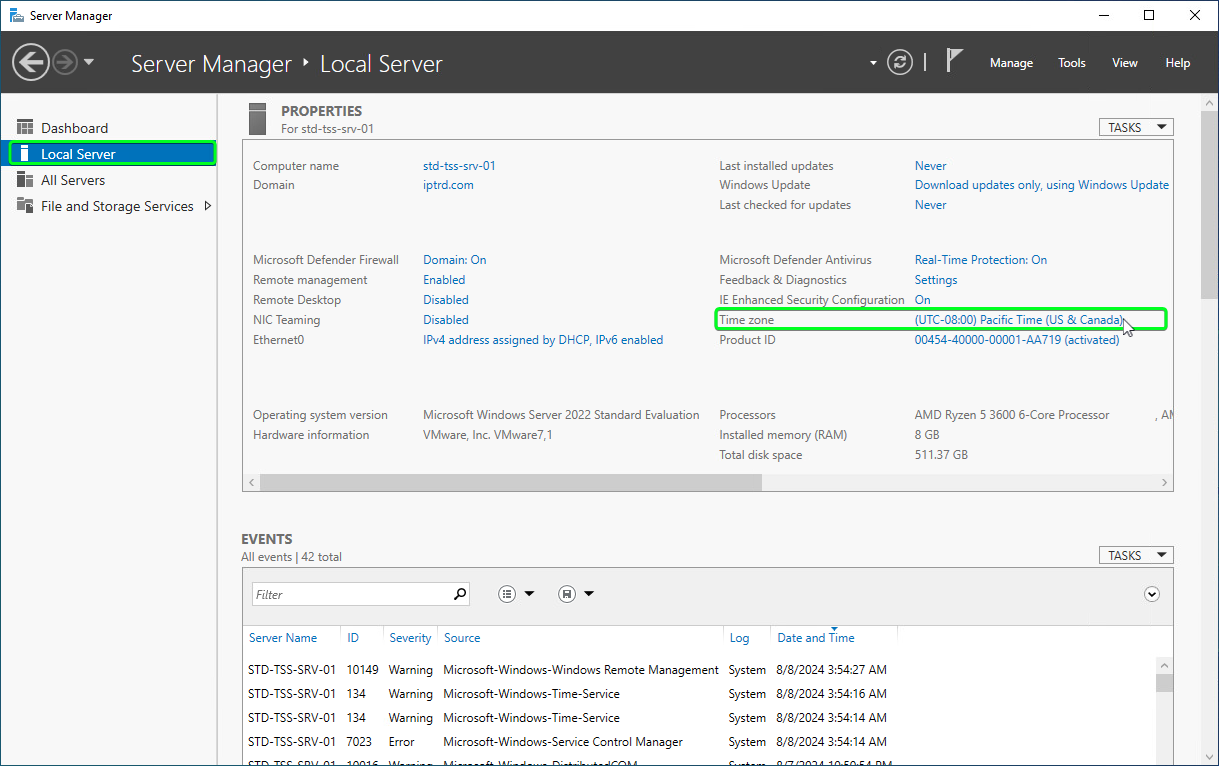
•In Server Manager, select "Local Server" on the left side and then Click on the Time zone link as shown.


configure_08


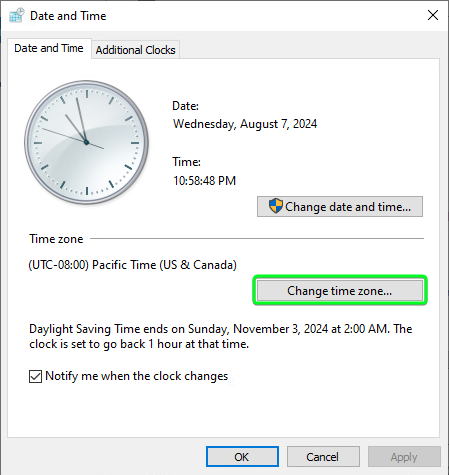
•Click on "Change time zone..."

configure_09

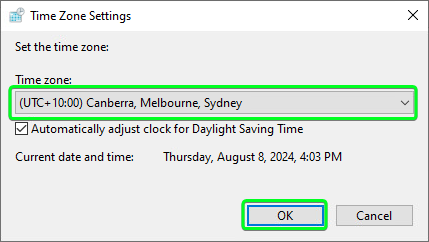
•Set time zone and Click "OK"

configure_10
 

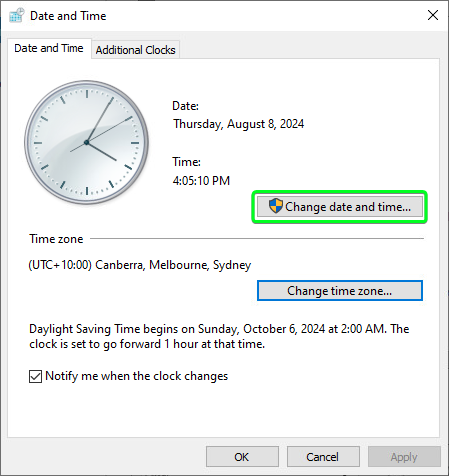
•If the date and time are incorrect, proceed to changing them by Clicking "Change date and time..."


configure_11


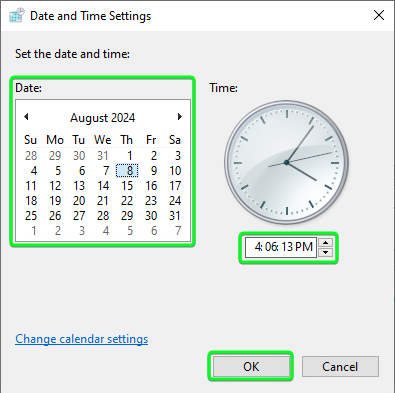
•Set date and time and press "OK"

configure_12


Windows Update

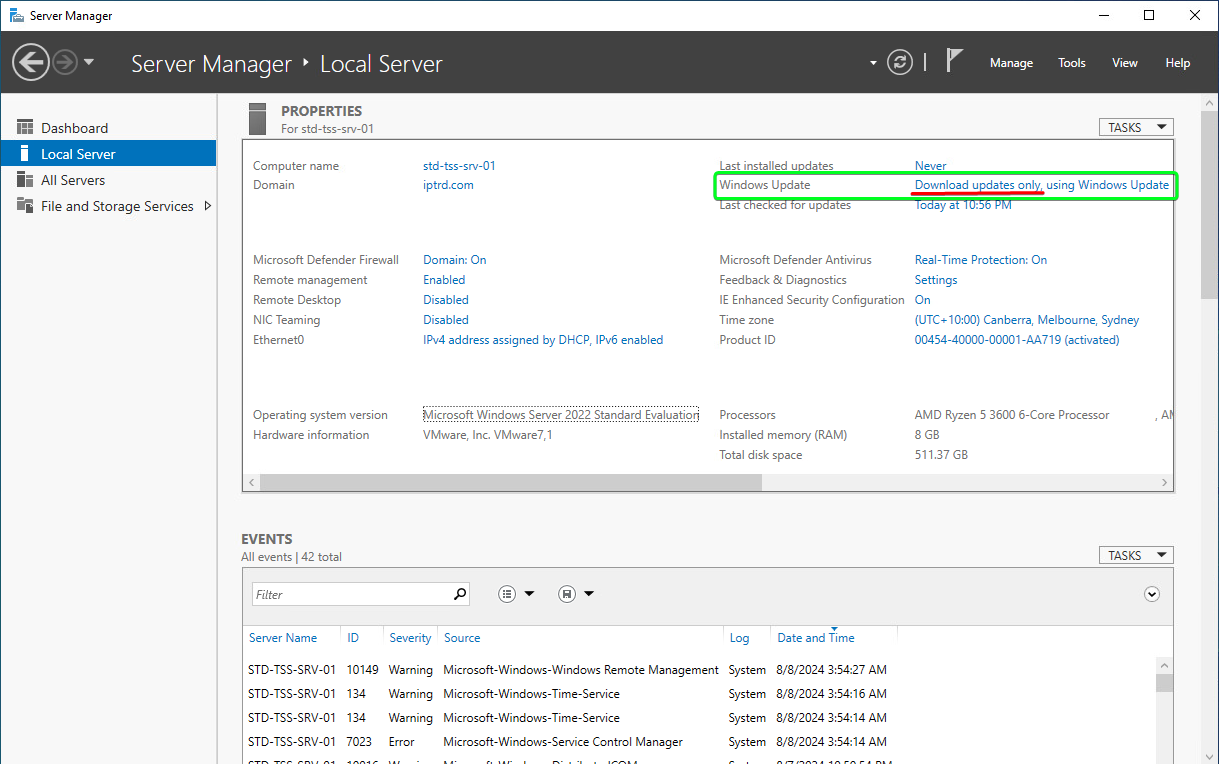
At a minimum the Windows Update system should not install any updates automatically (default behavior) which could impact production systems.


configure_13

Add roles and features

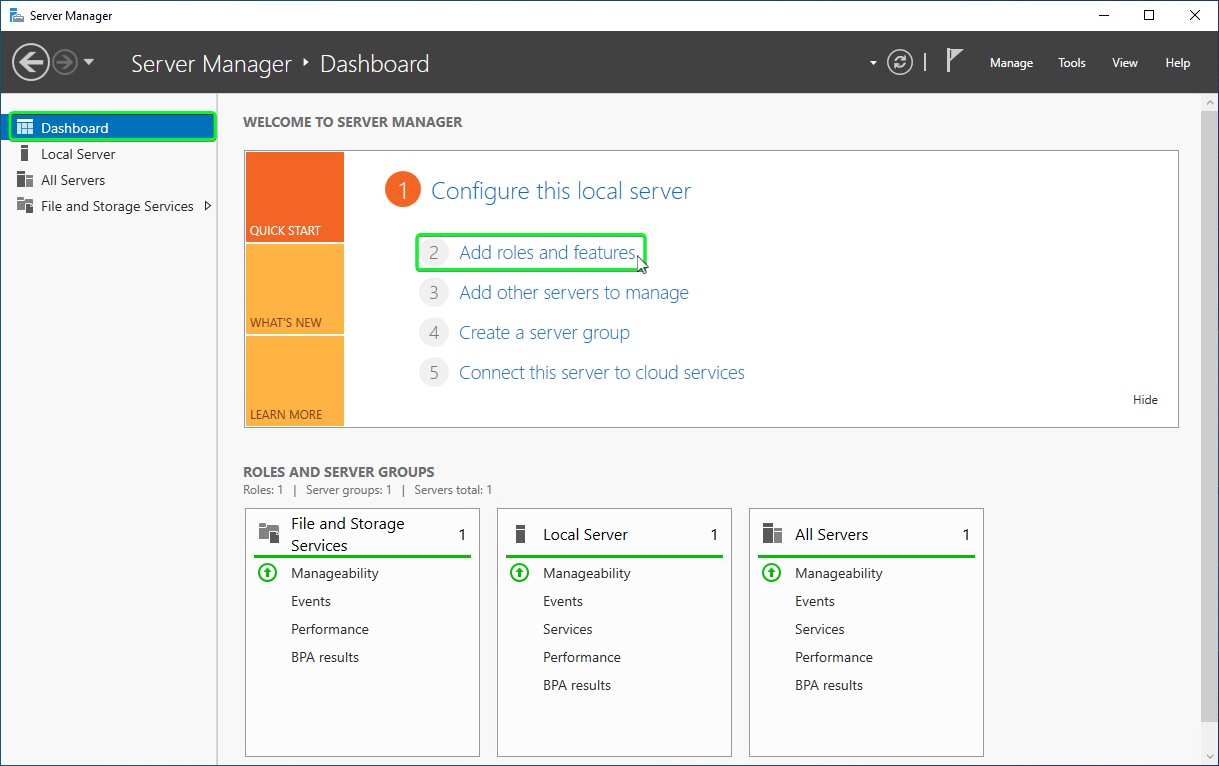
•On the Server Manager, Click on "Dashboard" on the left menu, then Click on "Add roles and features" link.


configure_14


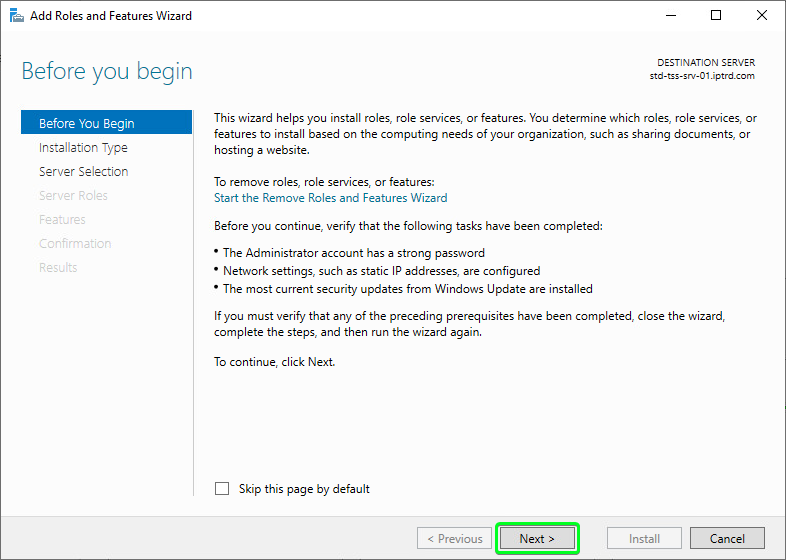
•Click "Next"


configure_15


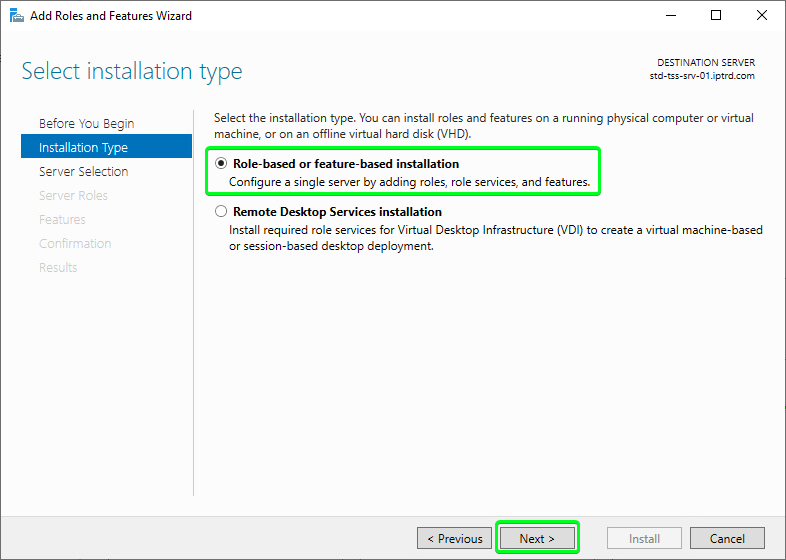
•Set option "Role-based or feature-based installation" and Click "Next"


configure_16


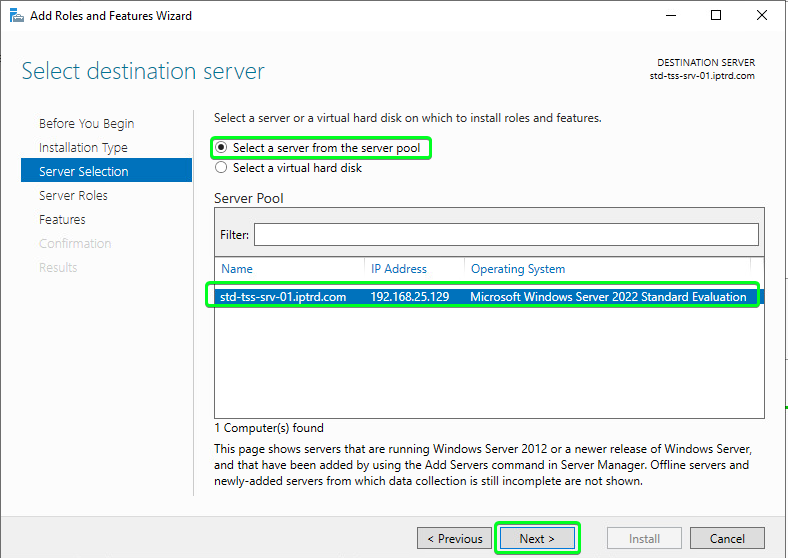
•Set option "Select a server from the server pool", select the current server and Click "Next"


configure_17


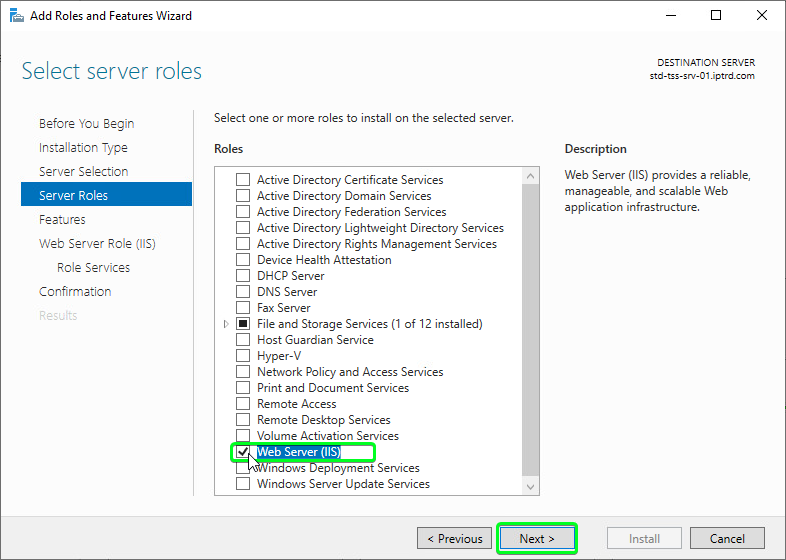
•Check options "Web Server (IIS)"


configure_18


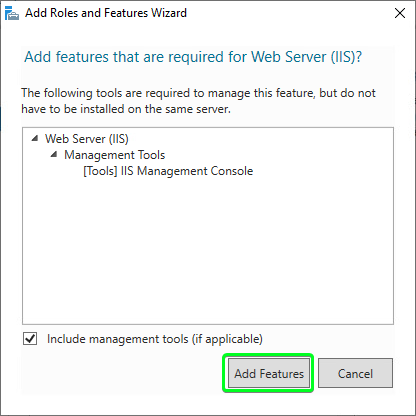
•Click "Add Features"


configure_19

•Click "Next"


configure_18


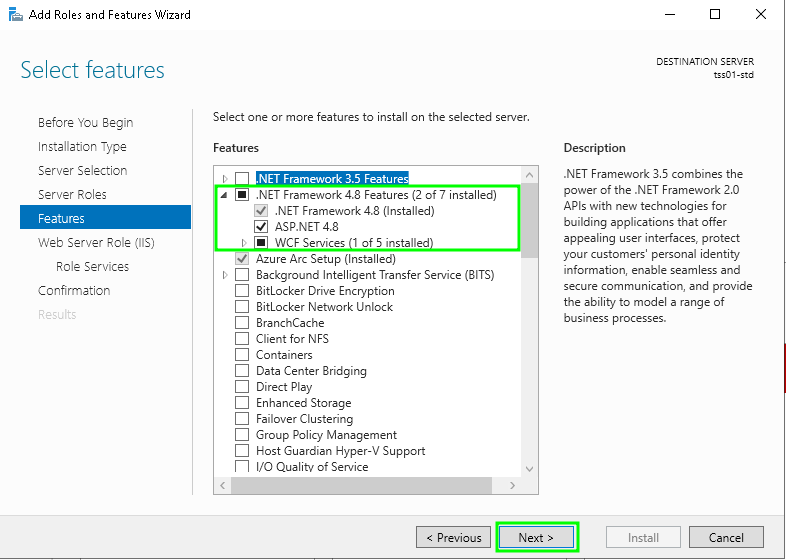
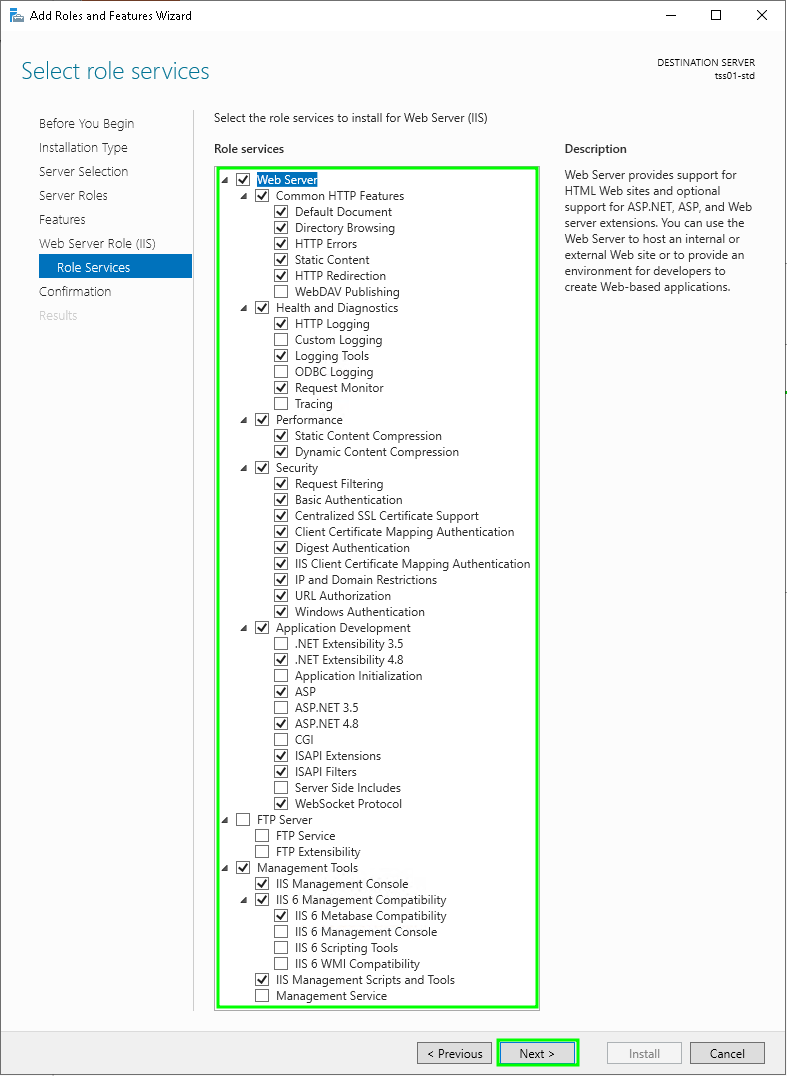
•Check all the options seen below, and Click "Next"


configure_22                                                                                                                                        


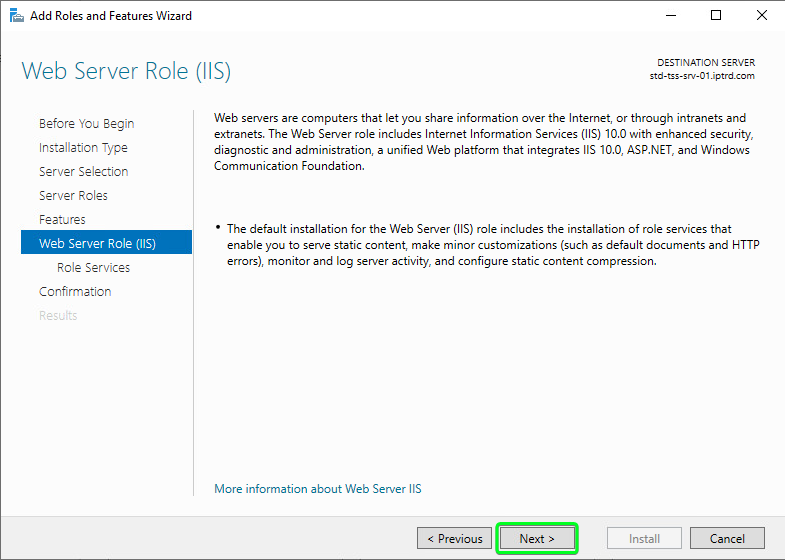
•Click "Next"


configure_24


•Check all the options as seen below, and Click "Next"


configure_25


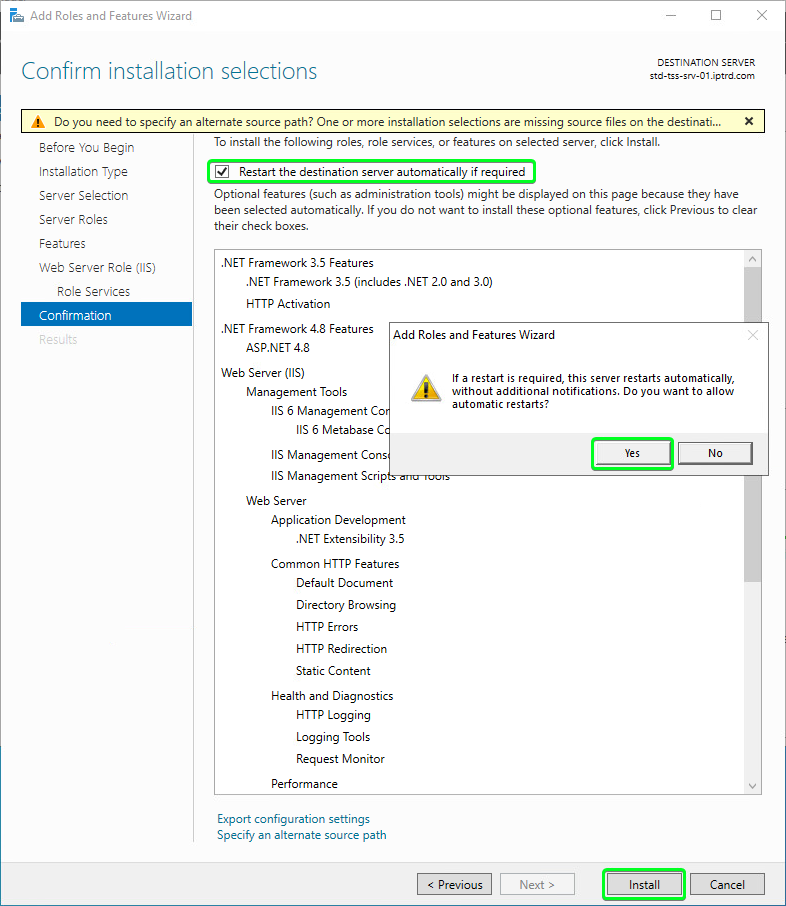
•Check options "Restart the destination server automatically if required" and Click "Yes" and then Click "Install"


TableCornerTopLeftC

IPT_Empty

IPT_Empty

TableCornerTopRightC

IPT_Empty

Info_icon

If you see the warning about specifying an alternative source path.

Insert the OS Install Disk and click on the link at the bottom "Specify and alternative source path" to add it.

Alternatively if the server is connected to the internet, it can source the required files from windows Update automatically

IPT_Empty

TableCornerBottomLeftC

IPT_Empty

IPT_Empty

TableCornerBottomRightC


configure_26


•Once installation is finished Click "Close"
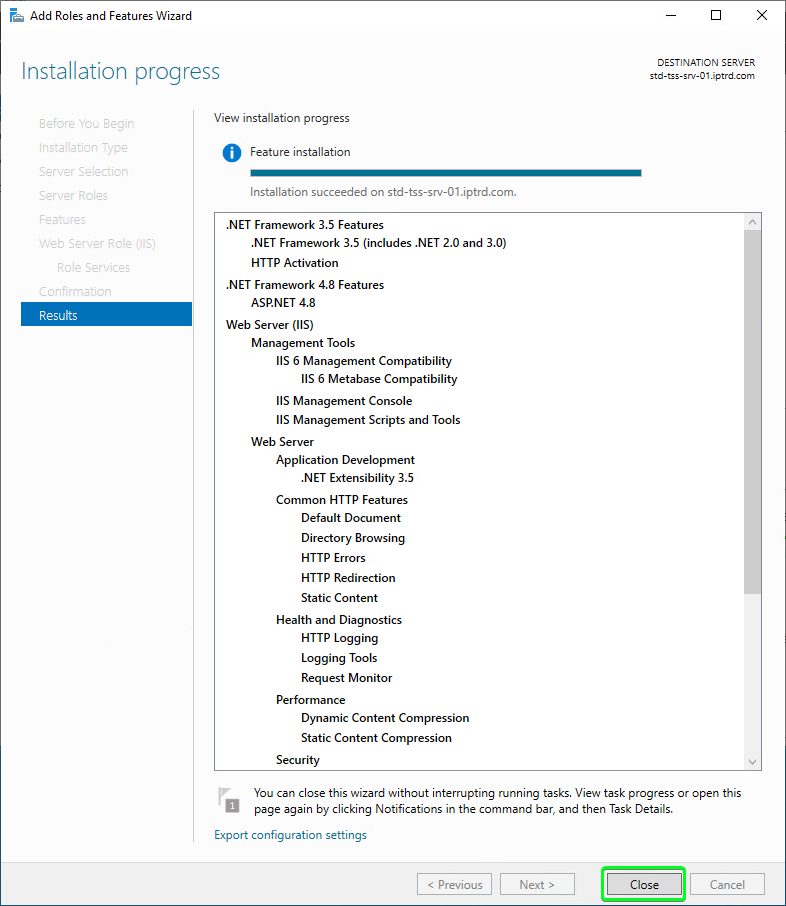
 

configure_27


Configure Windows Firewall

Depending on the installation, you need to make sure the Windows Firewall is configured to allow incoming traffic on all required ports and protocols

Please see: Network ports usage


To make changes to the Firewall


•On the Server Manager, Click on "Local Server" on the left menu, then Click on the line next to "Microsoft Defender and Firewall"
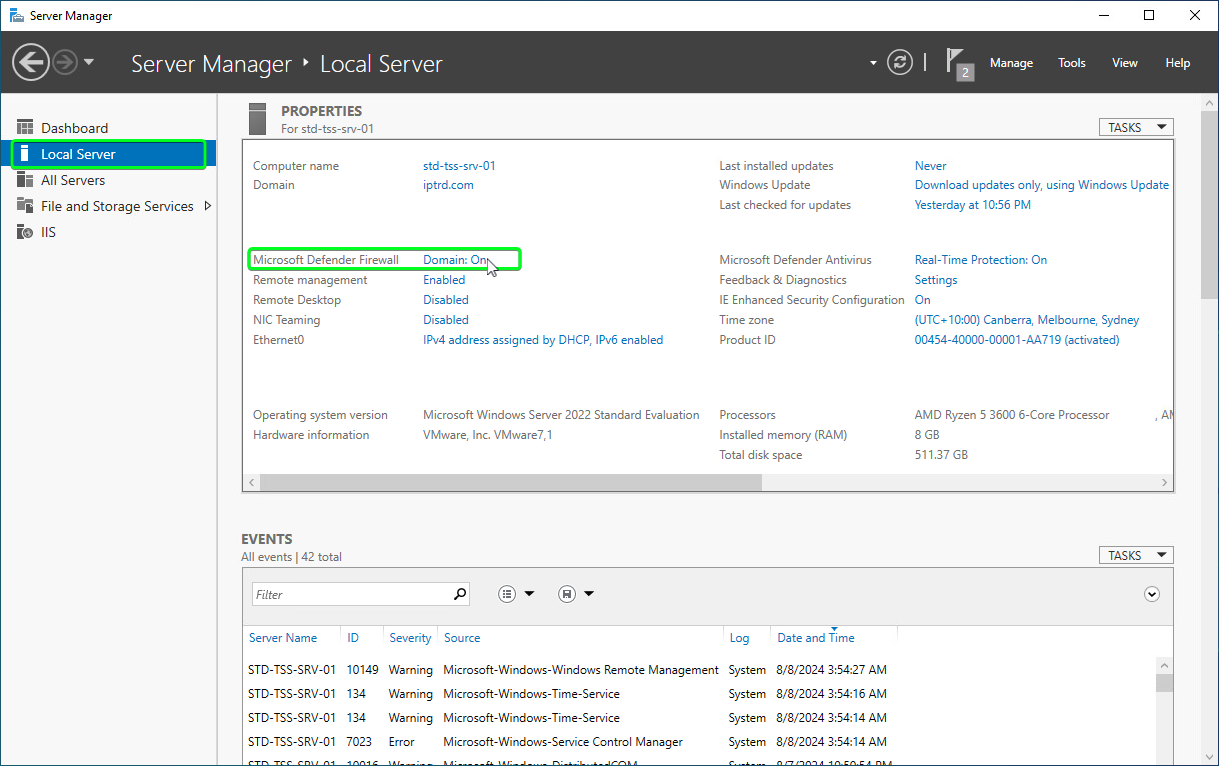
 

configure_32


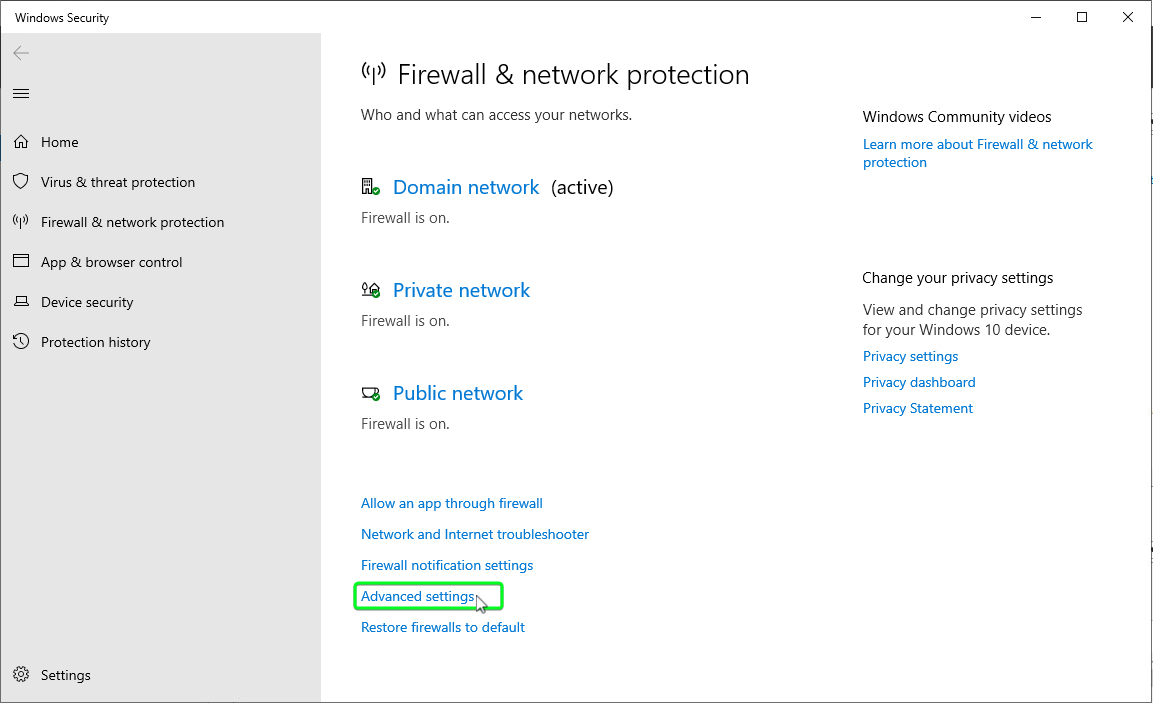
•Then Click on "Advanced settings"


configure_33


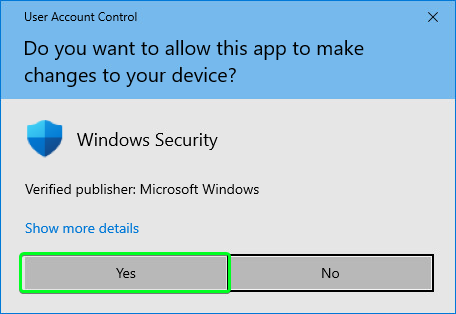
•Then Click on "Yes"


configure_34


•Then make the required Firewall rule changes and Exit.
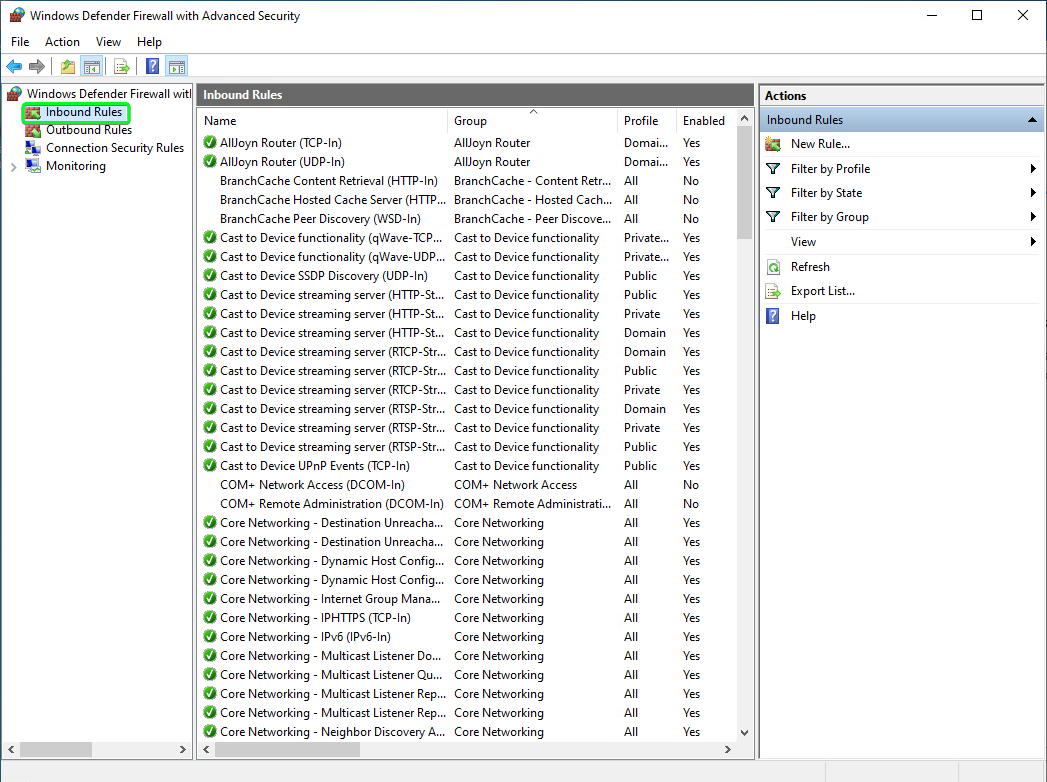
 

configure_35