Step 3 – Link queue to queue applet


Step 3 – Link queue to queue applet |
|
| Attendant Features > Call Waiting Queue > Configure > Using CuCM Line > Single attendant, one call-waiting queue |
At this stage, external calls directed to the queue extension are routed to the attendant console and trigger visual and audio notification associated to in-bound call events. IT & voice administrator must now proceed with the definition of a queue applet and link the call-waiting queue to this applet.
As stated above in the document, the number of applets and the distribution of queues among them can be freely defined. However, a few guidelines should be observed: ▪The number of available slots inside an applet (5 for a standard-size applet, 12 for a big applet) defines the maximum number of total calls that the associated queues can handle ;
•The queue applet must be programmed in the attendant’s personal profile. This can be achieved by using the embedded console administration tool.
For the example below, we illustrate how to proceed for the support queue, for which the extension 7001 has bee defined. The applet is created in the top-right corner of the screen (Applet 2).
1)Connect to the attendant console administration from your preferred Internet navigator and log onto the device with administration privileges ;
2)From the main menu, navigate to the Account Management menu and select the menu (Users or Shared Profiles) where profile to be edited is available. Then, select profile to edit. The Profile Edition panel is then displayed ; 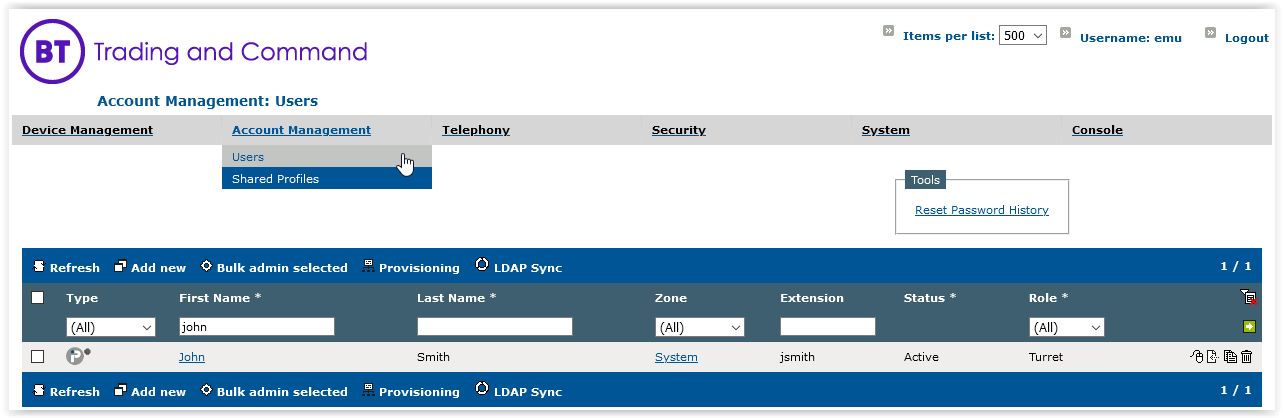
3)From the Profile Edition panel, navigate to the Screen Layout tab panel ;
4)Activate the checkbox corresponding to an applet (i.e. Applet 2), and set its type to Call Queue using the menu. Enter the queue extension (i.e. 7001) in the text field and click the Add button. The extension is added to the applet's extensions list. Commit the changes by pressing the update button at the bottom of the page ; 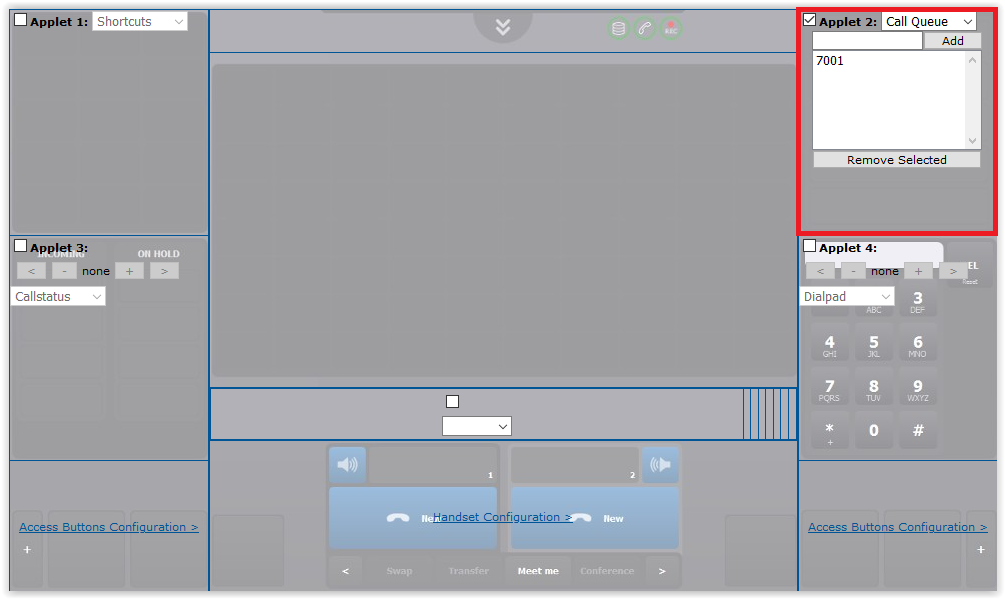 This associates the applet with the SUPPORT call-waiting queue (7001). Several queues can be associated to a single applet by just adding more extensions in the list.
5)The attendant must reconnect to the console to see the new layout.
|