Step 1 - Create queue extension


Step 1 - Create queue extension |
|
| Attendant Features > Call Waiting Queue > Configure > Using CuCM Line > Single attendant, one call-waiting queue |
On the PBX side, call-waiting queues are defined as simple extensions (directory numbers). There must be exactly one extension per queue and the following rules must be observed ▪The queue extension must be linked to the device which has been associated to the attendant’s user account; ▪The telephony infrastructure must be setup in order to have calling parties, who want to contact the service for which the queue has been defined, routed to that extension.
IT & voice administrators must proceed as follows:
1)Open Cisco Unified Administration console from your preferred Internet navigator and log onto the system with administration privileges ;
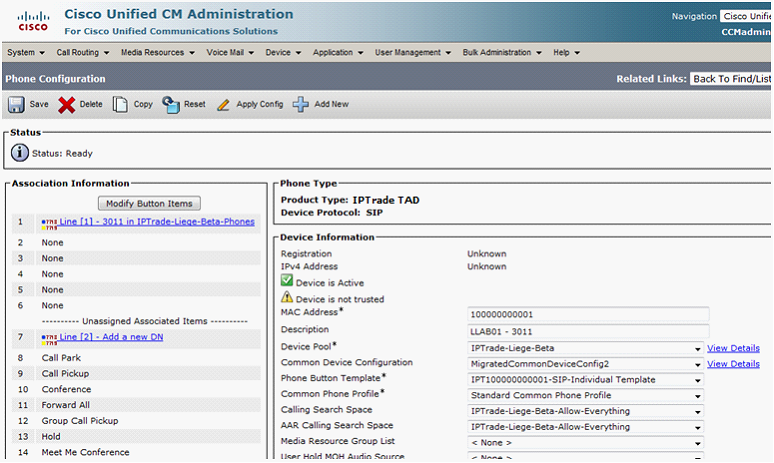
2)From the main menu, navigate to Device / Phone screen ; in the result list, locate the entry matching the attendant console device and open the Phone Configuration form ;
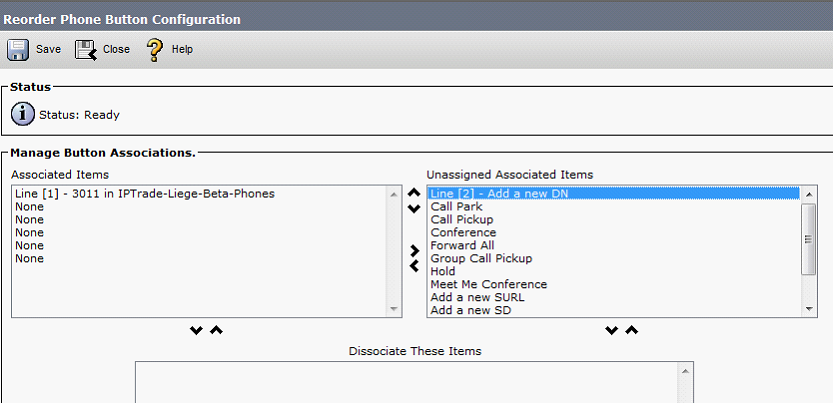
3)From the Association Information pick list, press Modify Button Items button ; the dialog box Reorder Phone Button Configuration is displayed ;
4)From the Reorder Phone Button Configuration dialog box, select the Line [2] – Add a new DN entry in the Unassigned Associated Items list, move it to the Associated Items list and apply the changes
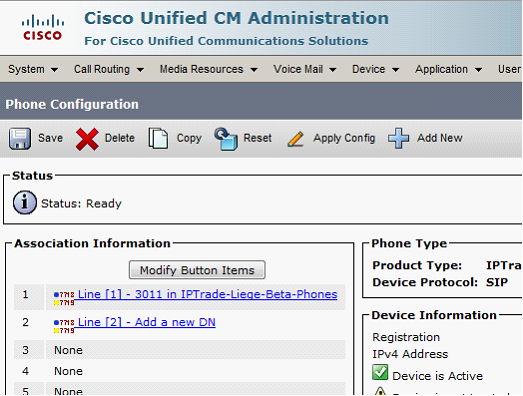
5)Go back to the phone configuration screen ; the entry Line [2] – Add a new DN should be visible in the Association Information pick list ;
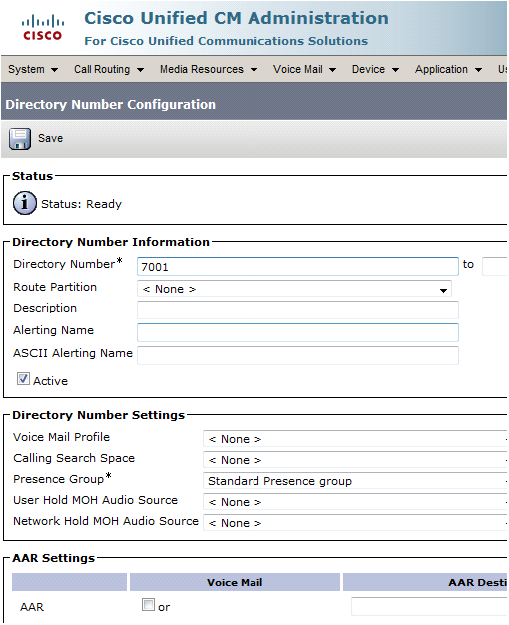
6)Select the link Line [2] – Add a new DN ; the Directory Number Configuration form is displayed ;
7)Fill-in the Directory Number Configuration form and apply the changes a)Directory Number field must be set with the queue extension – i.e. 7001 ; b)Refer to the Cisco documentation or ask the local IT & voice administrator for other values ;
8)Apply the changes on the device and proceed with the next step below ; |