Rocky Linux OS Install


Rocky Linux OS Install |
|
| Solution Integration > PBXs > BT Call Server > Installation > Standard Server |
Rocky Linux 10.x OS Install and setup
Visit: https://rockylinux.org/download and under the “Default Images” section download the “Minimal ISO” for v10.x (Get the latest v10.x available at the time)
Create and deploy the base VM (with the minimum Requirements) in your hypervisor and select the downloaded ISO as the install media.
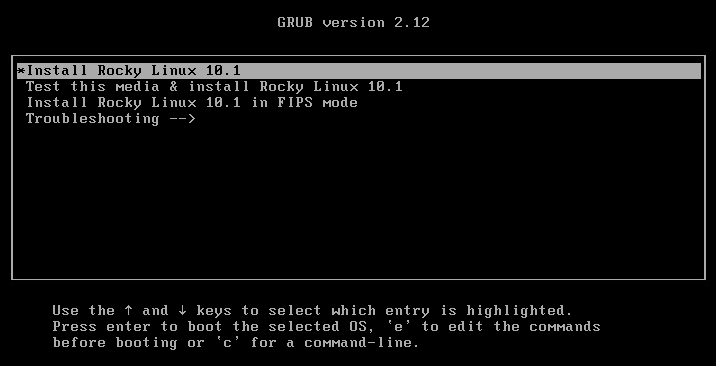
Boot with the install media and choose “Install Rocky Linux 10.x”
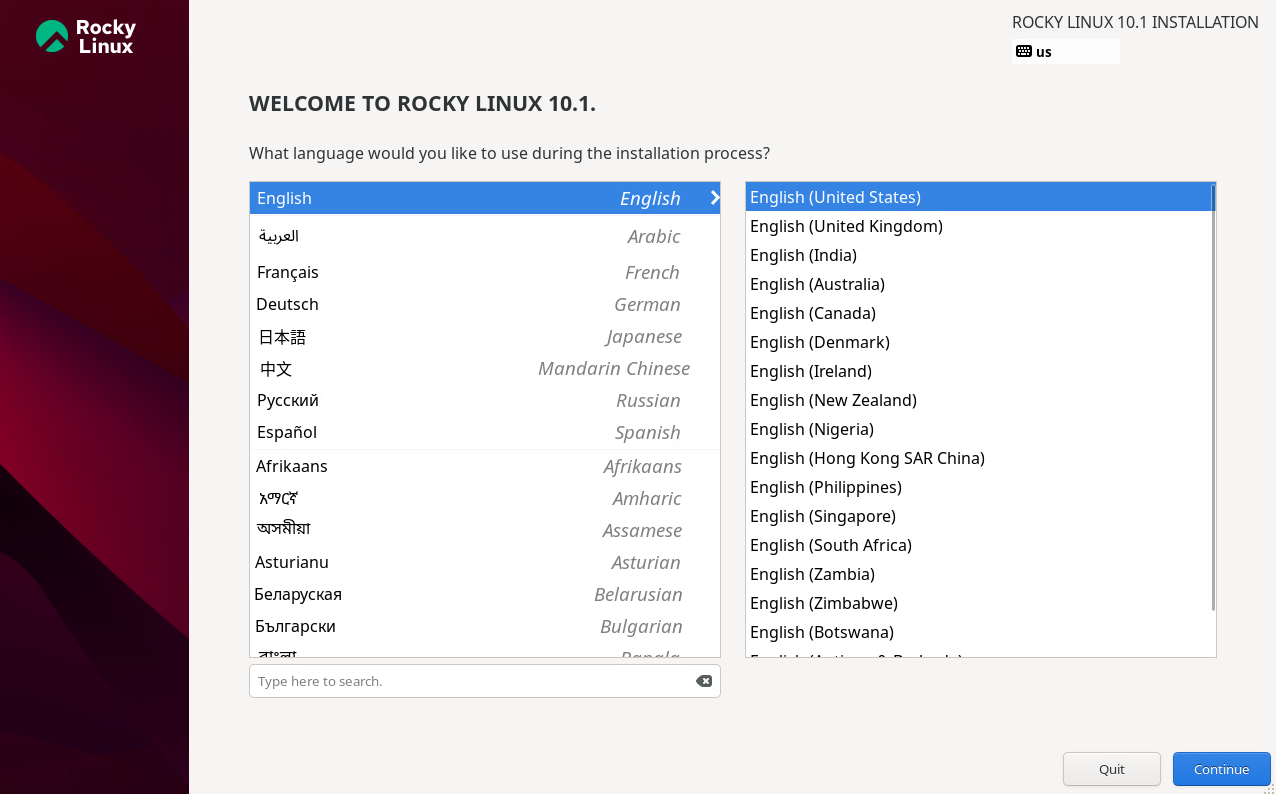
Choose language (Suggest keeping English for compatibility with BT Call Server) and “Continue”
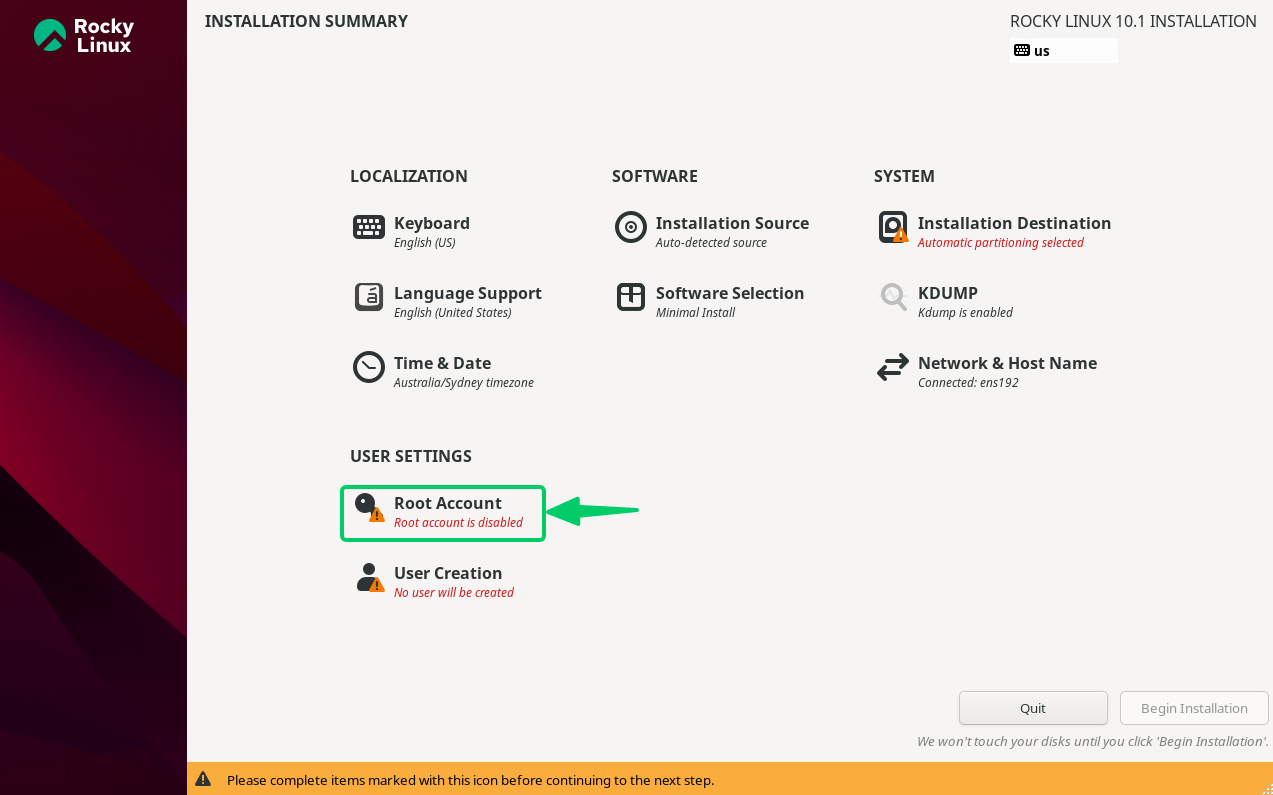
Leave the “Root Account” disabled
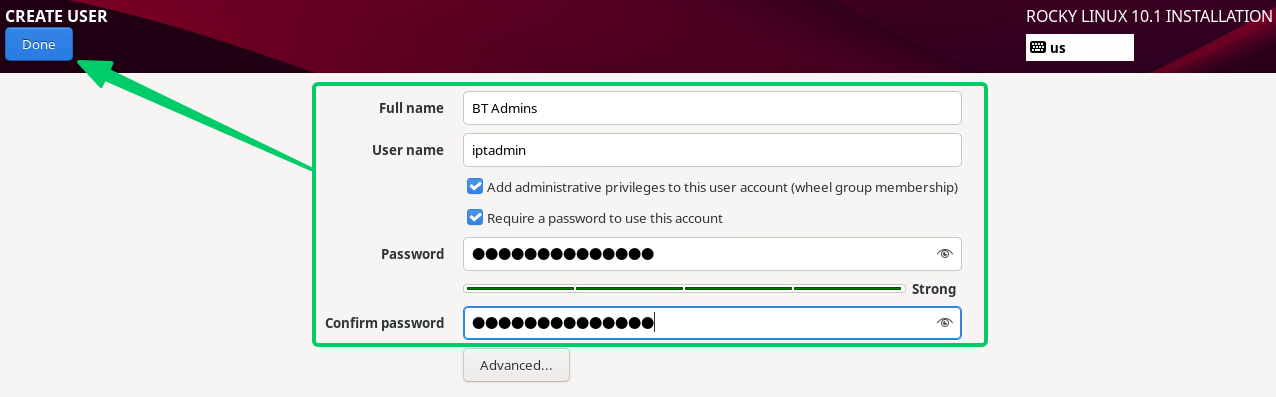
Click on “User Creation” make sure to add the required "iptadmin" user name. Also ensure “Add administrative privileges" is ticked as well as “Require a password to use this account” and choose a secure password. No need to configure anything in “Advanced…” it can be left with defaults. Click “Done” in the top left.
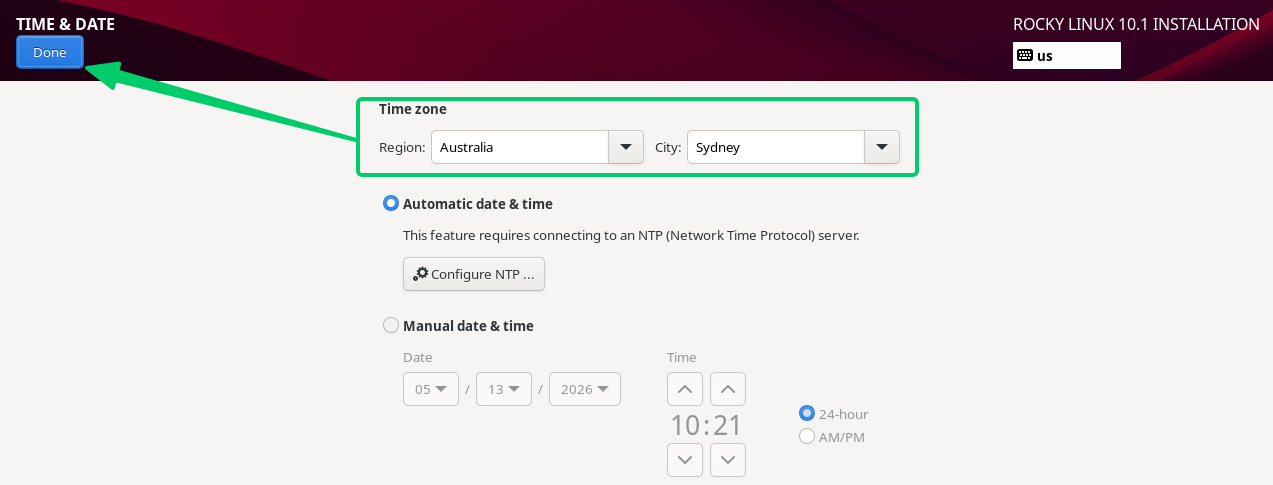
Click on “Time & Date” and set the details for your zone. Leave “Automatic date & time” selected. The BT Call Server install provides NTP configuration later. Click “Done” in the top left.
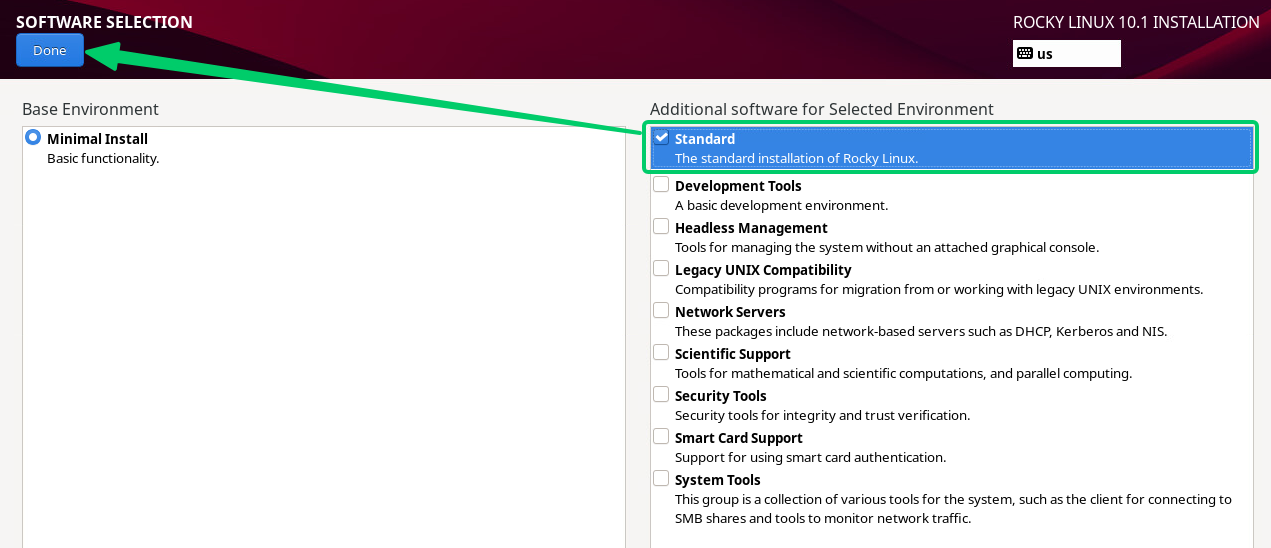
Click on “Software Selection” Check “Standard” and leave the rest unchecked. Click “Done” in the top left.
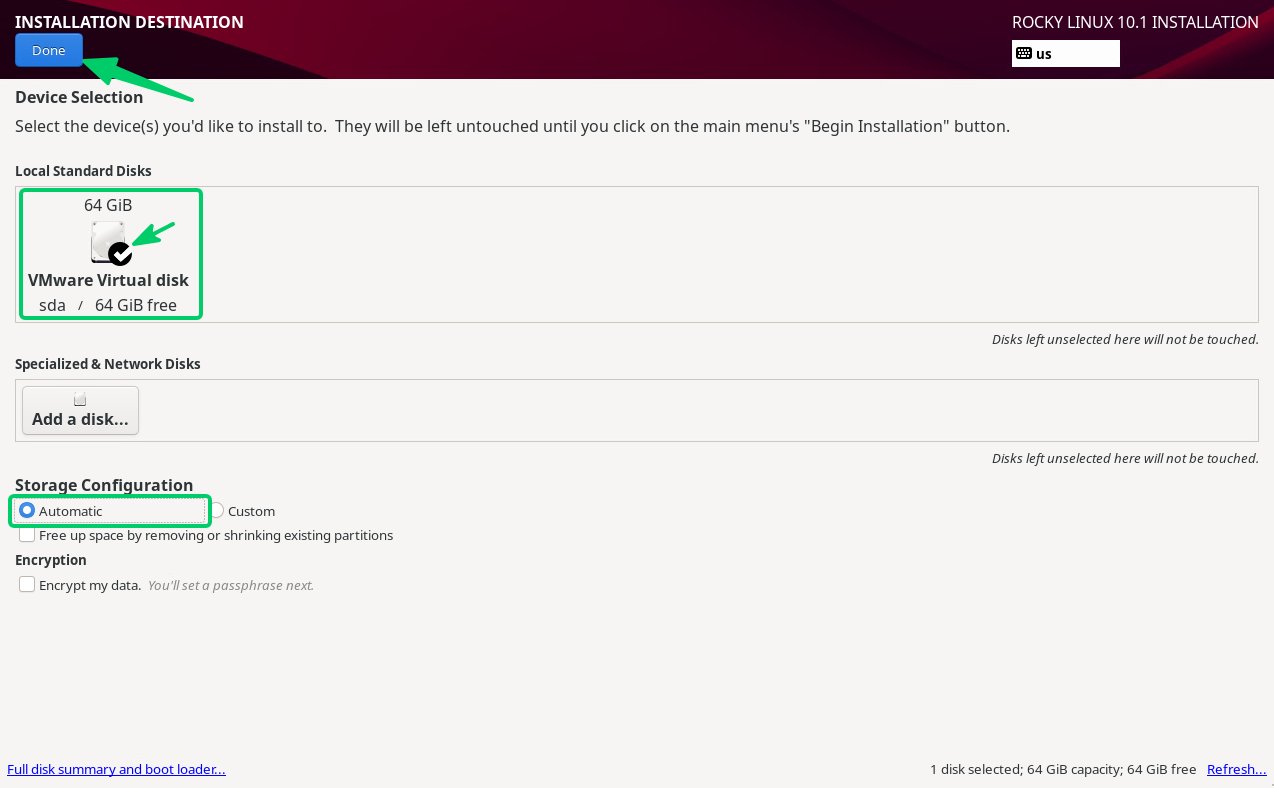
Click “Installation Destination” Make sure the “Local Standard Disks” has the 64GB HDD checked (as seen) For “Storage Configuration” leave “Automatic” selected Click “Done” in the top left.
It is assumed the VM will have a DHCP assigned IP with full internet access during the deployment phase.
However, If you need to manually set a Static IP at this point for the VM to work on the network with internet access,
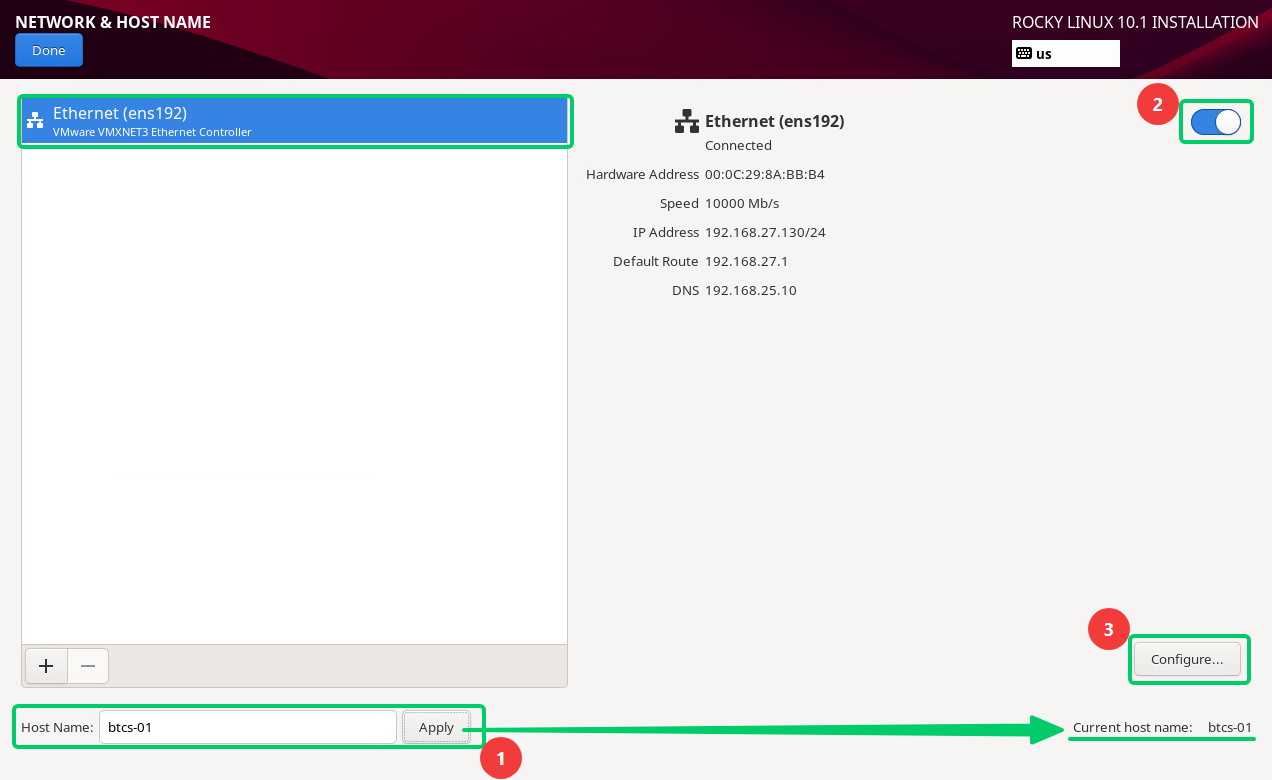
Click on “Network & Host Name” and enter in a “Host Name” and click “Apply”
Ensure the slider in point 2 is toggled "On"
To further configure the “IPv4 Settings”, click on “Configure...”
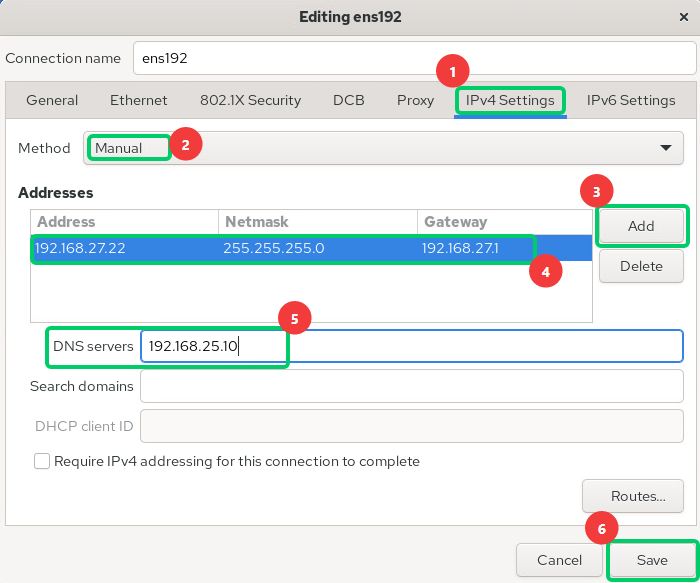
On the “IPv4 Settings” tab fill in all the required details as seen below. All other tabs can be left on defaults. Click on “Save” when done. Click “Done” in the top left to complete the Network & Host Name configuration.
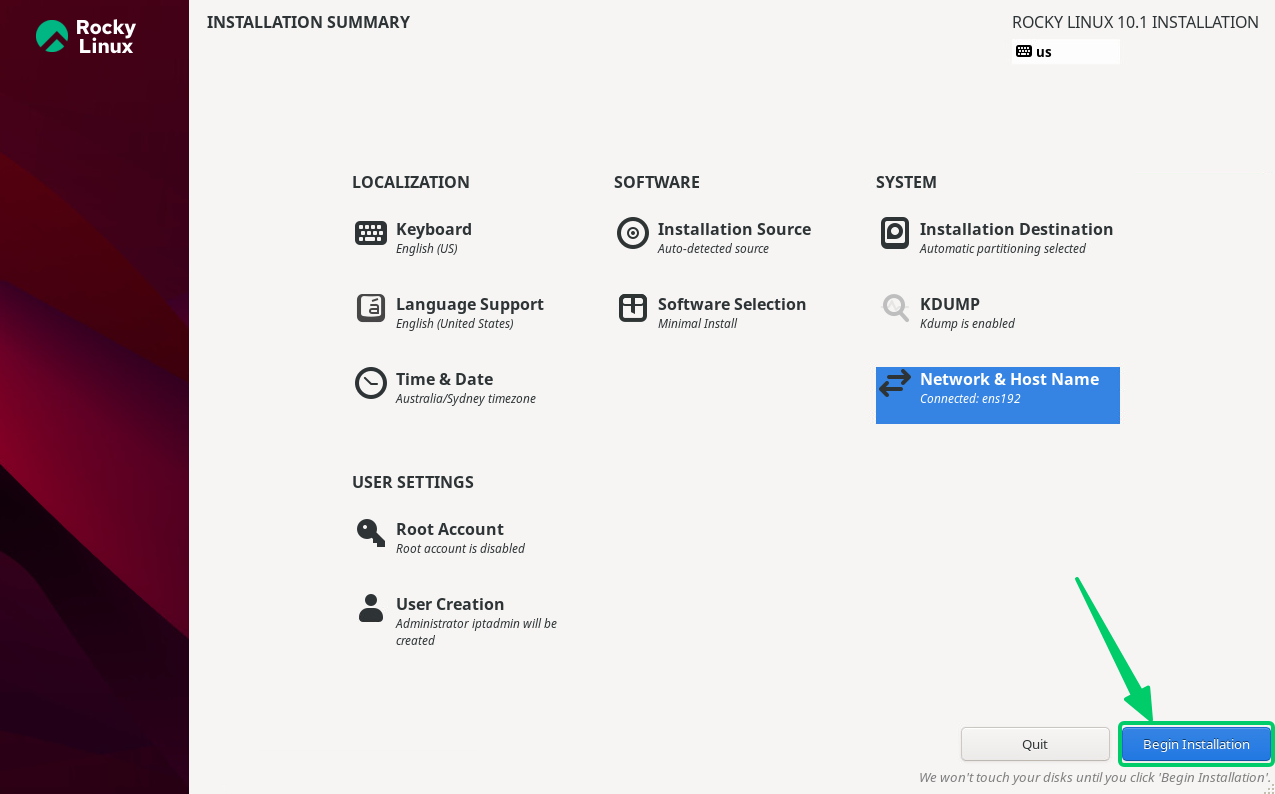
We are now complete with the Installation Summary. Click on “Begin Installation”
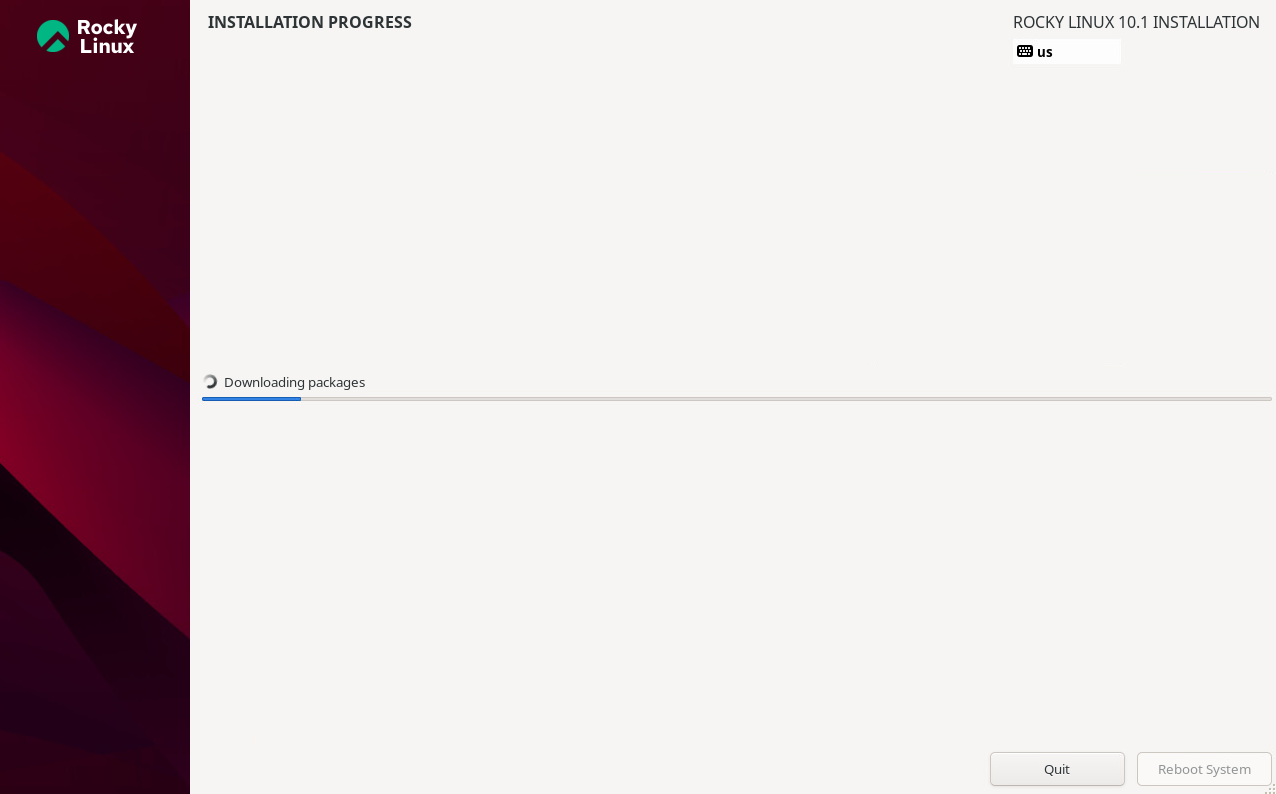
Installation will proceed
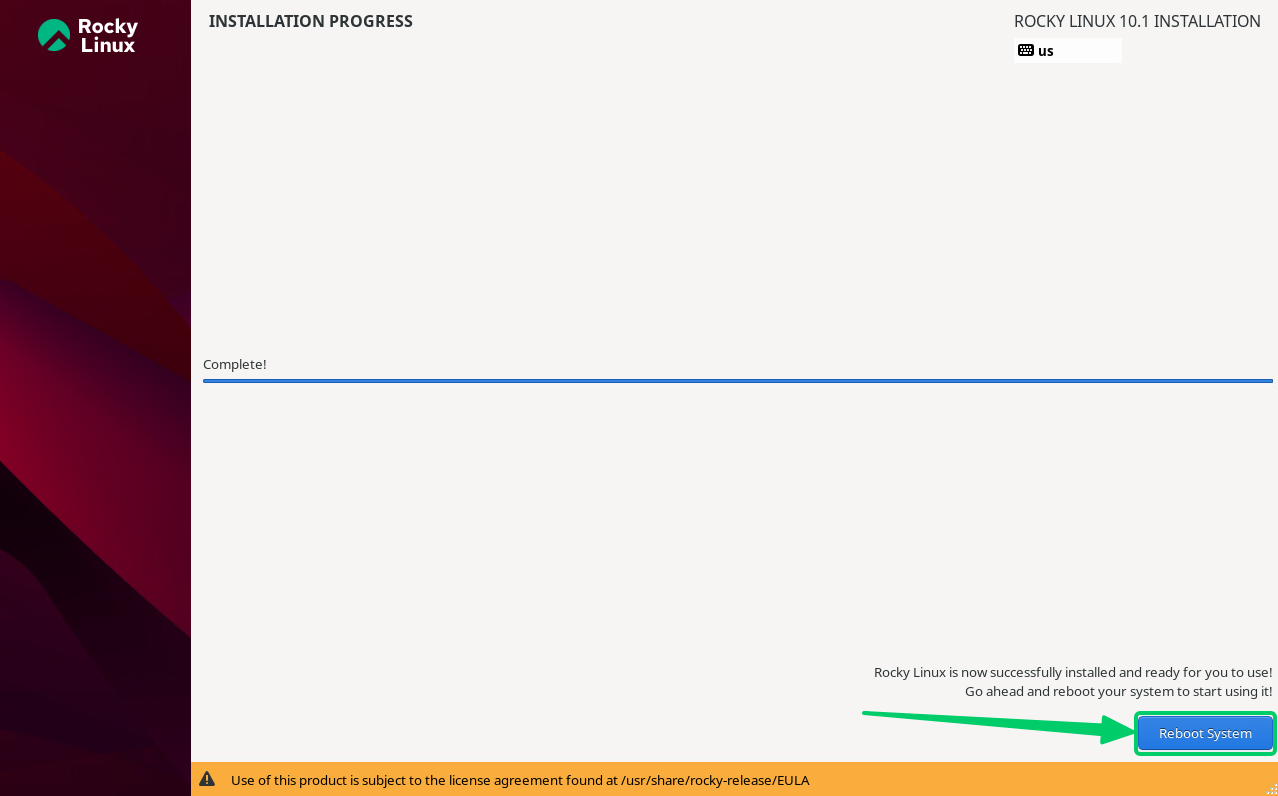
Once the install is complete, press “Reboot System”
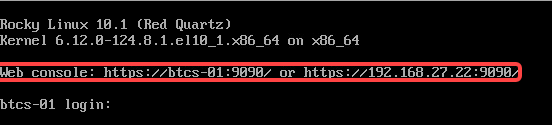
A default install of Rocky Linux comes with “Cockpit” installed. This is a web-based management tool for the OS, which provides an overview of hardware (CPU, memory, etc.), as well as services and firewall rules.
This could be flagged as an additional attack surface in production systems.
The choice is entirely up to the customer if they would like to keep or remove this service.
To disable Cockpit, login with the “iptadmin” user and run the following commands.
sudo systemctl disable --now cockpit.socket sudo firewall-cmd --remove-service=cockpit –permanent sudo firewall-cmd --reload
(Sudo password is always the same password for the “iptadmin” account)
To confirm cockpit is removed from the Firewall use the following:
sudo firewall-cmd --list-services
Finally to complete the OS staging update the system / packages
sudo dnf -y update sudo dnf clean all sudo reboot
The Rocky Linux OS is now staged and ready for the BT Call Server Scripted Install
Duplicate the entire procedure for any additional VM’s required. |