Link and position shortcuts on a map page


Link and position shortcuts on a map page |
|
| User Options > Shortcuts > Advanced Usage > Shortcut geographical mapping > Configure |
Adding shortcuts to a map page from the profile editionAs is the case with all types of pages, an administrator can add shortcuts to a map page from the profile edition form.
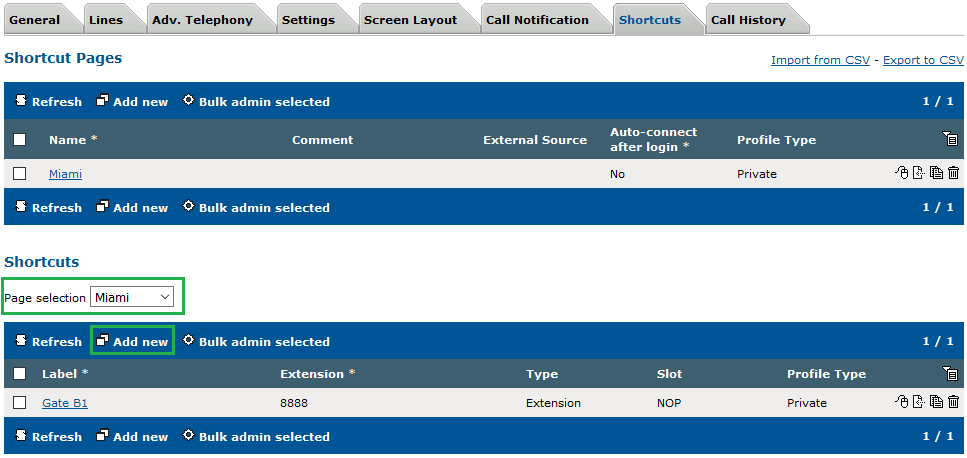
1.Connect to the TSS Administration Console using an administrator account. 2.Navigate to "Account Management" -> "Users" or "Shared Profiles" and select the profile to configure. 3.Select the "Shortcuts" tab. 4.Under the "Shortcuts" section, select your map page. 5.Click on "Add new" to add a new shortcut and directly link it to the map page (see limitations to have information about the types of shortcut that can be created).
 Linking existing shortcuts to a map page from the profile edition
Under certain conditions, an administrator can link some existing shortcuts to a map page from the profile edition form.
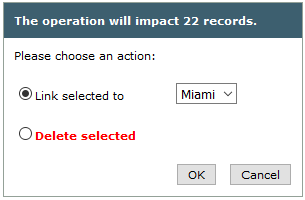
1.Connect to the TSS Administration Console using an administrator account. 2.Navigate to "Account Management" -> "Users" or "Shared Profiles" and select the profile to configure. 3.Select the "Shortcuts" tab. 4.Under the "Shortcuts" section, select all the shortcuts that meet the requirements (see limitations) you want to link to the map page. 5.Click on "Bulk Admin". 6.Select the option "Link selected to", choose your map page and click "OK".
Linking and positioning shortcuts on a map page from the shortcut layout edition form
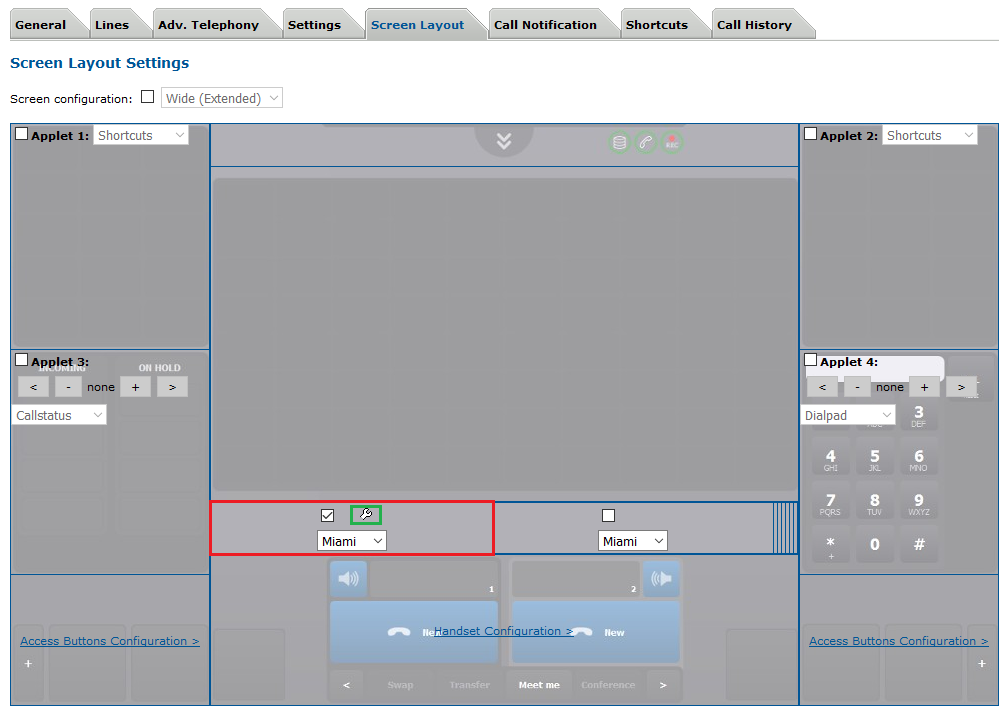
1.Connect to the TSS Administration Console using an administrator account. 2.Navigate to "Account Management" -> "Users" or "Shared Profiles" and select the profile to configure. 3.Select the "Screen Layout" tab. 4.Add the map page in the preferred pages. 5.Click on the wrench tool to open the shortcut layout edition form.
The shortcut layout edition page specialized for "Map" pages is divided into three areas : 1.Available shortcuts 2.Map area 3.Not positioned
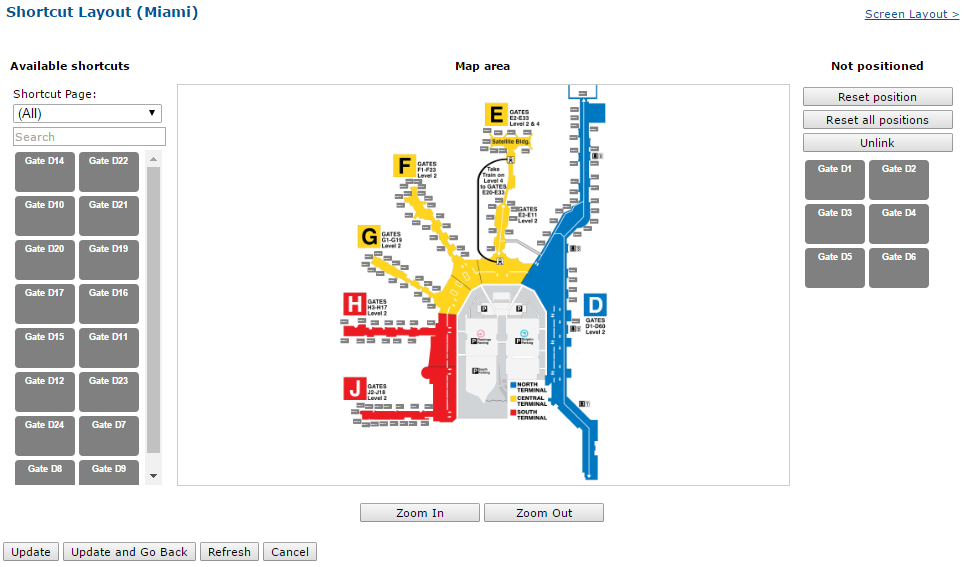
Available shortcuts areaThis area displays all supported shortcuts (see limitations) available for the user or the shared profile and that are not yet linked to the map page. It allows you to filter shortcuts base on their names or the pages to which it belongs to. Clicking on one of these shortcuts will link it to the page and move it to the "Not positioned" area.
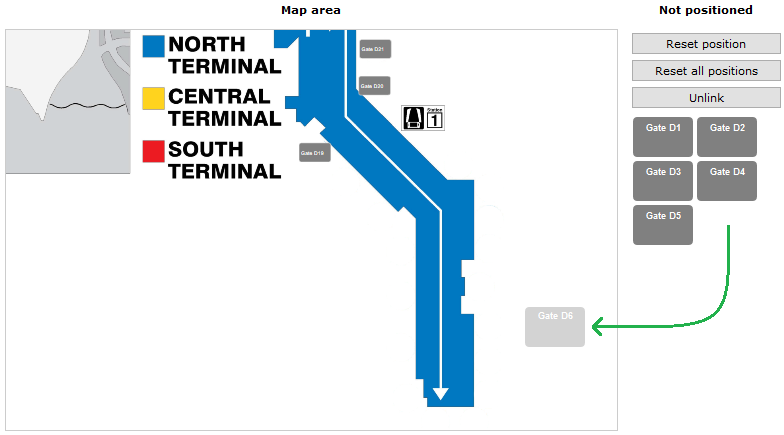
Not positioned areaThis area lists all shortcuts that are linked to the map page but do not have an initialized position yet. They can be either positioned in the map by drag-and-drop or just left there for later. If left there and the Update button is pressed, they are not unlinked from the page but they remain un-positioned.
•The "Reset position" button enables or disables the "reset position mode". Once activated, the administrator can click on any shortcut positioned on the map to reset its position and move it to the "Not positioned" area. •The "Reset all positions" button resets the position of all positioned shortcuts and moves them to the "Not positioned area". •The "Unlink" button allows effectively unlinking all the un-positioned shortcuts (currently in the right area), making them disappear from the form.
Map areaThe center area shows the image associated with the map page and linked shortcuts with valid position on top of it. Administrator positions linked shortcuts, one-by-one, by dragging them from the "Not positioned" area and dropping them on the map as shown bellow. The shortcuts will appear at the dropped positions. Once dropped, any shortcut can freely be moved on the map by selecting it.
Be careful that, if a shortcut is positioned outside the image's bound, a warning message is displayed and its position will be reset on update.
 |