TradeSense Configuration


TradeSense Configuration |
|
| Solution Installation > TradeSense Installation > Using the TradeSense Virtual Appliance |
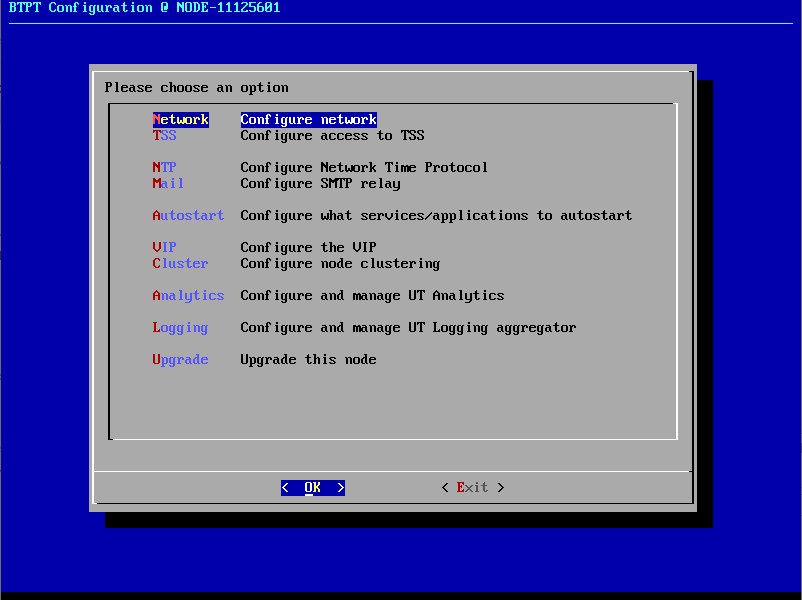
TradeSense configuration is done mainly through the Command Line (CLI) with the help of the "configure-node" script.
This is how it looks like: |
|
|
|
|
|
|
You can navigate through the various options using the arrow keys on your keyboard. Hit [Enter] to select an option. Hit [Esc] to go back. Hit [Tab] to switch between the options on the bottom and the main options. You can also use the letters highlighted in red as shortcuts, pressing the corresponding key on your keyboard will jump to the item. |
|
|
|
|
|
|
|
|
|
|
|
These default credentials are shared between each and every TradeSense VA. Make sure to check the Security section of this manual when deploying on production. |
|
|
|
|
|
Login: root
Password: Uta*969131
This method is mostly useful during the first configuration.
As soon as the network configuration is done (see below), it is highly advised to use a SSH client to connect to the TradeSense VA.
In the VMware client, open the console for the TradeSense VM.
Log into TradeSense using the provided credentials.
|
|
|
|
|
|
Mind that the keyboard layout is QWERTY. |
|
|
|
|
|
|
|
|
|
|
|
If "configure-node" does not automatically start, run "configure-node" to manually start it. |
|
|
|
|
|
When "configure-node" is successfully started, you can jump to the "Basic configuration" section below.
If the TradeSense network configuration has already been done and is working, you can SSH into the VA using the provided credentials.
ssh root@<tradesense-ip>
Start configure-node by running:
configure-node
1.Network configuration
2.Cluster configuration
3.NTP configuration
4.TSS configuration
5.Upgrade source configuration (FTP)
In the main menu, select "Network".
Provide a "Node name".
|
|
|
|
|
|
The node name must be the same as the one defined during the TSS configuration. |
|
|
|
|
|
If prompted, select the network interface "eth0".
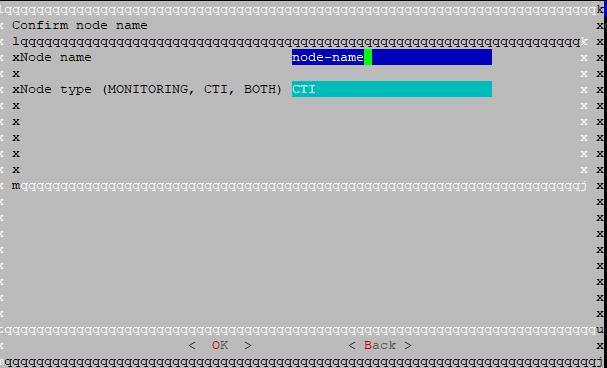
Users can configure the Node Type as one of the following options: Monitoring, CTI(Computer Telephony Integration), or Both.
•CTI: When the node type is set to CTI, it functions as a CTI server. In this mode, all monitoring features including SNMP Gets, SNMP Traps, and ICMP Pings are disabled.
| The message "This is a CTI Node. Monitoring (SNMP Gets, SNMP Traps, ICMP Pings) disabled" will be displayed in the TradeSense UI. |
•Monitoring: When the node type is set to Monitoring, it operates as a monitoring server. In this mode, CRM,Call-related features are disabled.
| The message "This is a Monitoring Node. CRM disabled" will be displayed in the TradeSense UI. |
•Both: When the node type is set to Both, all features including CTI and monitoring are enabled and operate normally.
Select "static" network mode.
|
|
|
|
|
|
Except for testing purposes, the "dhcp" network mode must be avoided. |
|
|
|
|
|
Provide an IP address, Netmask and default Gateway. Leave the DNS Server empty (DNS should only be configured after upgrading to a newer TradeSense Bundle).
Commit the changes.
|
|
|
|
|
|
If an execution error is displayed at the end of the process, it can be safely ignored by pressing OK. |
|
|
|
|
|
|
|
|
|
|
|
Below IP's will be reserved for TradeSense internal usage. Make sure that you should not allocate below IP's for any devices. 1. 10.246.0.0 - 10.246.7.255 2. 10.247.0.0 - 10.247.0.255 3. 10.248.0.0 - 10.248.0.255 4. 10.249.0.0 - 10.249.0.255
|
|
|
|
|
|
In the main menu, select "Cluster".
Select "Operations".
Select "Reset".
Select "Yes".
Back in the main menu again, select "Cluster".
Select "Configuration".
Provide a "Cluster name".
Hit [Enter].
|
|
|
|
|
|
The cluster name must be the same as the one defined during the TSS configuration. |
|
|
|
|
|
|
|
|
|
|
|
Leave the "Master node quorum" untouched (equal to 1). Clustering is not supported yet. |
|
|
|
|
|
In the main menu, select "NTP".
Provide an IP address or a domain name.
|
|
|
|
|
|
IP address/domain names can be comma separated. |
|
|
|
|
|
Hit [Enter].
In the main menu, select "TSS".
Set "TLS enabled" and "TSS port" according to the TSS configuration:
"TLS enabled" to true and "TSS port" to 443 OR "TLS enabled" to false and "TSS port" to 80.
Provide a TSS host.
Provide a TSS version (leaving the TSS version empty will automatically set the default TSS version).
Syslog configuration:
Users can configure a TradeSense node to forward OS-level syslogs to the TSS.
Default port for syslogs will be 514.

Hit [Tab] until the "Find/Verify version" button is highlighted.
Hit [Enter].
In the main menu, select "Upgrade".
Select "Configure".
Change the "user:password" if needed.
Hit [Enter].
Going forward from 9.7.8 the ftp protocol is disabled and we use https protocol while downloading a firmware
Please follow the process if the firmware upgraded is <=9.7.7 to >=9.7.8
After performing the upgrade to latest from version <= 9.7.7 please configure the authentication as stated below.
Navigate to Upgrade option > Configure
URL: https://tss-fqdn/conf
Authentication enabled : true – if authentication is enabled this is considered if ftp authentication is enabled in TSS
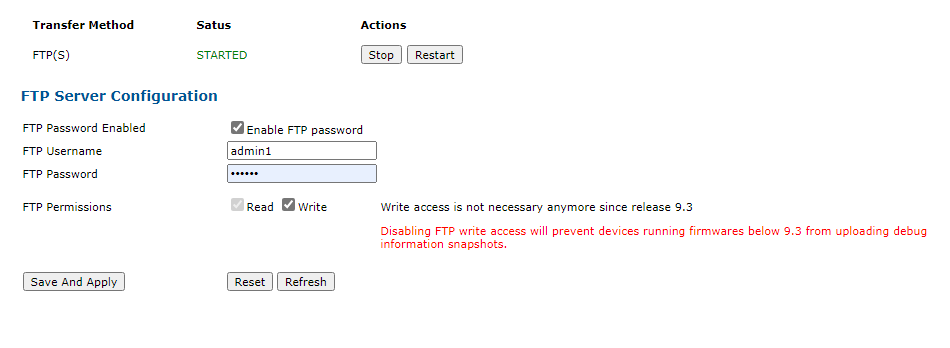
Username – Username you provide for ftp. Admin1 is example
Password– Password you provide for ftp
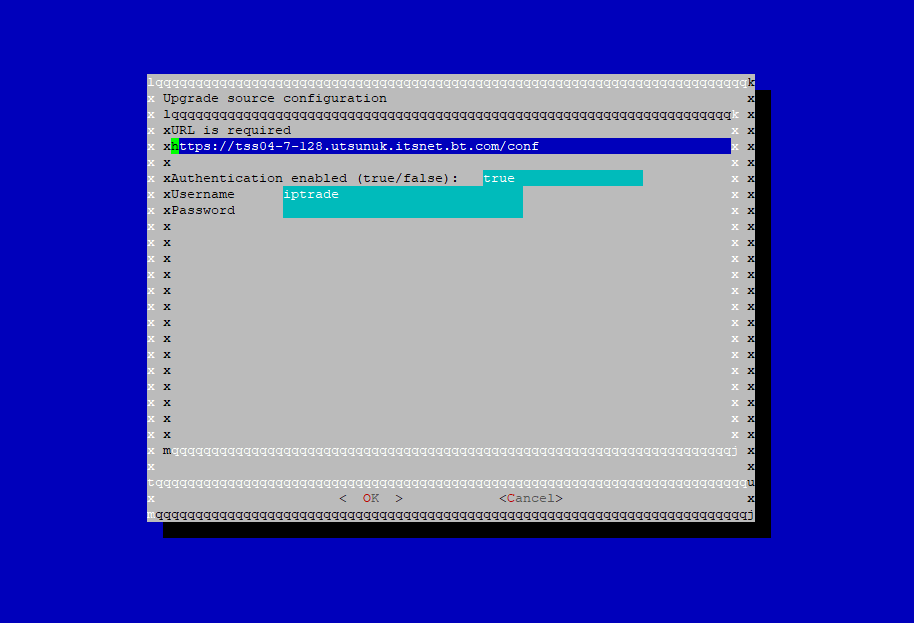
Authentication enabled : false – if authentication is disabled this is considered anonymous login while downloading the firmware from TSS. No need to provide username and password.
|
|
|
|
|
|
Even if you left the "user:password" unchanged, you must hit [Enter] |
|
|
|
|
|
|
|
|
|
|
|
If it is a fresh TradeSense install, you must upgrade to the latest available upgrade bundle before dealing with application and component activation. |
|
|
|
|
|
|
|
|
|
|
|
Before choosing "Assure & Analytics", make sure that your system meets the resource requirements. |
|
|
|
|
|
In the main menu, select "Autostart".
Select one of "Assure", "Analytics" or "Assure & Analytics".
Select "Restart".
Hit "[Enter]".
I an error occurs, an error message is displayed and/or a button allows to "View log".
Scroll to the bottom of the log with the [Spacebar] or [PageUp/Down] keys.
You can also view log output in /var/log/configure-node.log