OAuth Configuration in Azure


OAuth Configuration in Azure |
|
| Solution Integration > OAuth > Configuration |
An application has to be registered in Microsoft Azure in order to manage the OAuth login process in TSS. This is basically 3 step process. •App registration in Microsoft Entra ID •Creating application roles. •Assigning roles to users in Enterprise Apps
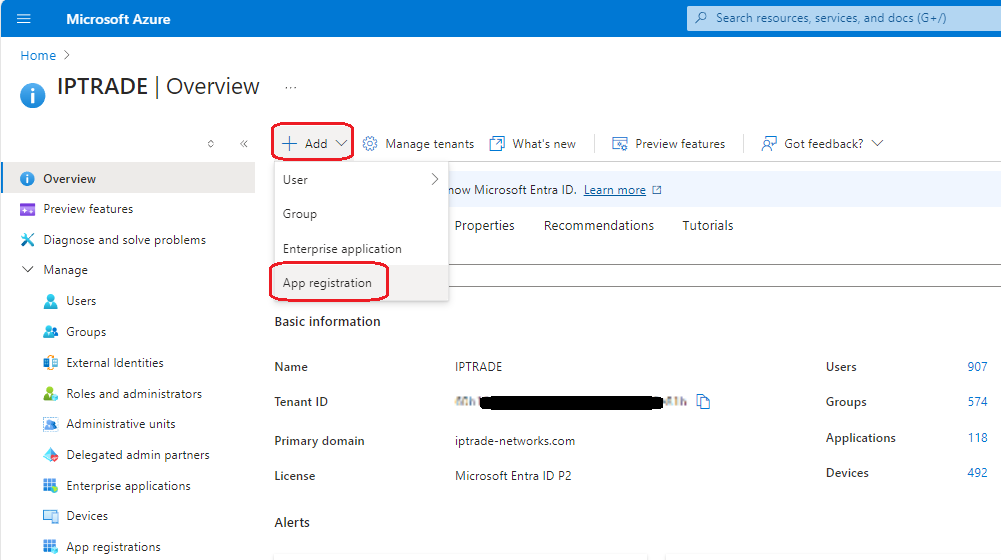
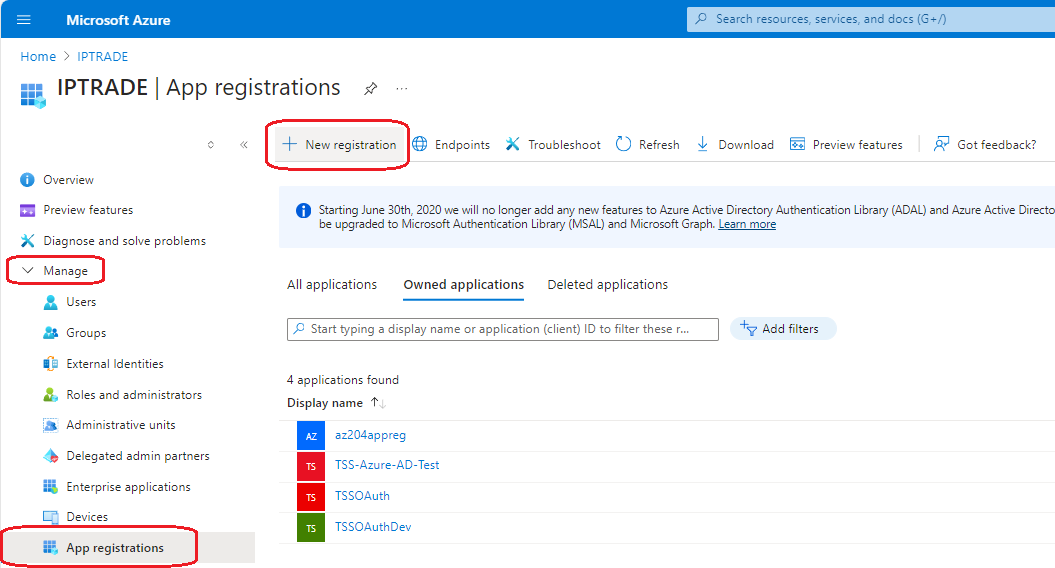
App RegistrationFollow below steps for app registration. 1.Login to https://portal.azure.com/ and search for Microsoft Entra ID. 2.Click Add -> App registration from top menu to register a new application. Or alternatively, expand menu item “Manage” in left blade and click on “App registrations” and then click on “New registration” menu on top.
OR
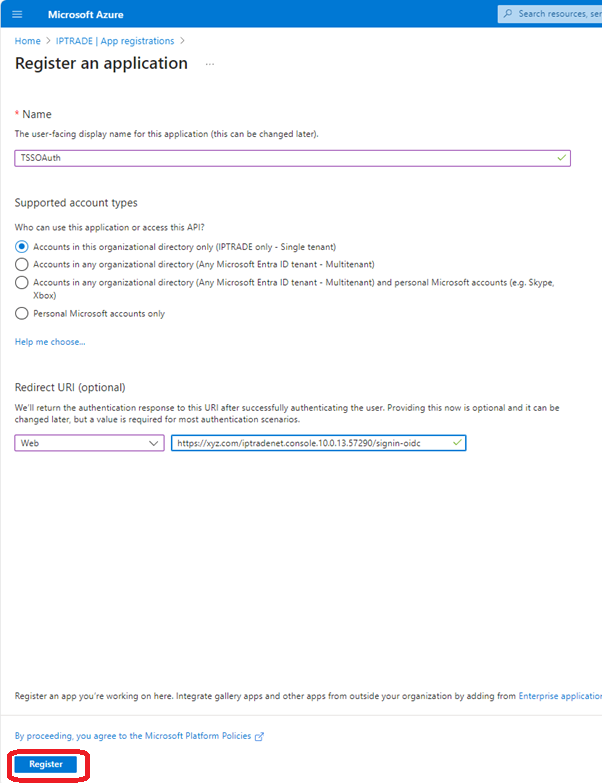
3.Provide a unique name of your choice, select default option of Single tenant, select Web as platform and provide TSS base URI (including version detail) as redirect URI suffixed with “/signin-oidc” like below example. e.g. : https://xyz.com/iptradenet.console.10.0.13.57290/signin-oidc
4.Click on Register button, the new application will be created/registered, and overview page will be displayed. Please note “Application (client) ID” and “Directory (tenant) ID” to be used under TSS settings. You may anytime revisit the application to see these IDs.
Configuring Certificates
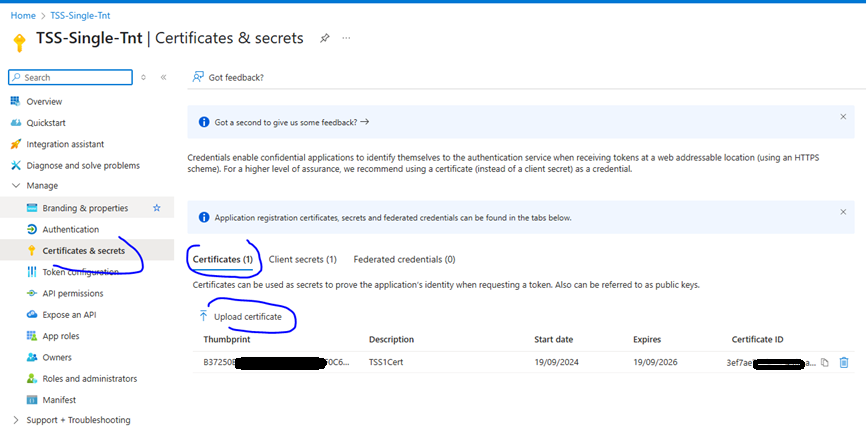
Follow the Tss configuration section for installation of the client certificate into the TSS. One there it can be exported as a .cer file(publick key) and installed into Azure. This will ensure that only the TSS can authenticate to this app registration securely. This step is mandatory.
1.Click on Certificates and secrets from the left blade of App Registration page. Install the certificate on Azure portal as shown below
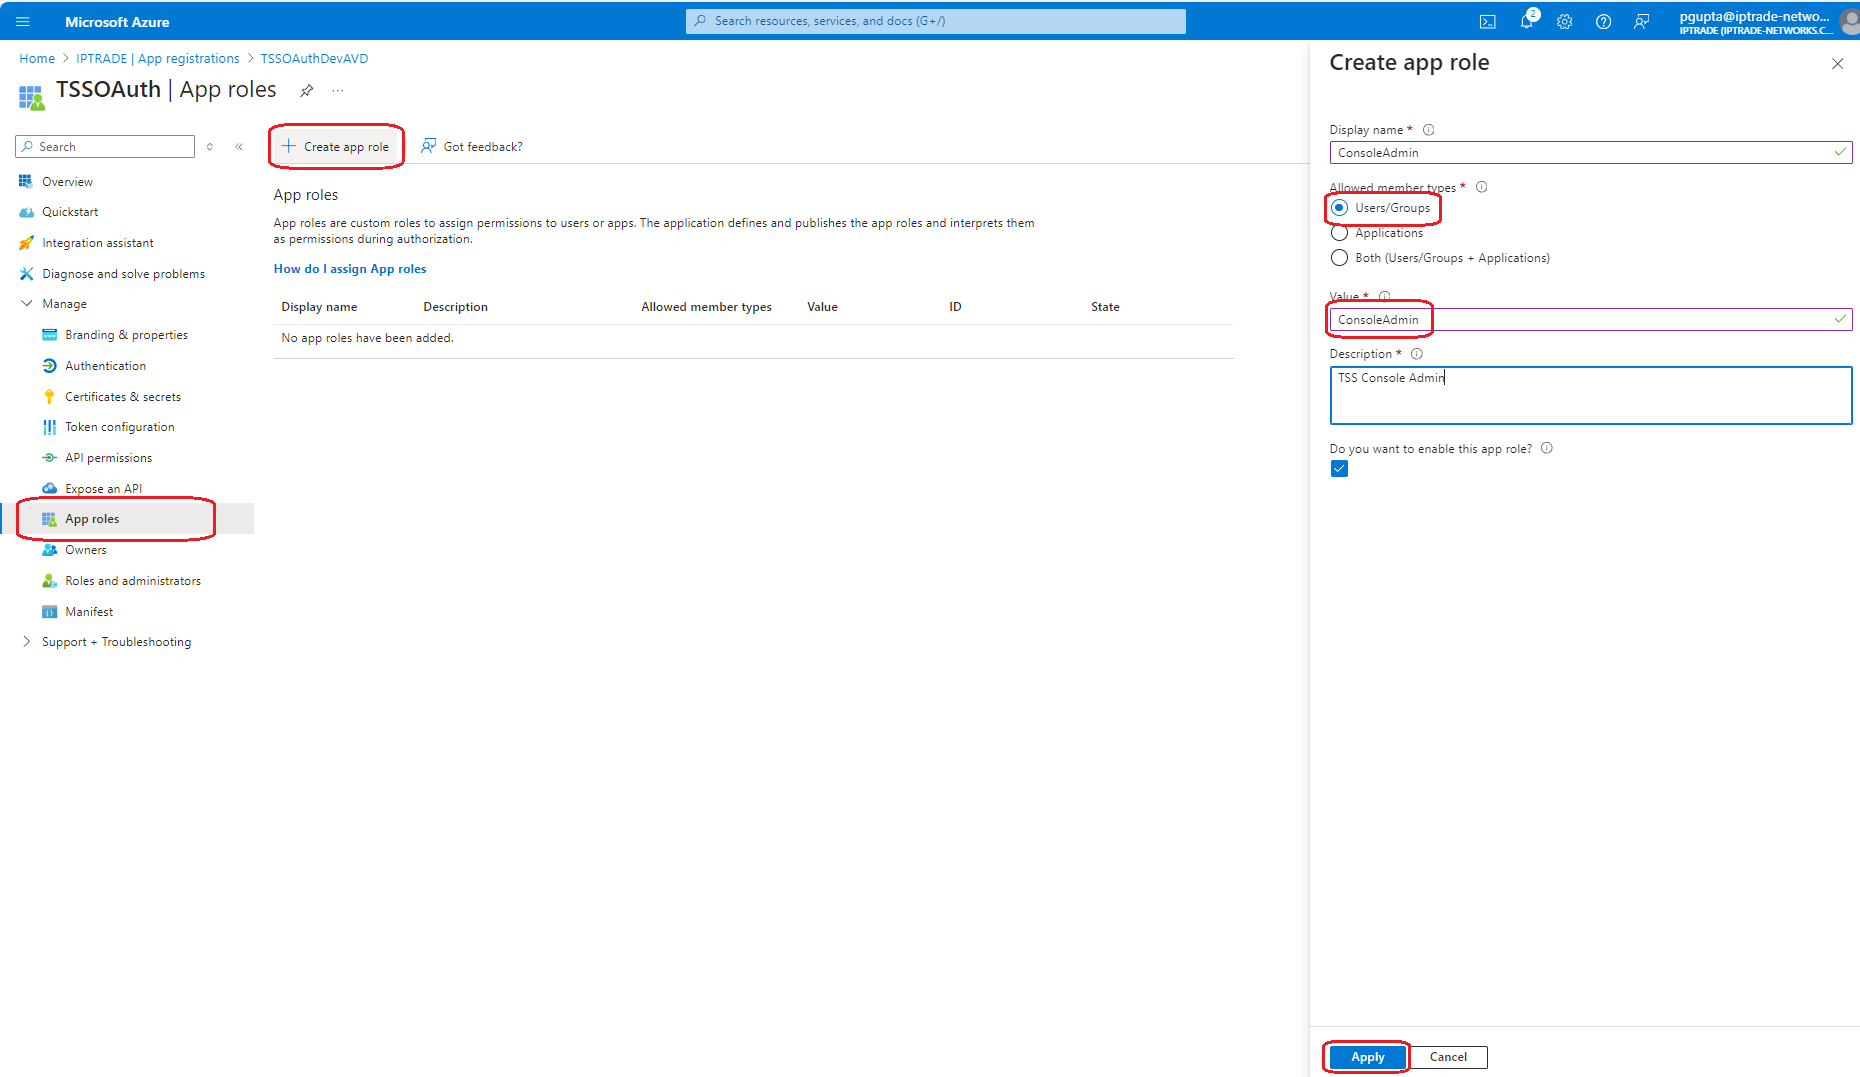
Creating App RolesFollow below steps for app registration. 1.Click on App roles from the left blade of App Registration page. 2.Click on Create app role button on top menu to add a new role and provide role details for the following a TSS admin role (in Value field) e.g 3.ConsoleAdmin. You may provide same Display name as Value for any role for convenience and provide some user-friendly description for the role. Select “Users/Groups” for allowed member types. Click apply to save the role. Keep default selected to enable the selected role.
2.Repeat step 2 and 3 for all other 5 roles as listed below or as needed. •ConsoleAdmin •ConsoleAdminReadOnly •TSSAdmin •ConsoleAdminBusiness •ConsoleAdminUser •ConsoleAdminSettings
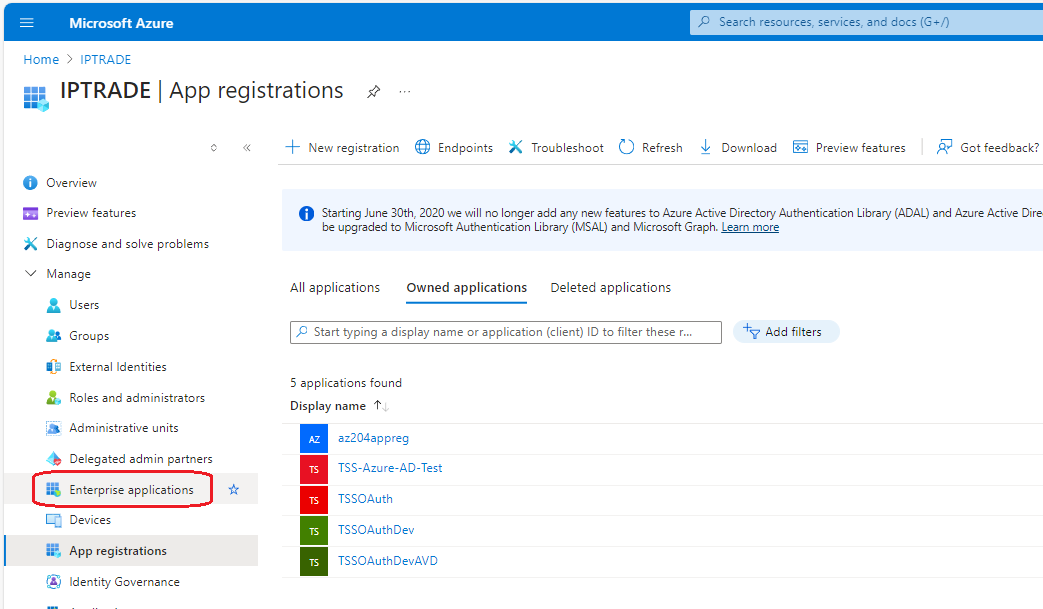
Assigning App RolesFollow below steps for app registration. 1.Go to Enterprise Applications by going back to “Microsoft Entra ID” and selecting Enterprise Application from the left blade or directly searching for Enterprise Application in search bar at top and selecting it.
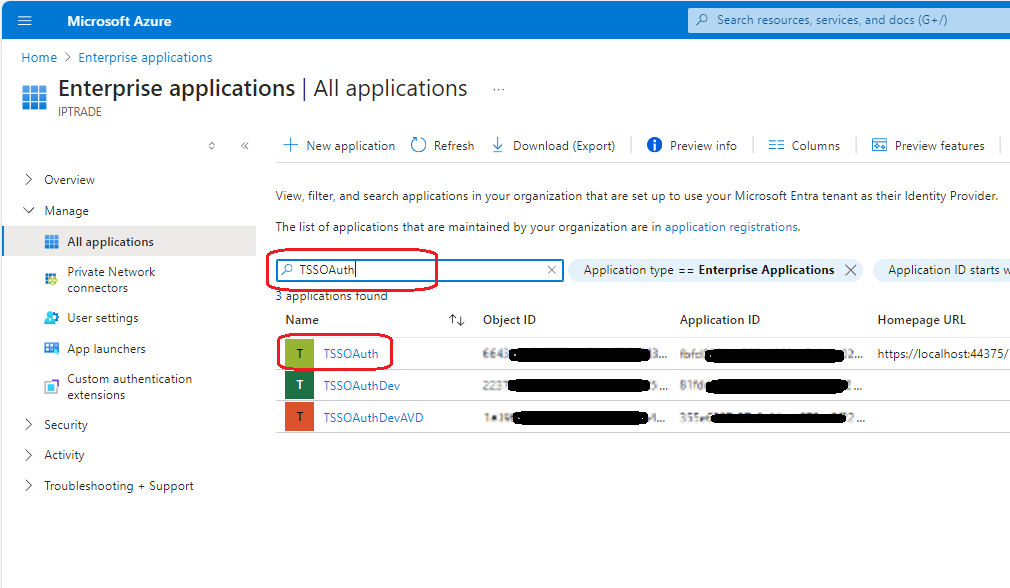
2.Search for the application name you registered earlier and click on it to open.
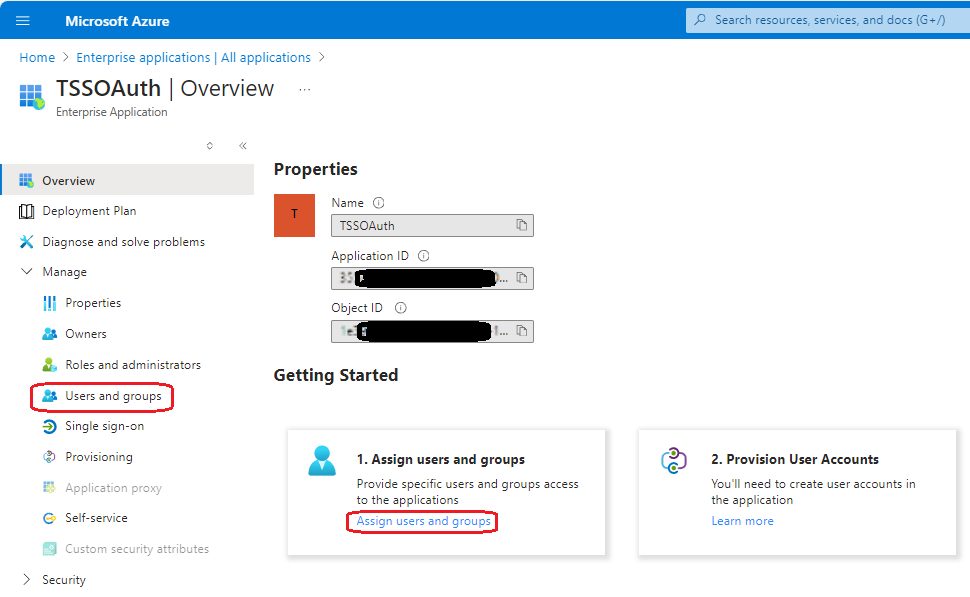
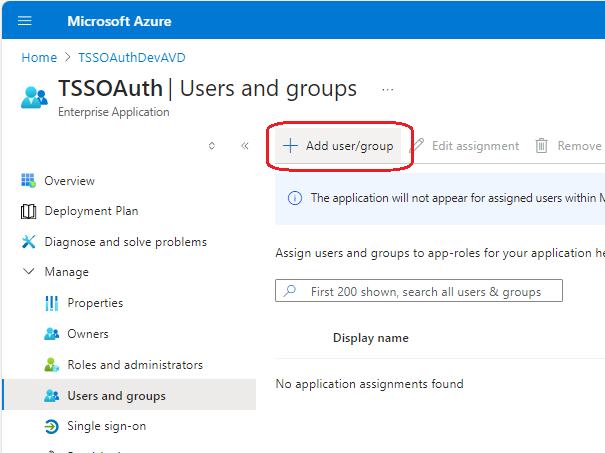
3.Select “Users and groups” from the left blade by expanding Manage menu or click on the link in the large button "Assign users and groups" in the center window.
4.Click on “Add user/group” link to assign an application role to any user.
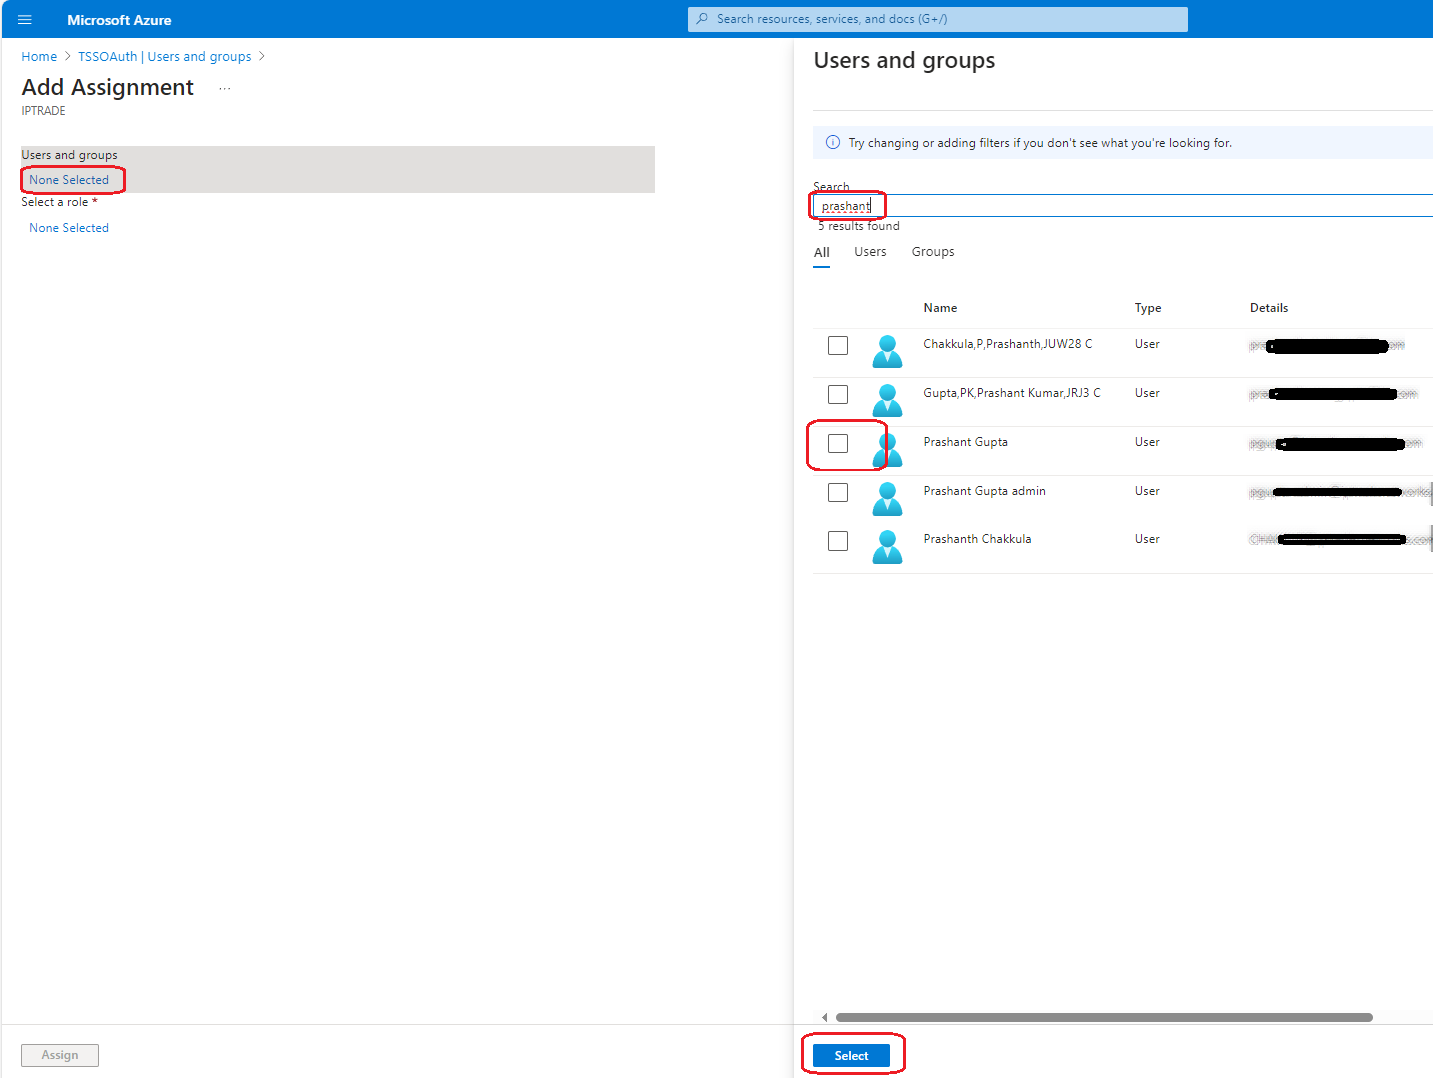
5.Click on “None Selected” link to select user or group, search for a name/id etc and select/tick the desired user to whom TSS admin role must be assigned and click on Select button at the bottom of the blade.
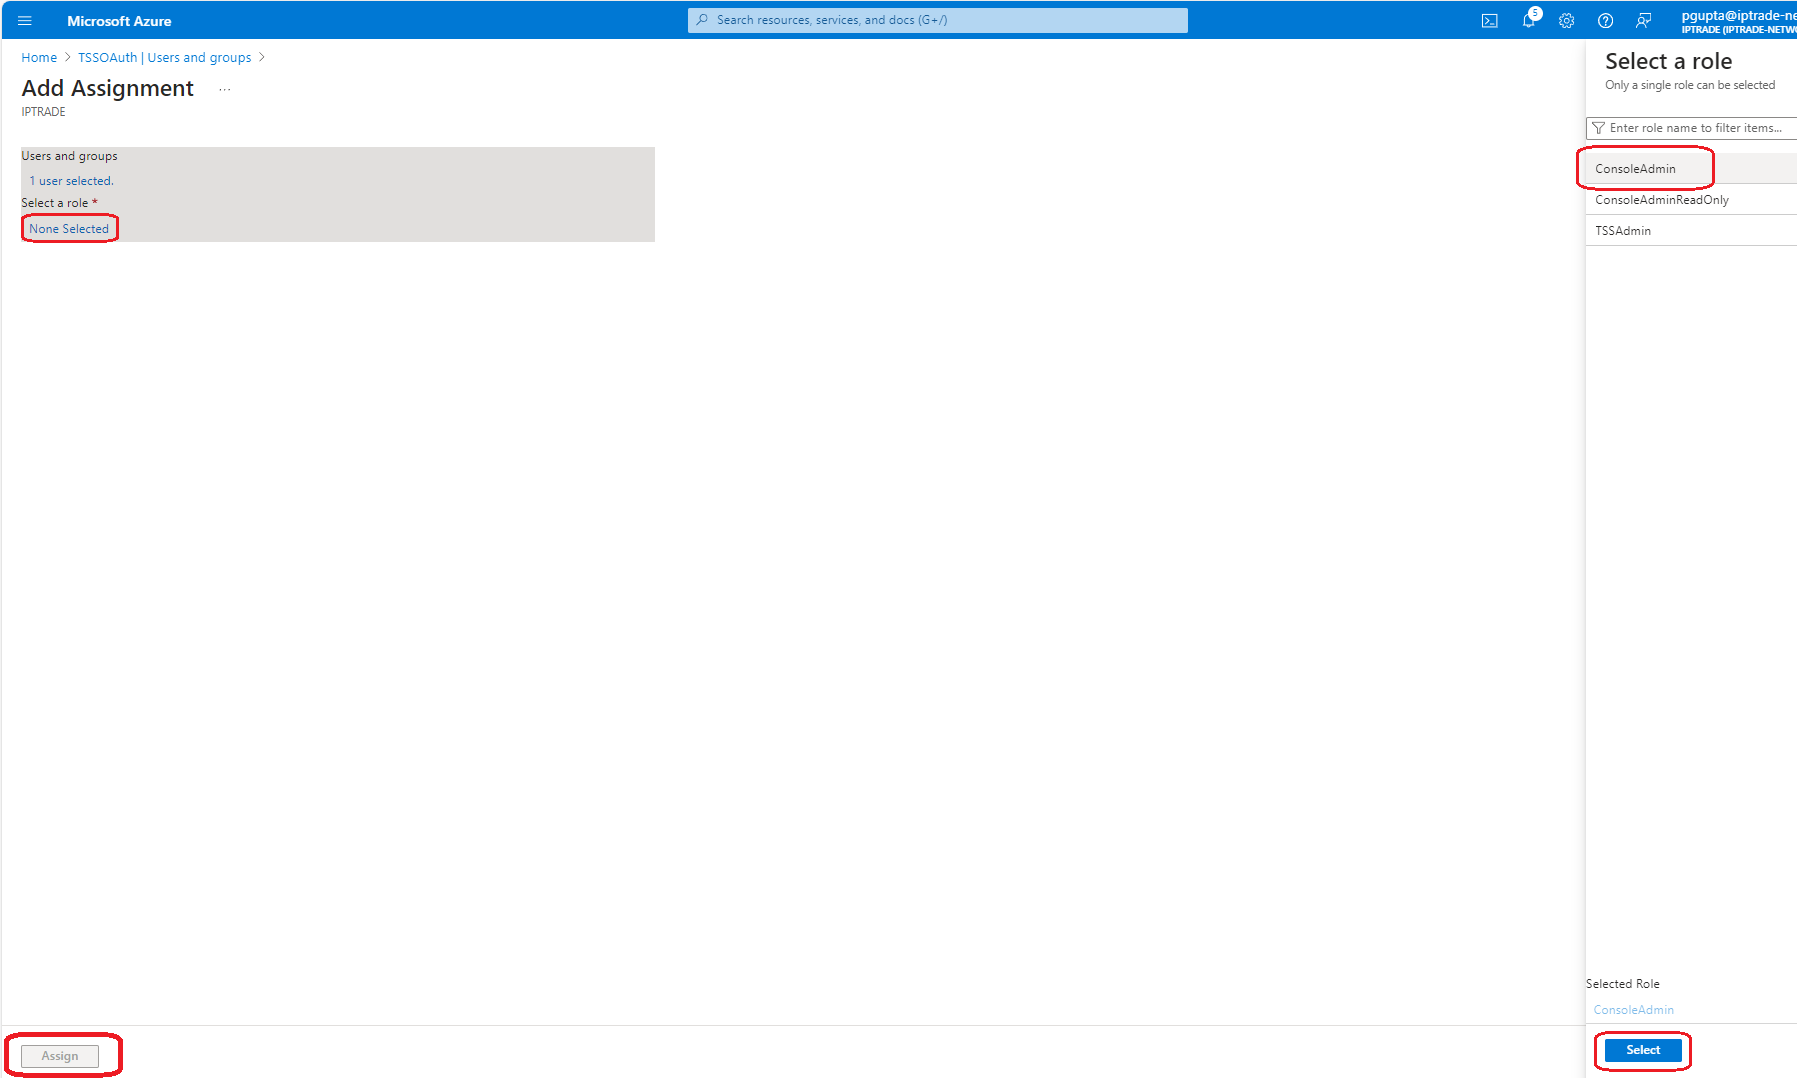
6.Click on “None Selected” link to assign an application role. Click on a role in right blade and press “Select” button at the bottom of the blade. Then click on “Assign” button at bottom left of the screen.
7.Repeat the steps 4 through 6 to assign role to any other users. |