Turret configuration


Turret configuration |
|
| Trading and C&C > Turret Proxy To Open communication (TPO) > Group Intercom > Configure |
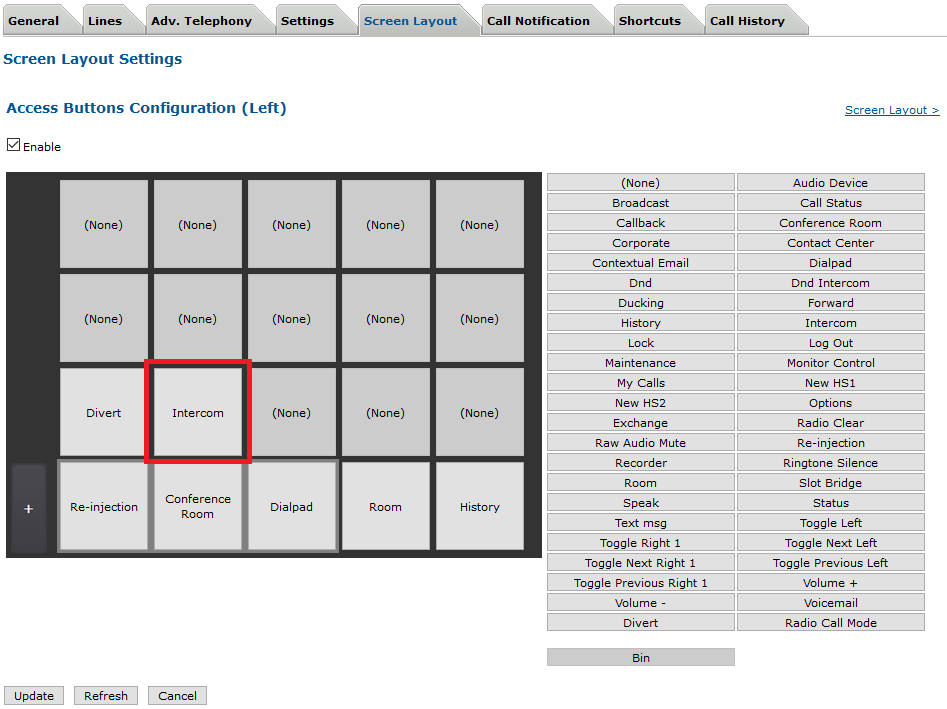
To see (and interact with) all available group intercoms, the user profile must allow accessing the Intercom panel, as shown below.
To speed up the access to group intercoms, however, intercom shortcuts can be defined in the user's profile. Create an Intercom Group shortcut
1)Open the TSS Administration Console and log onto the system with administrator privileges ; 2)From the main menu, edit a user or shared profile (select Account management > Users or Shared Profiles) 3)Select the Shortcuts tab and and click Add New
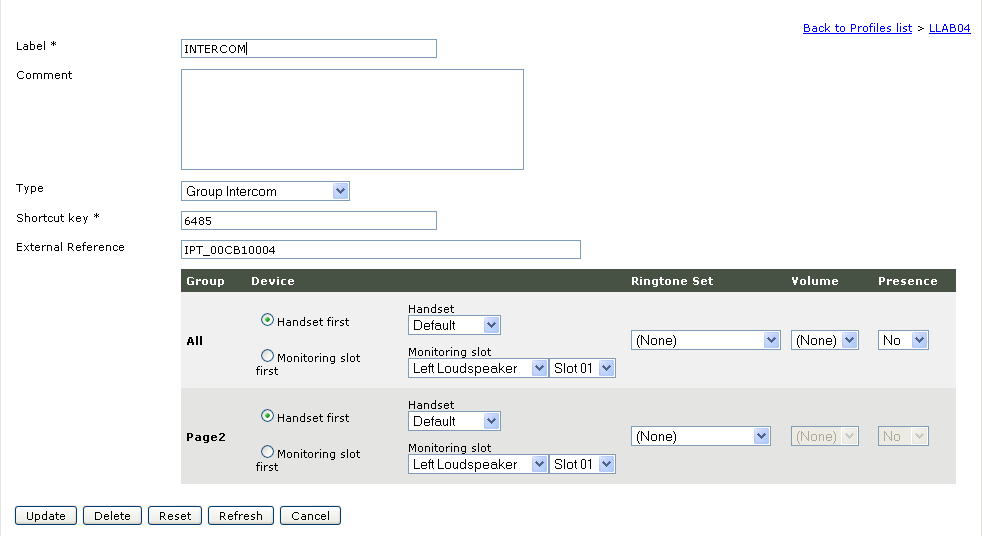
Fill the Label field with the name chosen for this intercom, select the Group Intercom type, the shortcut key must be the one define in TPO Line Pool population.
Other configuration
4)Ensure that Direct Access to TPO is set to true for intercom (in Users-->Settings--> Intercom)
5)If some intercom groups or intercom group shortcuts are defined without TPO DNS Name, ensure that the default TPO is configured.
6)Define if only intercom calls or if all calls on loudspeaker and handfree must be muted when a priority intercom is active.
Intercom panel access7)Additionally, you can add an Access button to allow the user to see and interact with intercom groups (in User > Screen Layout > Access Buttons Configuration).
|
||||||||||||||||||||||||||||||||||||||||||