Routing


Routing |
|
| Solution Integration > Session Border Controllers > AudioCodes as a PBX |
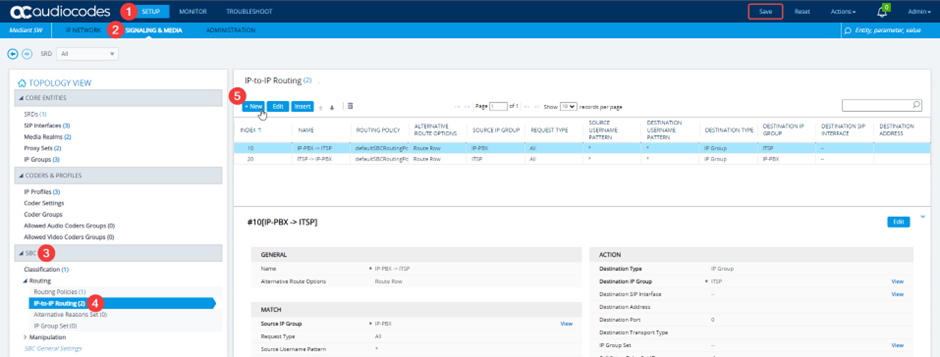
Browse to “Setup > Signaling & Media > SBC > IP to IP routing” and click “New”Note: The Index Numbers are significant, as this List is processed by the SBC Top Down until a match is found.
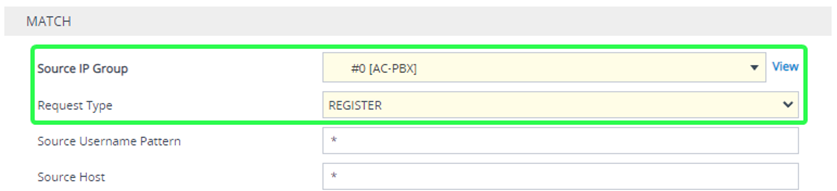
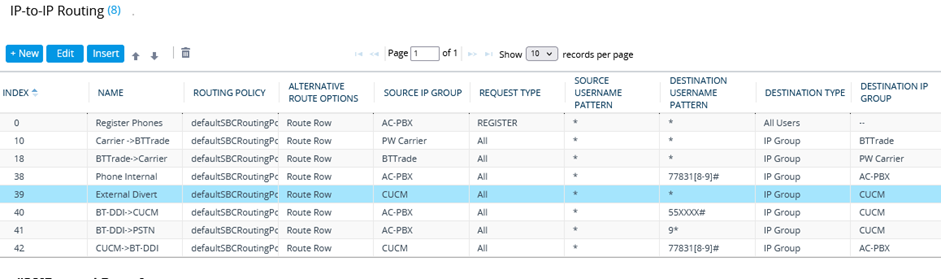
Registration routing The settings we are concerned with are: GENERAL -> Index = “2” (since this profile is for TPO Registrations, we chose a low Index number so that it’s processed near the top, but realistically any Index number can be used) GENERAL -> Name = “Any Name” (Use something meaningful such as “Register Phones”)
MATCH -> Source IP Group = “Linked to the New IP Group created in Step 3” MATCH -> Request Type = “REGISTER”
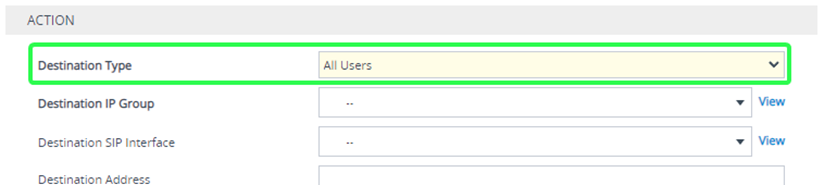
ACTION -> Destination Type = “All Users”
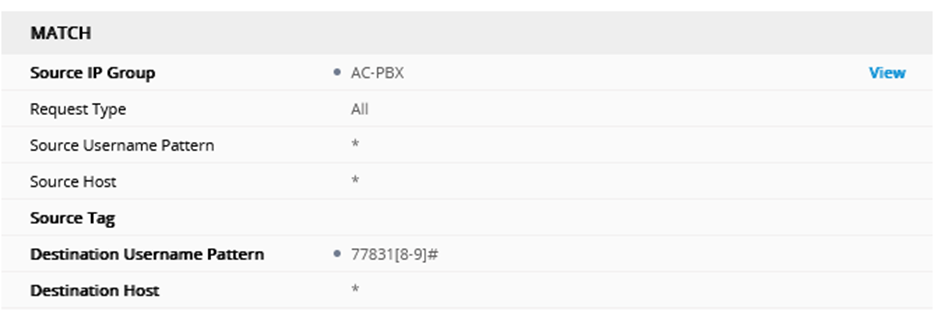
Extension to extension routing Profile 2 defines the Internal SBC routing for the Lines (Extensions) we will add in the TPO/TPO Places so they can call each other. GENERAL -> Index = “38” (any Index number can be used, we chose “30”) GENERAL -> Name = “Any Name” (Use something meaningful such as “Phones Internal”)
MATCH -> Source IP Group = “Linked to the New IP Group created for AC-PBX” MATCH -> Destination Username Pattern = “Your Extension Pattern” (In this example we will use Extensions 778318, 778319, thus we use a pattern of “ 77831[8-9]# “ which covers these)
ACTION -> Destination IP Group = “Linked to the New IP Group created in Step 3”
External froward routing Lastly a route is needed to allow calls th forward from the SIP Trunk back to the SIP Trunk without this route call forward and transfer between external number will not use SBC as PBX. GENERAL -> Index = “Your Index” GENERAL -> Name = “External Divert”
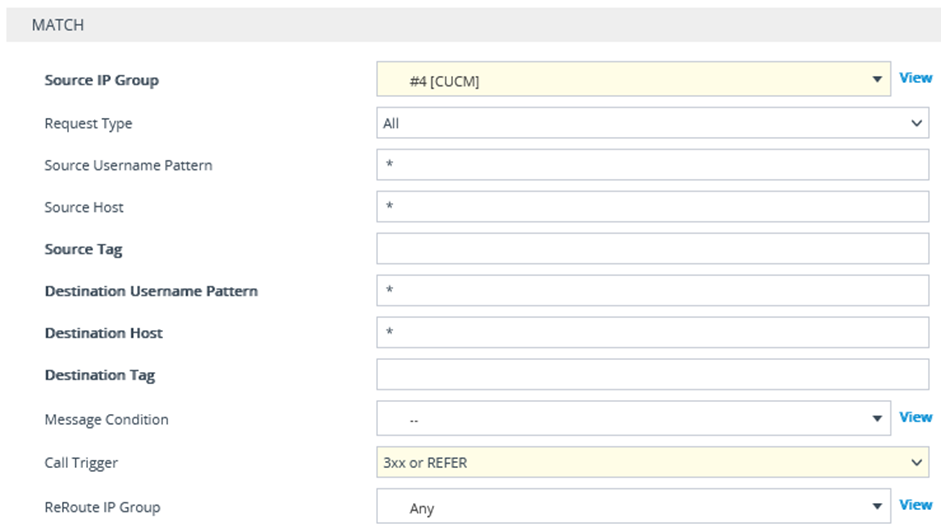
MATCH -> Source IP Group = “Linked to the IP Group created for BT-DDI” MATCH -> Destination Username Pattern = “9*” (In this example we use 9 for the line to get to PSTN)
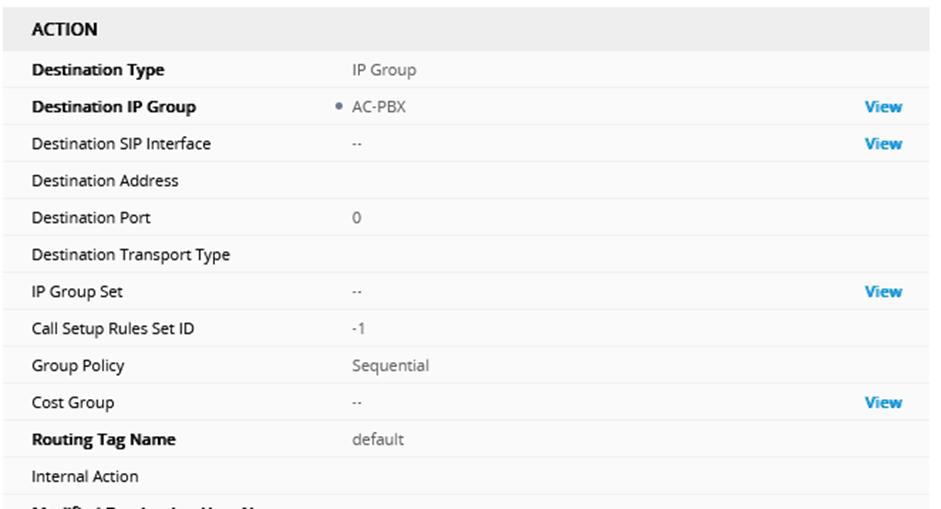
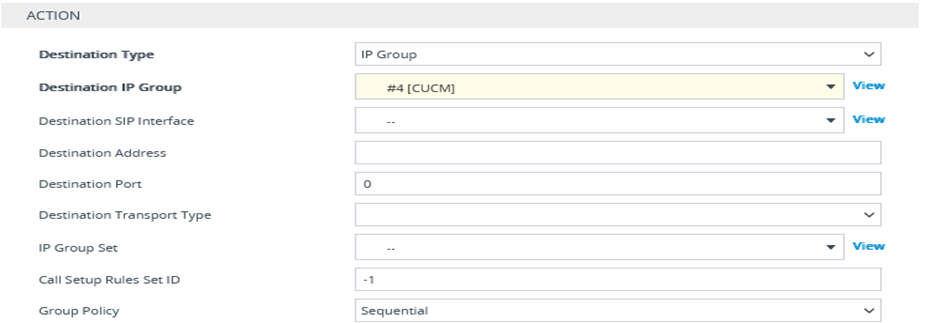
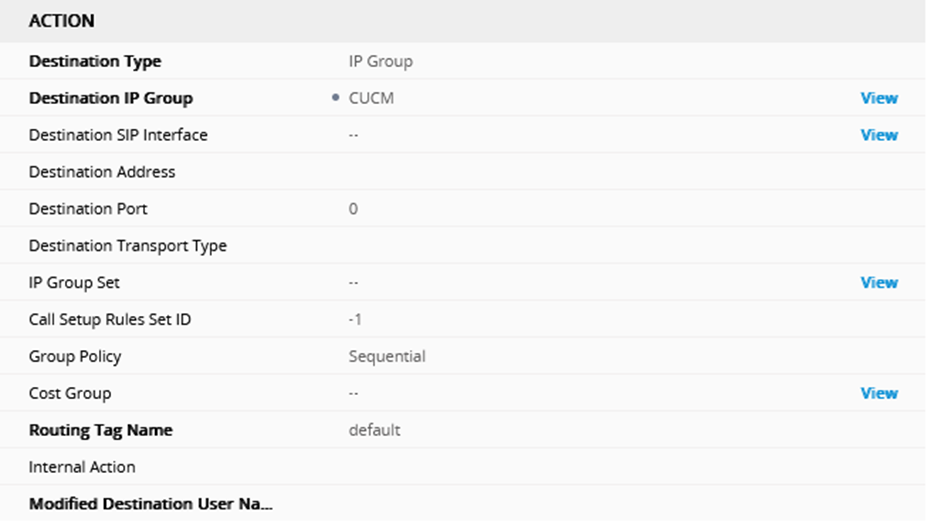
ACTION -> Destination IP Group = “Linked to the IP Group created for CUCM SIP Trunk”
Extension to SIP trunk rouing GENERAL -> Index = “40” (any Index number can be used, we chose “30”) GENERAL -> Name = “Any Name” (Use something meaningful such as “BT-DDI->CUCM”)
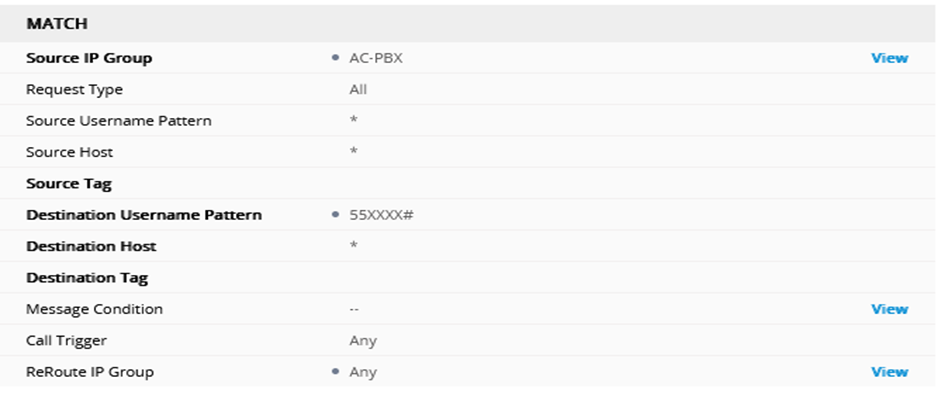
MATCH -> Source IP Group = “Linked to the New IP Group created for BT-DDI” MATCH -> Destination Username Pattern = “55xxxx#” (In this example our Cisco extns all start 55 and are 6 digits long)
ACTION -> Destination IP Group = “Linked to the New IP Group created for CUCM SIP Trunk”
Extension to PSTN rounting GENERAL -> Index = “Your Index” (Chose any index usually space them so if we have to add we can) GENERAL -> Name = “BT-DDI->PSTN” MATCH -> Source IP Group = “Linked to the IP Group created for BT-DDI” MATCH -> Destination Username Pattern = “9*” (In this example we use 9 for the line to get to PSTN) ACTION -> Destination IP Group = “Linked to the IP Group created for CUCM SIP Trunk” SIP trunk to Extension routing GENERAL -> Index = “Your Index” (Chose any index usually space them so if we have to add we can) GENERAL -> Name = “CUCM->BT-DDI” MATCH -> Source IP Group = “Linked to the IP Group created for CUCM” MATCH -> Destination Username Pattern = “77831[8-9]#” (In this 778318 and 778319) ACTION -> Destination IP Group = “Linked to the IP Group created for CUCM SIP Trunk”
You should then have a route table similar to below
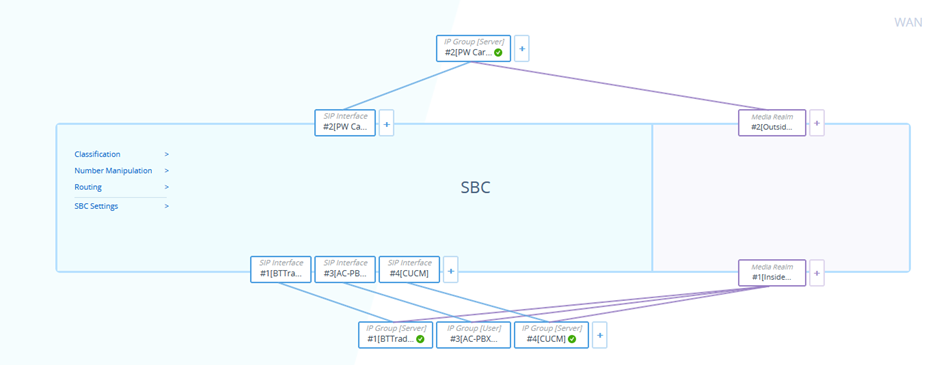
Your TOPOLOGY VIEW should look similar to this now:
|