Configuration of SBC as a PBX


Configuration of SBC as a PBX |
|
| Solution Integration > Session Border Controllers > AudioCodes as a PBX |
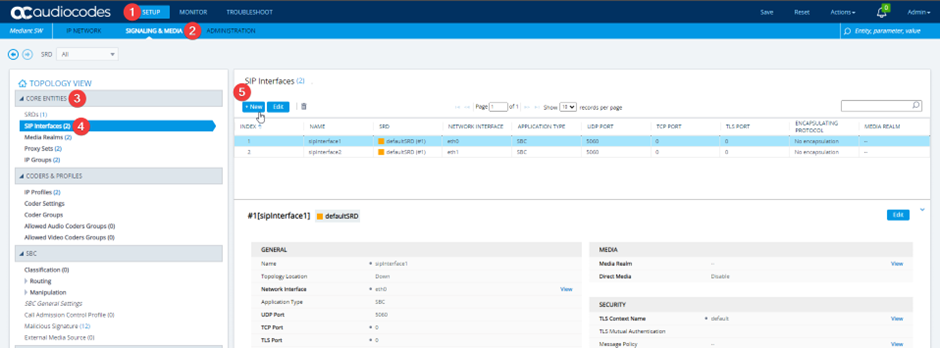
To allow the SBC to function as a PBX and allow the BT Trade TPO to register to the SBC we need to add the below configuration. Add a new SIP interface browse to “Setup > Signaling & Media > Core Entities > SIP Interfaces” and click “New”
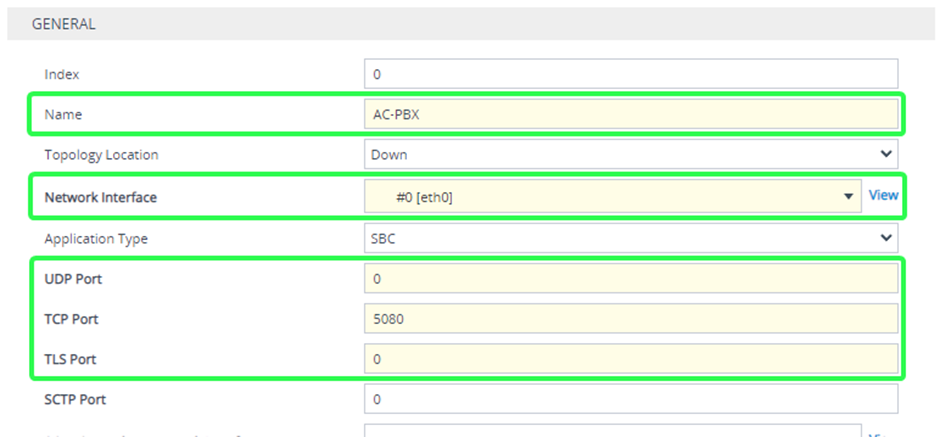
The settings we are concerned with are:
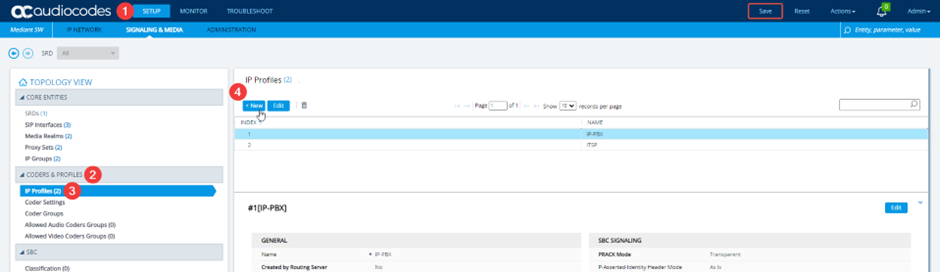
Add an new IP profileBrowse to “Setup > Signaling & Media > IP Profiles” and click “New”
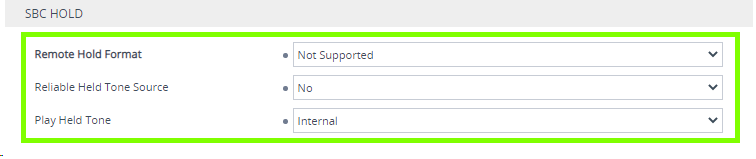
The settings we are concerned with are: SBC FORWARD AND TRANSFER-> Send Header for Transfer= Remote=Party-ID
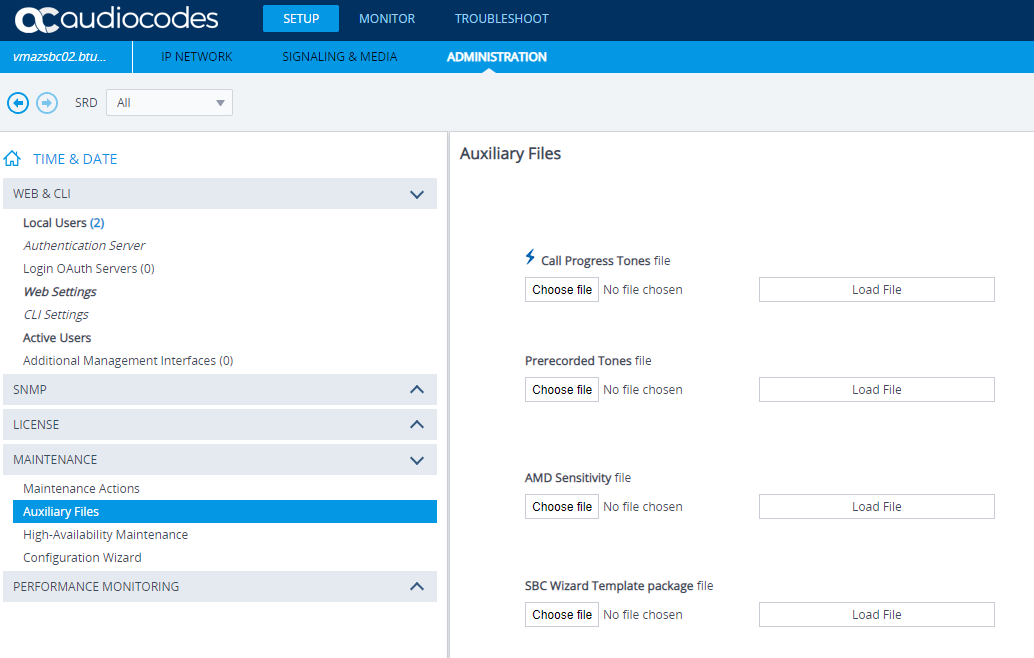
We need to upload the pre-recorded tones file to the below location.
Coders
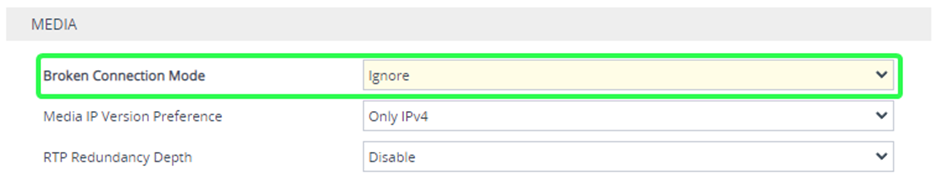
MEDIA -> Broken Connection Mode = Ignore
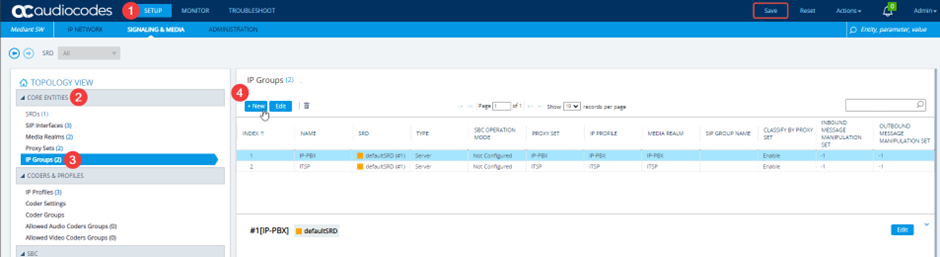
If you do want to have broken connection then choose a value larger than that of the TPO RTP or Carrier timers. Add a new IP groupBrowse to “Setup > Signaling & Media > Core Entities > IP Groups” and click “New”
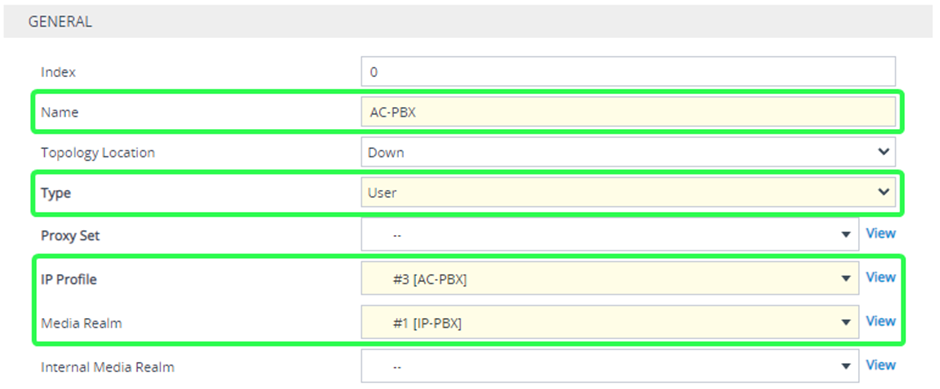
The settings we are concerned with are: GENERAL -> Name = “Any Name” GENERAL -> Type = User (This one is important as this allows the TPO to Register on the SBC) GENERAL -> IP Profile = “Linked to the New IP Profile created in Step 2” GENERAL -> Media Realm “Linked to a Media Realm of Choice” (Here we just reuse the existing one for “IP-PBX” but a new one can be created if desired and linked here)
SBC GENERAL -> Classify By Proxy Set = Disabled (We are not linking to any Proxy here since the SBC will be the Proxy (PBX), also why we don’t create a Proxy Set either)
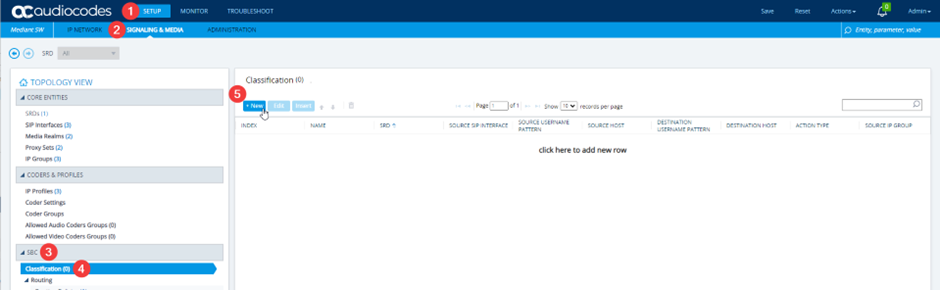
Add a new classificationSince we will register the extensions there is no proxy set used for this type of IP Group so we need to create a classification so SBC can route calls. Browse to “Setup > Signaling & Media > SBC > Classification” and click “New”
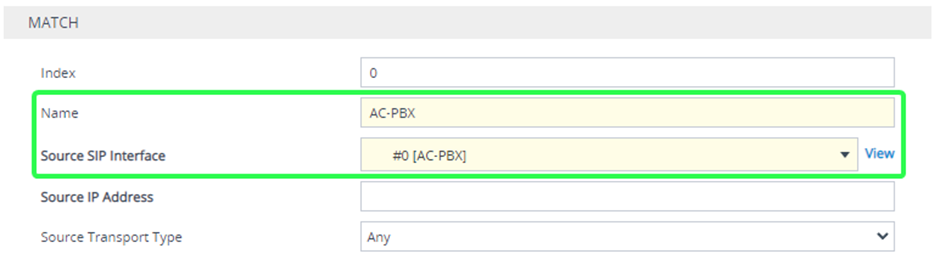
The settings we are concerned with are: MATCH -> Name = “Any Name” MATCH -> Source SIP Interface = “Linked to the New SIP Interface created in Step 1”
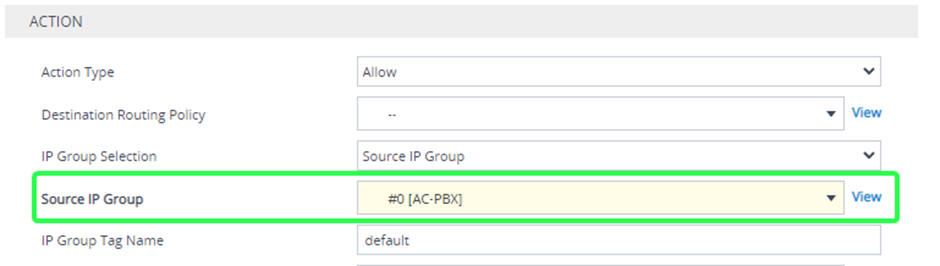
ACTION -> Source IP Group = “Linked to the New IP Group created in Step 3”
|