Hardware Heath Monitoring file


Hardware Heath Monitoring file |
|
| Standard > Troubleshooting Data: References > Turret > Turret Debug Information |
Turret firmware periodically collects and stores Hardware figuresSystem stores the latest 100 samples of following figures that are collected every 3 seconds:
▪Fan speed ▪CPU temperature ▪Motherboard temperature ▪CPU usage ▪Other temperatures (Hard Drive Disk, ACPI, ...)
Stored samples are provided as part of Turret debug information. HWHealth.csv file can easily be imported in an Excel sheet for further analysis. Supported hardware and platformsHardware Health Monitoring has been designed for WES7 and WIN10 platforms.It only supports HE, LI, NE, NA, AL, SI, CA, SE and CO devices.
NOTE: The hardware sensors DO NOT always provide reliable data. This file and its data are meant only as a troubleshooting guide or aid. This feature is completely disabled on FlexPro.Fine tuningNumber of sample stored and figures collection periodicity can be configured.Caution: manipulate those settings with caution, they may have significant impact on performance and memory usage.•Number of stored sample oFTP configuration key: application.global.hm.queuesize oDefault: 100 samples oCaution: increasing this value increase memory usage and output file size (HWHealth.csv) •Periodicity oFTP configuration key: application.global.hm.timer.delay oDefault: 3000 ms oCaution: decreasing this value may impacts turret performances •History oHistory depends on settings here-above oDefault: 100 x 3000 ms gives a 5 minutes history oYou can change history length using the two configuration keys but please, keep cautions in mind. How to import HWHealth.csv file in Microsoft ExcelOpened in a text editor, this file is difficult to readThis section describe how to import HWHeath.csv file in Microsoft Excel (2010 in this example).
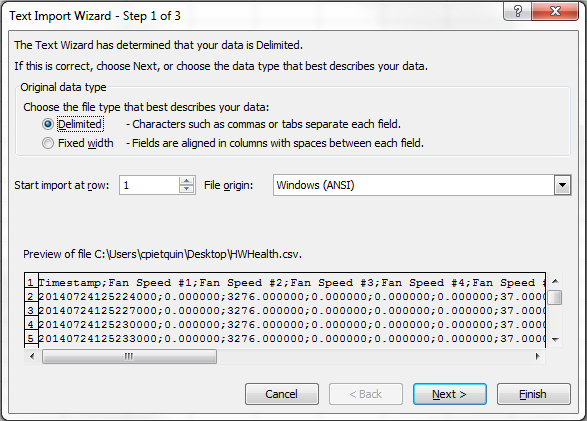
1.Unzip debug information archive 2.Open Microsoft Excel program 3.Click on File -> Open menu 4.Choose HWHealth.csv file in debug information folder. Text import Wizard will appear 5.In first step of Text Import Wizard, choose Delimited option and click on Next button
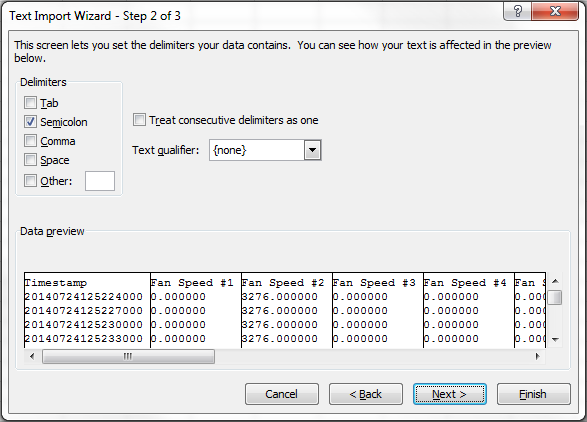
6.In second step, choose Semicolon delimiters, {none} text qualifier and click on Next button
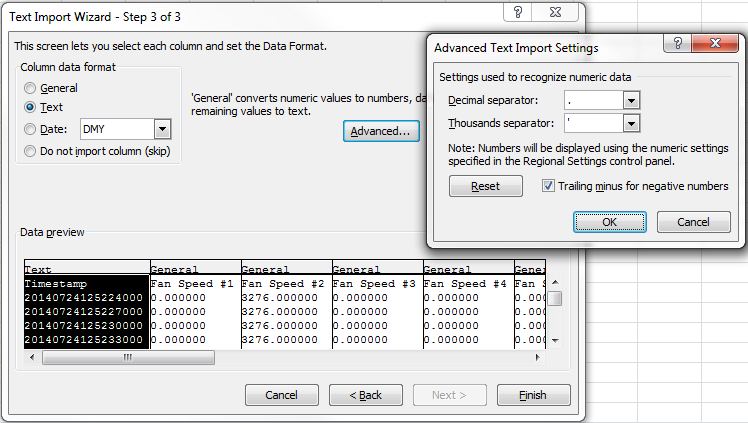
7.In third step, select first column (Timestamp) and choose Text column data format instead of General, click on Advanced button, select "." for decimal separator and " ' " for thousands separator. Click on OK button then click on Finish button
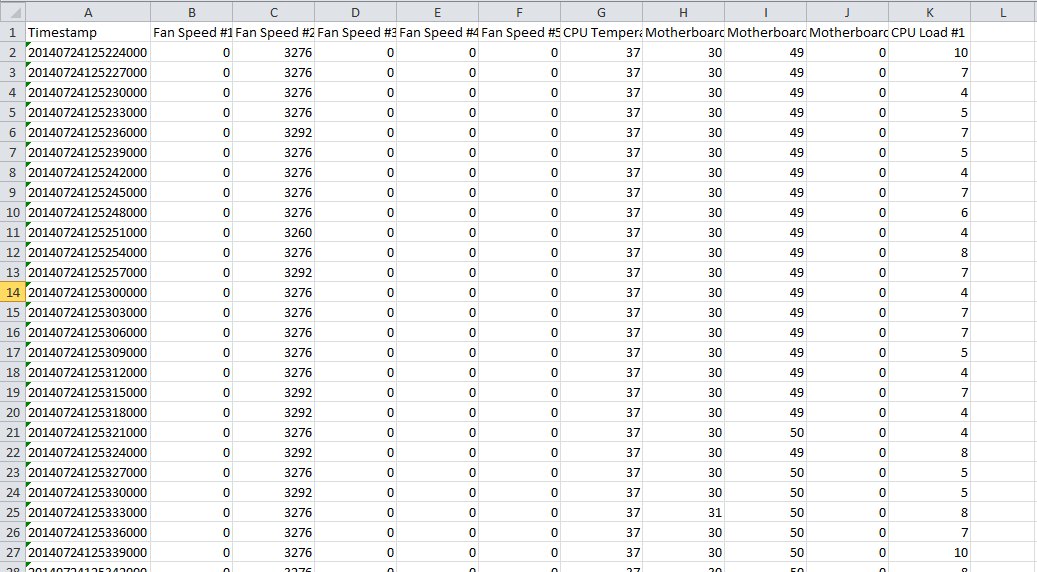
8.Data appears under column format in Microsoft Excel. It allows to create graphics and other tools
|