SBC Configuration


SBC Configuration |
|
| Trading and C&C > Turret Proxy To Open communication (TPO) > SIP STX Lines |
Introduction
This section of the help is concerned with the configuration required to establish an encrypted connection to the LSE SIP STX service via a SIP trunk. Normally the customer will supply the SBC and it will be their job to configure however on some occasions BT will supply and when this happens an AudioCodes Virtual SBC will be used to terminate the SIP trunk from LSE.
The installation, Licensing and Basic configuration for AudioCodes SBC is covered is a section under Solution Installation section of the TSS help see SBC-AudioCodes
Further information on AudioCodes SBC configuration can be found in the docs folder on the BTExtranet or on the Audiocodes website https://www.audiocodes.com/library/technical-documents)
This section assumes that the SBC has been installed and the basic configuration carried out in line with support for Private Wires and so will focus on the configuration needed to enable TLS and SRTP encrypted trunk required by LSE.
Secure Trunk Configuration Add a new TLS ContextAll the configuration will be set in one context so it can be referenced in the rest of the SBC setup.
Navigate to Setup -> IP Network -> Security -> TLS Contexts
From here add a new TLS Context make sure to set the DH key size to 2048 as it defaults to 1024 and LSE require 2048
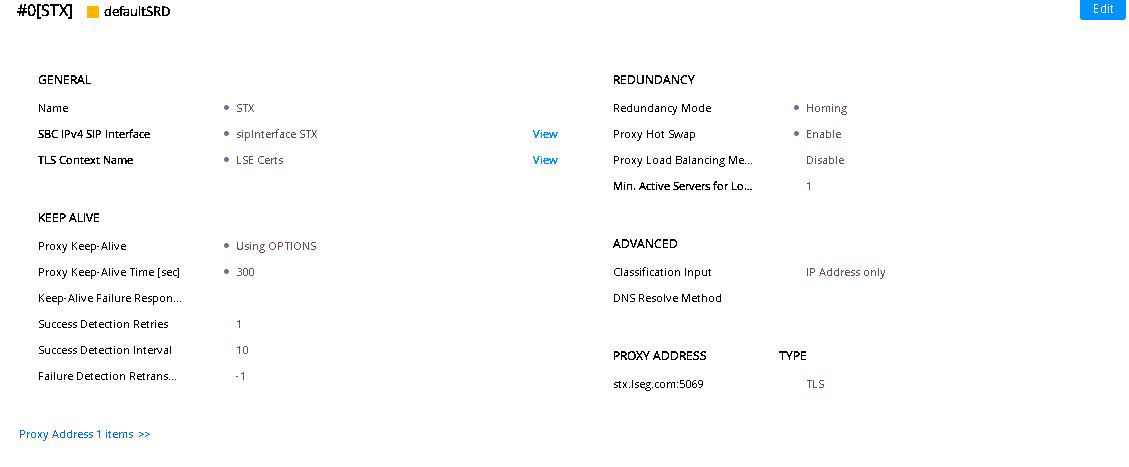
Encrypt SignalingOnce the TLS context is created it needs to be assigned to the STX proxy group to encrypt the signaling.
Navigate to Setup -> Signaling & Media -> Core Entities -> Proxy Sets
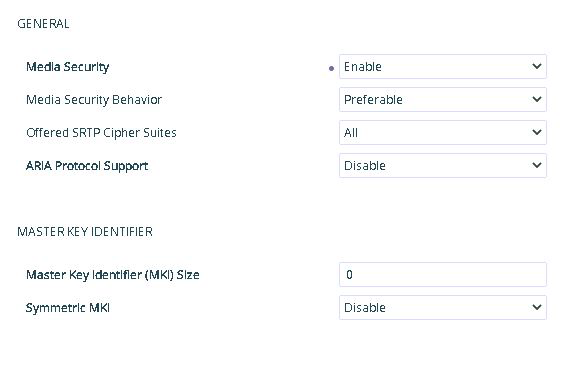
Encrypt MediaEnable Media Security option.
Navigate to Setup -> Signalling & Media -> Media -> Media Security
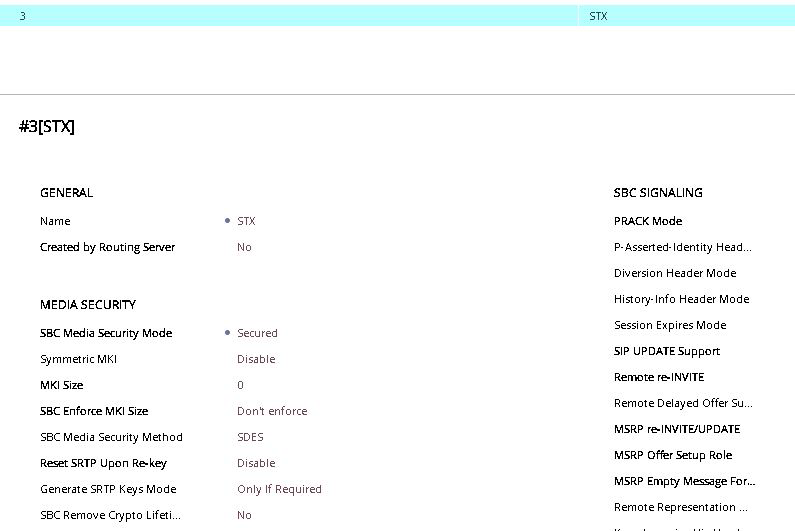
Select the media security mode on the STX IP profile security for the outside interface the SBCMedia Security had to be set to Secured. If this is not done no encryption options will be present in the SBC and you will get 488 from LSE trunk.
Navigate to Setup -> Signalling & Media -> Coders & Profiles -> IP Profiles
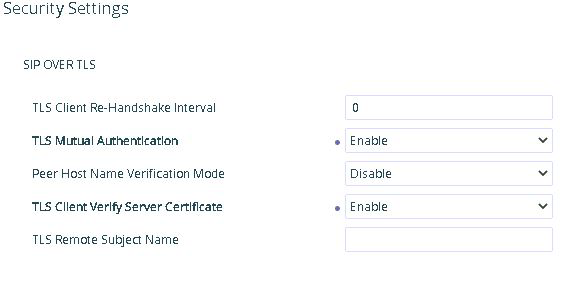
Adjust Security SettingsEnable TLS Mutual Authentication and TLS Client Verify Server Certificate.
Navigate to Setup -> IP Network -> Security -> Security Settings
NAT TranslationIf the SBC is behind a NAT firewall you will need to add NAT translation to allow the SBC to work if SBC is in a DMZ it will be able to connect to LSE direct.
Navigate to Setup -> IP Network -> Core Entities -> Nat Translation
CODEC Lists
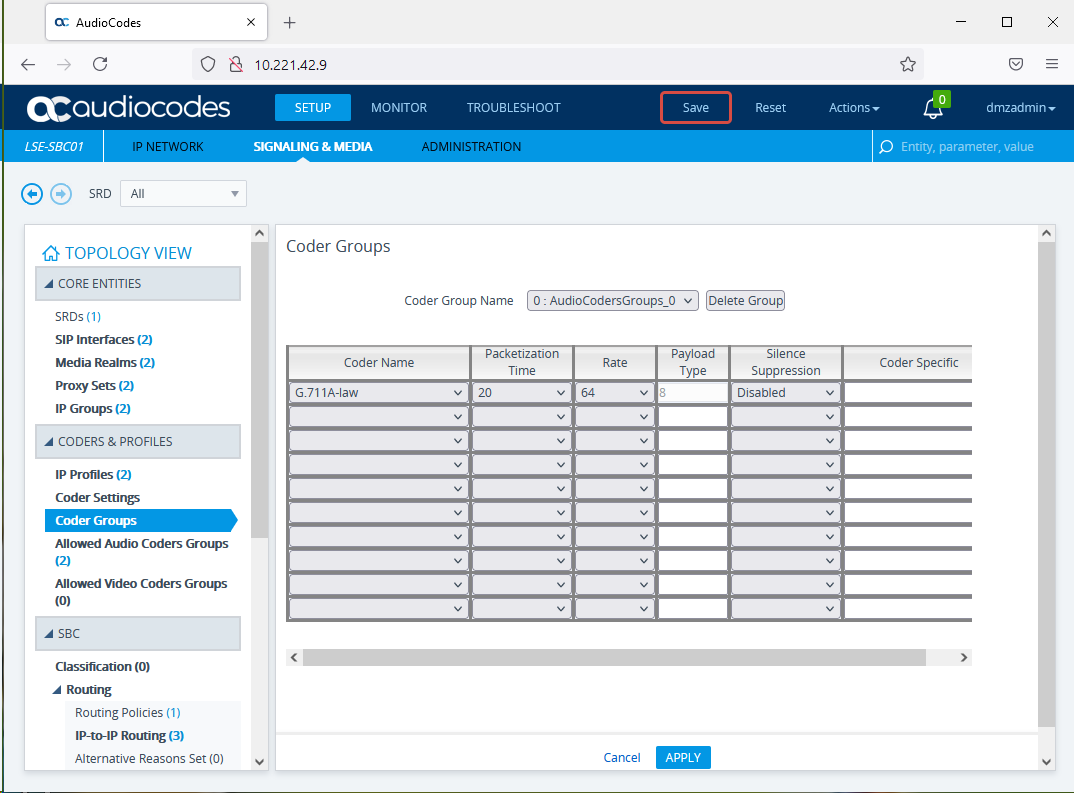
Need to set the CODEC lists to include G711alaw for the outside interface to LSE as LSE expect G711alaw. So define a CODEC list with G711alaw and all CODEC'ss removed. If this not done you will get 488 from LSE trunk. On the inside you can set to match the PBX but it will put extra load on the SBC if it has to transcode so will be better if the list on both interfaces match.
Navigate to Signaling & Media -> Coders & Profiles -> Allowed Audio Coders Group
Root Certificates
All Certificates and Keys needed will be issued by the LSE
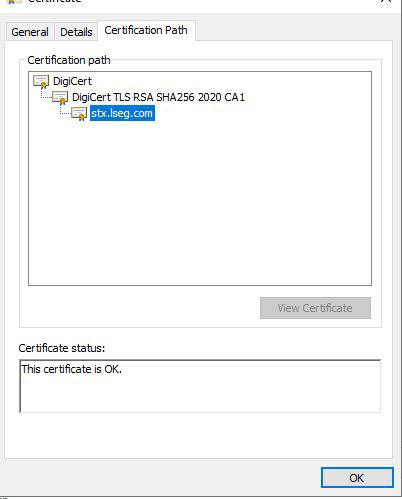
The root certificate is in .CRT format. If we inspect the file using Windows certificate manager we can see the certificate chain from LSE to digicert.
LSE do not send these certificates separately they are all in one bundle but they all need to be imported into the SBC. To obtain these files:
•Double click on the intermediate certificate (“DigiCert TLS RSA SHA256 2020 CA1” in the certificate chain image above) •Go to the Details tab and click “copy to file” •click through the wizard and select base 64 encoding. •give the file an appropriate name •repeat this process for the Digicert root CA (“Digicert” in the certificate chain image above)
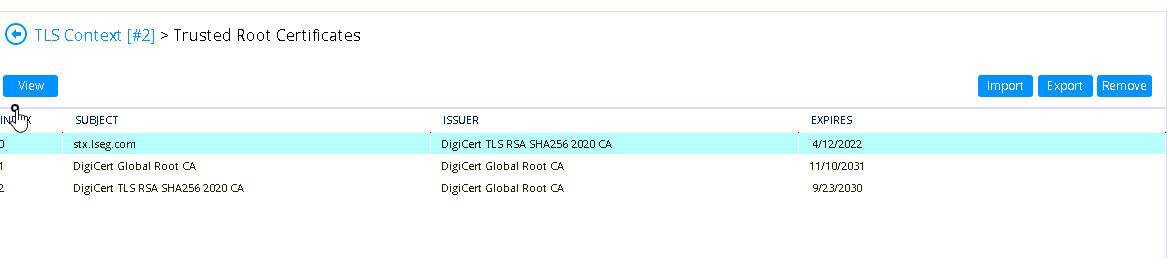
Next the .CRT file from LSE and the two exported Digicert certificates need to be uploaded to the SBC and added to the TLS context.
Navigate to Setup -> IP Network -> Security -> TLS Contexts -> Trusted Root Certficates
Use the Import option to upload the files
The file browser for the upload will not find the .CRT files as by default it expects .PEM so change the search criteria to all files so they can be selected and uploaded.
Private Device Certificates
LSE will issue the private certificate in a single concatenated .pem file. This will be sent in a password protected zip.
-----BEGIN RSA PRIVATE KEY----- ABCDEFIBAAKCAQEAu1FUYDID3aE9MLT0GQ0ueQF34FTiE+jsZn5HBryM+g4ksCOx G4ePSVU3Q4iNWOZxxW64McRfiTgDwOs0344ela9WuG+8ozLF3RfUmnbPKWg2J/uO qm8LAxLtOWhZQjNwICI3Hi+lszhaG/dd8/MRT9NDL6v43xnlJkfCe1cecmXvY7ga JCVG4tNHO/elHS9YGup4g65Y2/2KUW1nyUUL4Kyy/6EN2OaqlY60I0R23SFterW1 FmVDnTDRyX3Q0gnGKbWcyUJCHKI2WcVgFitPQRgS975mi/KDfnugxxb9B2ulj/nd FL2oAYizba41P4g7UKk3aD8XnU4I/QI+wjv7iQIDAQABAoIBAH/AuzQUSHCqnEoQ z/4Z8F0U9EYqfjon/Lr2WsisZdXROZJr9UmaTc4s8VD827ILEQMfPT6r+KBkdKLp h5kEm7Vo7VNC2bvQUAQ3UYe7ihRqf60LM0ToEPGawfIKSf4NiOZRj5fl1TQDNemm 7wwG9gKkSklEF6tJRPCztl9ajmhkFDTq6yNE663FwH9TUBj9nmzZ8mJB/NjIocQX RJaAs3lrnxyBgeJgFSfjP52oPcm498a13Ij/Eqa43eOrorFX29bKLlmBRQXgW/ch Azfx4NC/Jx6meU8gp/gU8T8lD9NmXjpRqRmvXgQytrlbjw4naiIzwUypg3POoWsL GW1RU5ECgYEA5ZD8owCcT9yIMj93UIbq7GbPLEbNG0XQeQufWIUjHuVSsvd7nKWw DQZ1kIv4TIIxGBd7I+aaVRAmx76efS0+NdJ1eeCOsVn07XK2JbXLNBNL49gaouEh peFqPb0GhHjN4c+vRb4fIxLWttx/tt8r1KPAwYmeoWZPVk7OETShV30CgYEA0OL2 kog6ovbpoLf0ykADcLw7VIHQN82e653C4DGKIBq524NJ6BpILDxZ8rDHn7d5EtqH Kil9MHyO8PhncAX8paYid6SKitw/buDnEKzUpN/wUzgZJ4oFS1MNc0JLcloDpBjo PKdSdGTdmgI5BioeiA6lzqMV0/6LboIrDqDTqf0CgYBf3bQivdaI4yddFHPXBQCF yEkrzEVK5lSwt9HLPY31EP8ADalpOSfTyKa/vjPqf1PRI70guOQqMZyAPXIiBAq+ nyy/wK7WESLfJdA63zgEfypp84zsB+ftRb0AGzflii0v53LiRQrrsqpHor0SuQ+s tNWB/N5puDfZav9S4A+gYQKBgDA9ahI3EcuW2Cd8tDSNCf5cChufCxYID358ZYff CPYXFfsC2+uVPjuxCFjKyJ8zAOwAuZxcDoRHD7/IriKpz0n2DxmwTyp4aNHTcKli MI2PBfJCD1UZQ9W8bWvD0Kas8RBRjDiNr7YfoSmy/7ZTvc9QCqyo7x6RN2Qi/YyY SamFAoGAbUUe/qCi15sxAdFVLLZQc1snL4dufj1Og8wvHB/3ypiBE+fHoxU/6Zkx BtcON5jYcVYRBHr05eO0uY6TkpoYAdjo6OV4y91r4Mo1bEOqvG8O4z+OJWkIFGKX DLKppJDgAvo/mmCnwZJK5MLajZfWSuHFECt0bsiLQ3lsdS3nX4I= -----END RSA PRIVATE KEY----- -----BEGIN CERTIFICATE----- ABCDEF+jCCAeICAQEwDQYJKoZIhvcNAQELBQAwXzELMAkGA1UEBhMCR0IxDzANBgNV BAcTBkxvbmRvbjEoMCYGA1UEChMfTG9uZG9uIFN0b2NrIEV4Y2hhbmdlIEdyb3Vw IHBsYzEVMBMGA1UEAxMMc3R4LmxzZWcuY29tMB4XDTIxMDUyNDEwNTAzOVoXDTMx MDUyMjEwNTAzOVowJzEWMBQGA1UEAwwNODMuMjQ0LjIyNy43MjENMAsGA1UECgwE TFNFRzCCASIwDQYJKoZIhvcNAQEBBQADggEPADCCAQoCggEBALtRVGAyA92hPTC0 9BkNLnkBd+BU4hPo7GZ+Rwa8jPoOJLAjsRuHj0lVN0OIjVjmccVuuDHEX4k4A8Dr NN+OHpWvVrhvvKMyxd0X1Jp2zyloNif7jqpvCwMS7TloWUIzcCAiNx4vpbM4Whv3 XfPzEU/TQy+r+N8Z5SZHwntXHnJl72O4GiQlRuLTRzv3pR0vWBrqeIOuWNv9ilFt Z8lFC+Cssv+hDdjmqpWOtCNEdt0hbXq1tRZlQ50w0cl90NIJxim1nMlCQhyiNlnF YBYrT0EYEve+Zovyg357oMcW/QdrpY/53RS9qAGIs22uNT+IO1CpN2g/F51OCP0C PsI7+4kCAwEAATANBgkqhkiG9w0BAQsFAAOCAQEAQ+Nx+VZwdkcfHDtyHz6ncIcD rQAIuifGeoQyBVru3tZ920WyZ2ilxqFSOIPnfa7k5XbpATfJVQwcTivYrNzWhaF8 KCuye5p7U9dHPK6kaVfLrCKzsiEsL47jZTtqr7dAs+uu6isY0OSQaEWBhGyrn7+b 1HQWcG35TnaIbpldpTa3ETLcdsKOxsnHEHghqaFn1gA/J9AO0gY+UyFLOcoVWses Ml04tty8gsLjx2nQ/bIlxle9g5JlE1FszVEyPLYL+KOr9ly3yJOrwCxScxAWD4ar UuLDNQiRgv+qV0SkUv2rAeGd9iGkxXwItLlcG5gX03p9rg7Kk3l4HExoo73NNw== -----END CERTIFICATE-----
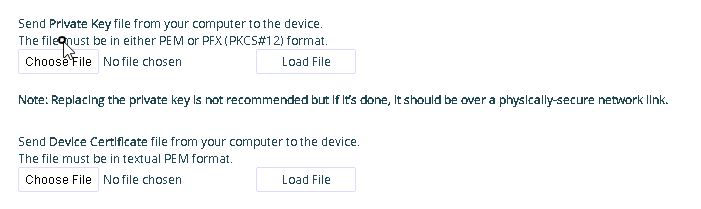
As both the private and device key are both included within the same file the file needs to be uploaded twice. •First using the private key option •Second using the device certificate option
Navigate to Setup -> IP Network -> Security -> TLS Contexts -> Change Certificates
|