TLS Setup


TLS Setup |
|
| Solution Integration > PBXs > BT Call Server > Web UI > System |
TLS Setup for Web UI
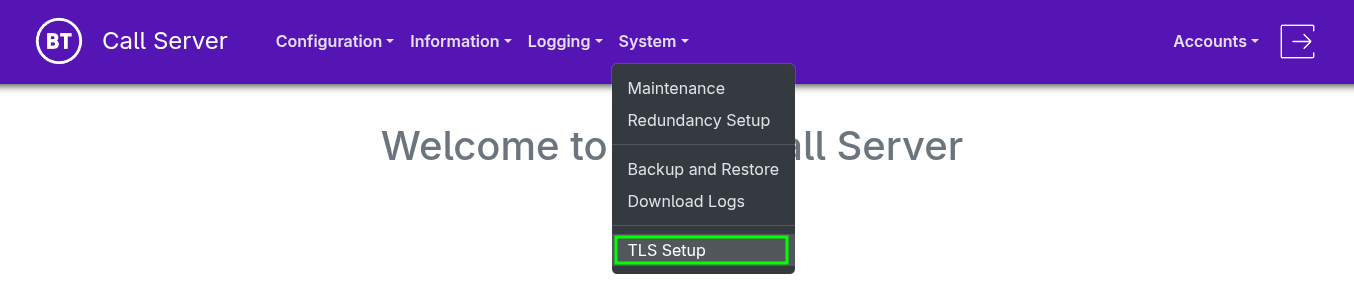
•From the navigation menu, go to System > TLS Setup.
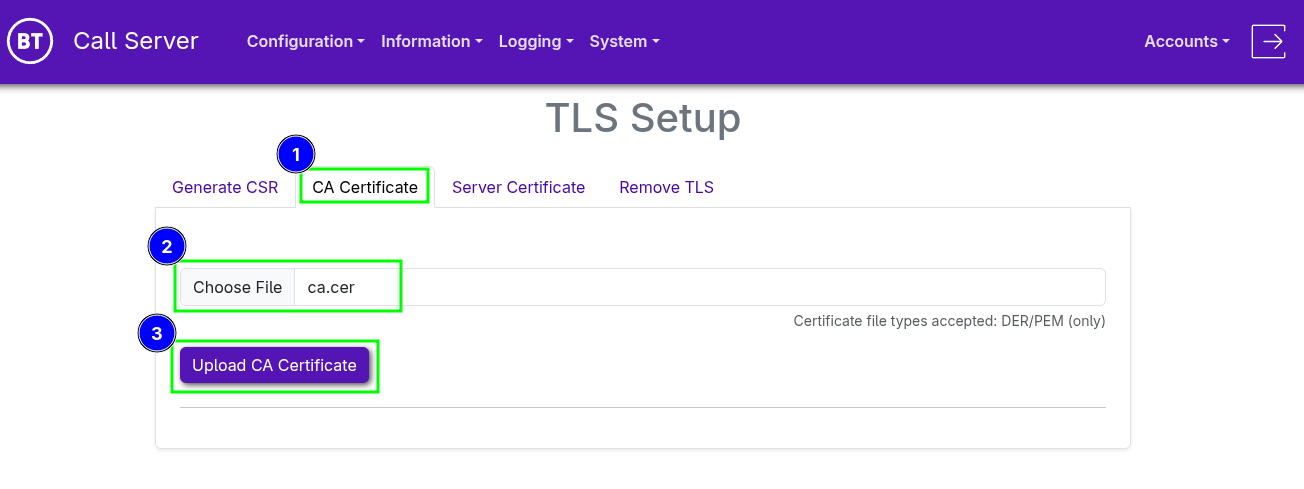
•The first step is to upload the CA certificate, from the navigation tabs, select "CA Certificate". •Click "Choose File" and browse to the CA certificate on your local machine. •Click "Upload CA Certificate" to complete the upload.
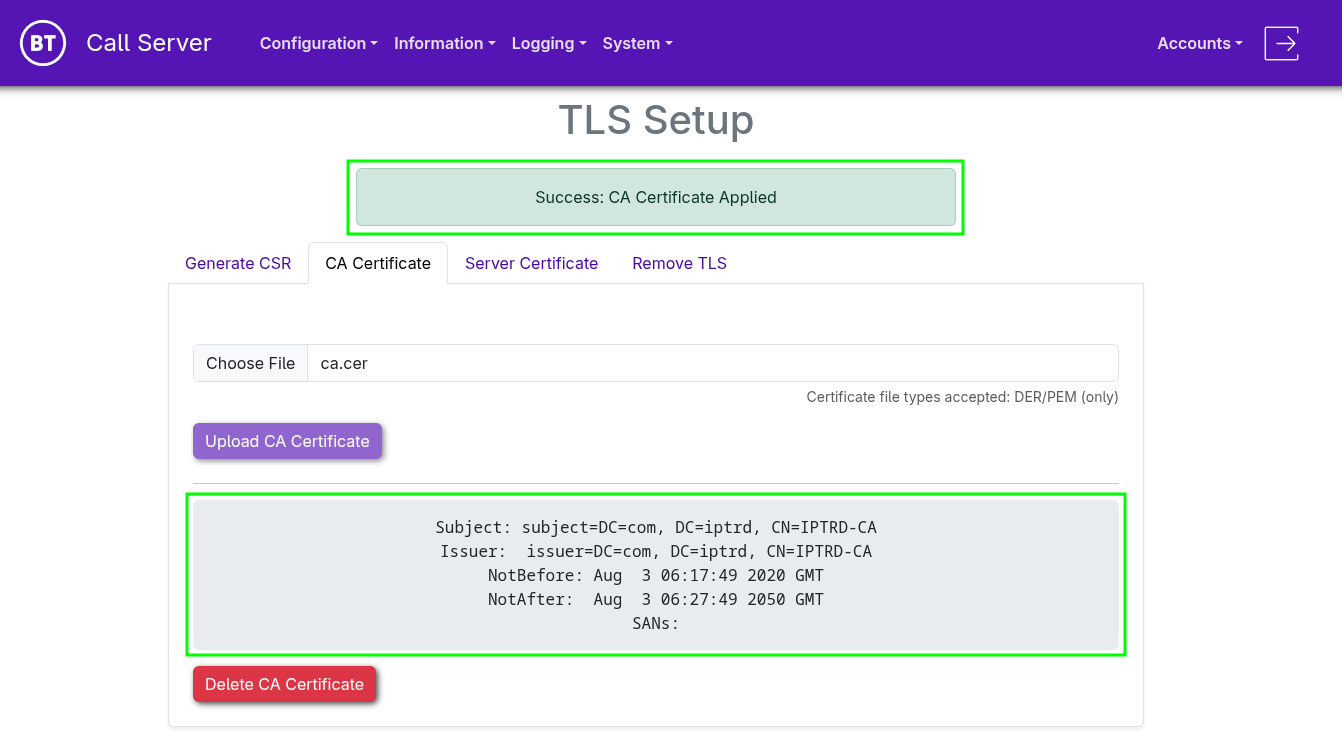
•A confirmation notification will appear at the top, it will also display details of the applied CA certificate. •An option to delete the CA certificate is available, allowing renewal or replacement in the future if required.
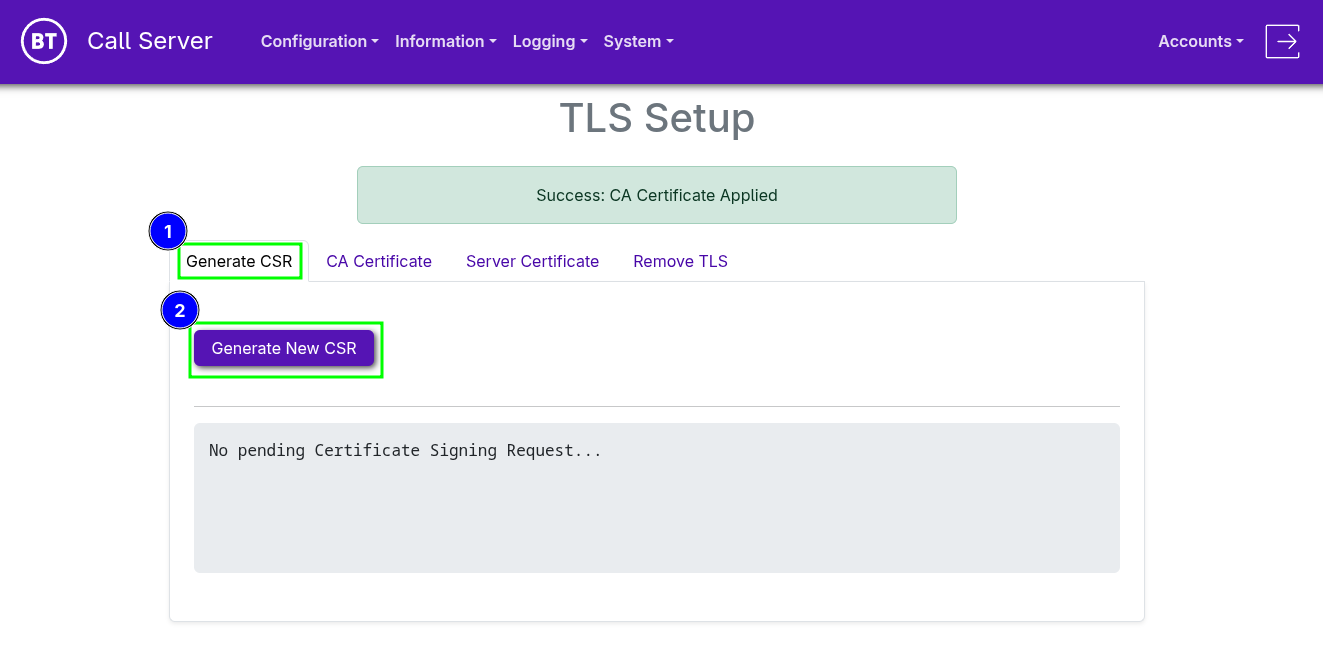
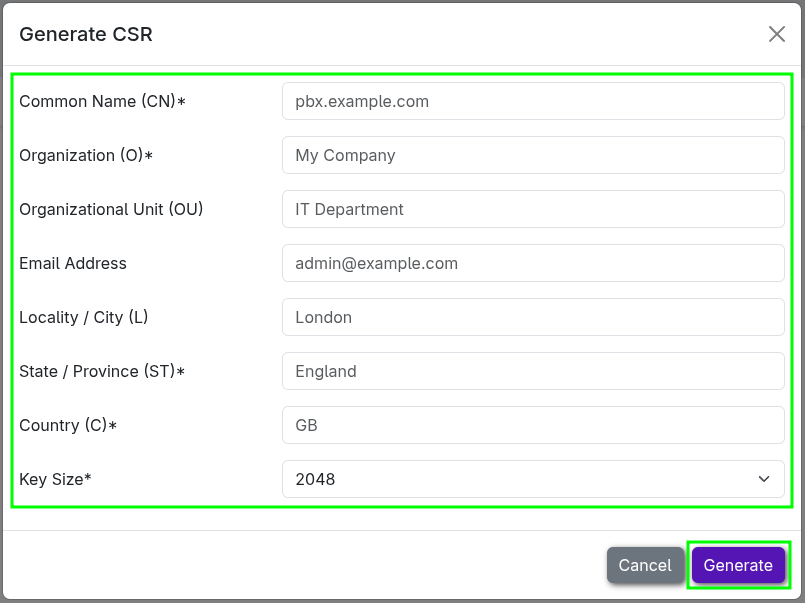
•The next step is to generate a CSR (Certificate Signing Request), from the navigation tabs, select the "Generate CSR" tab. •Click "Generate New CSR"
•Fill in all the fields. Those marked with an asterisk (*) are required, while the others are optional.
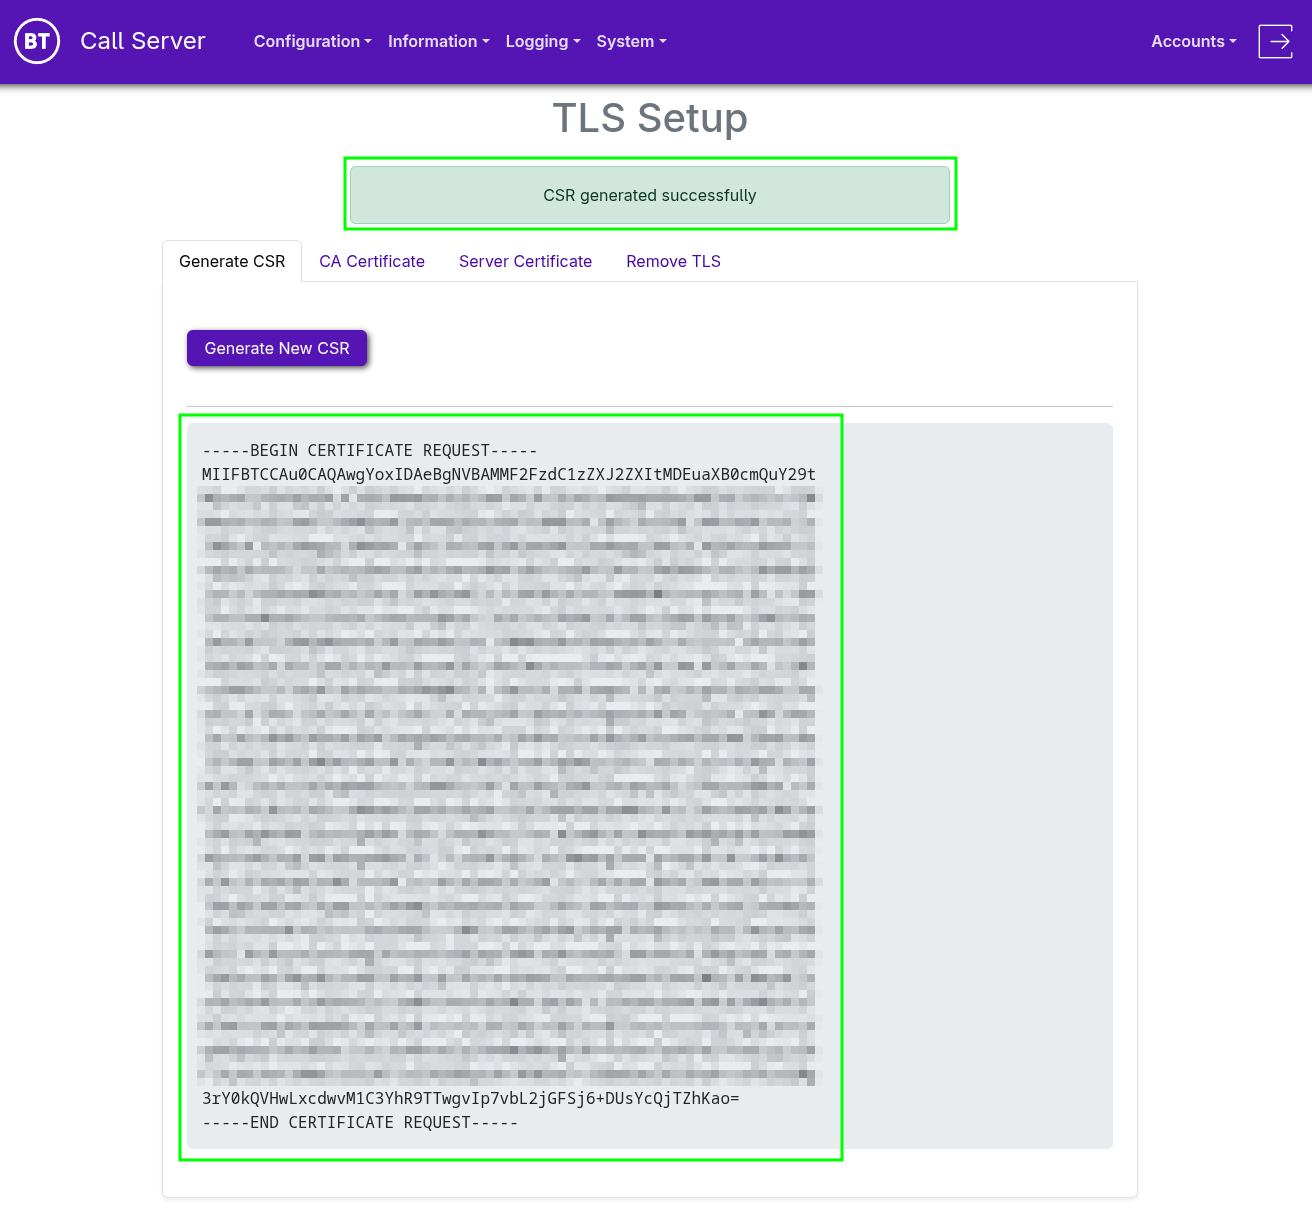
•After the CSR is generated, a notification will display the status along with the full CSR. •Copy the entire text, including the lines -----BEGIN CERTIFICATE REQUEST----- and -----END CERTIFICATE REQUEST----- , and provide it to your Certificate Authority (CA) for certificate issuance.
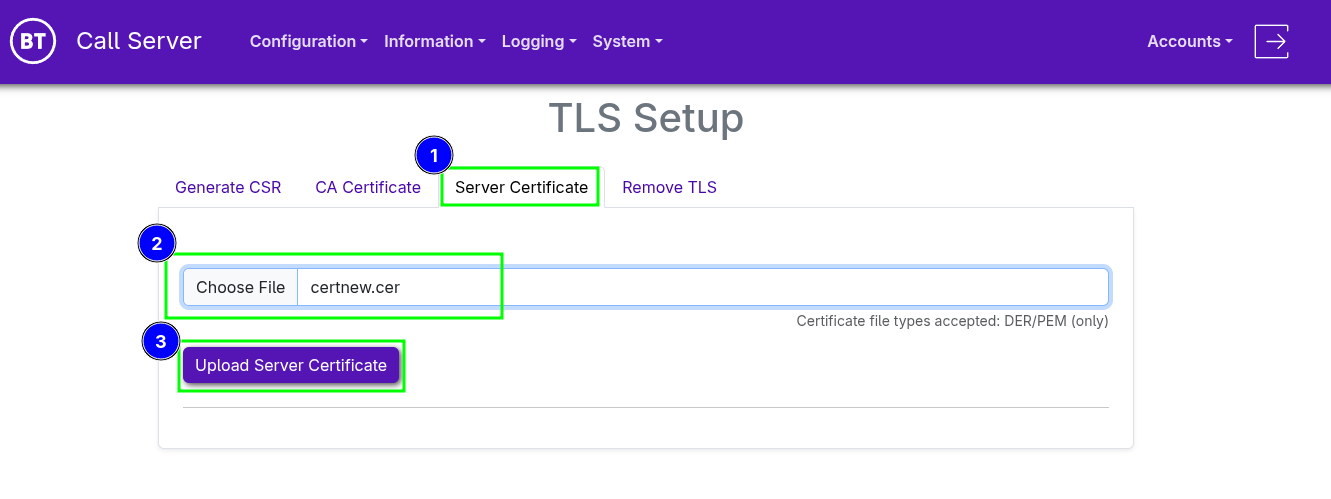
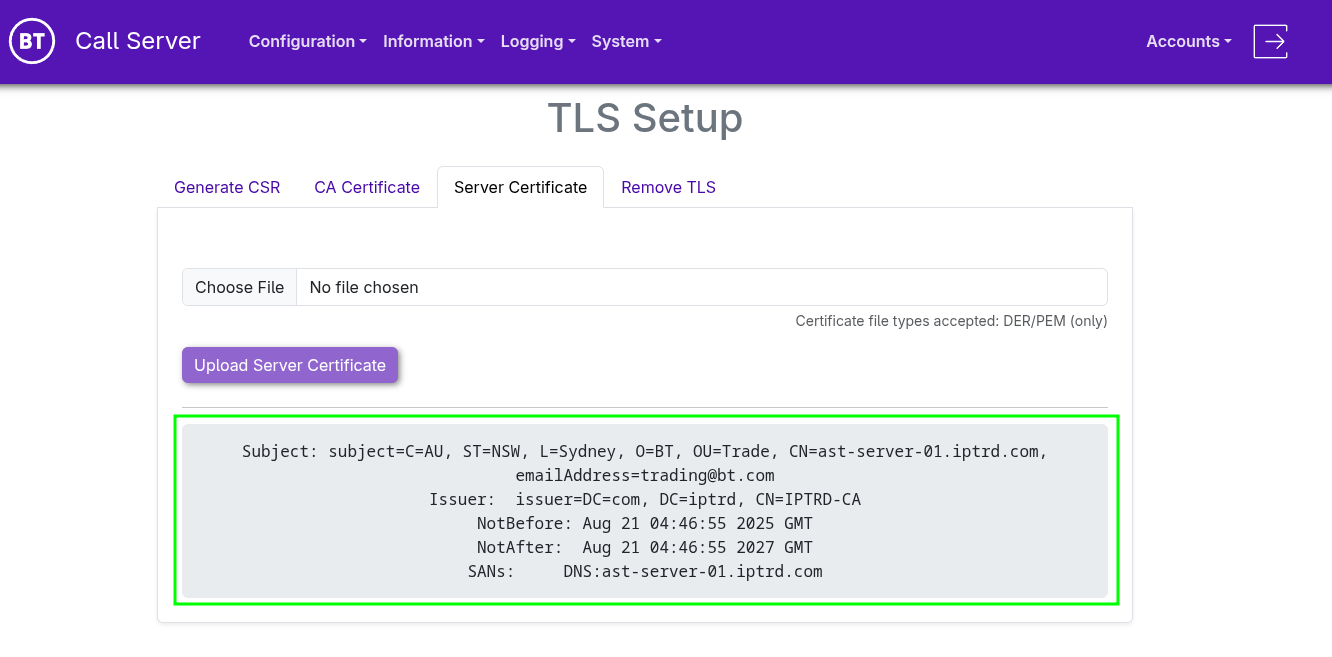
•Once you have received a valid certificate from the Certificate Authority (CA) •From the navigation tabs, select "Server Certificate". •Click "Choose File" and browse to the Server Certificate on your local machine. •Click "Upload Server Certificate" to complete the upload.
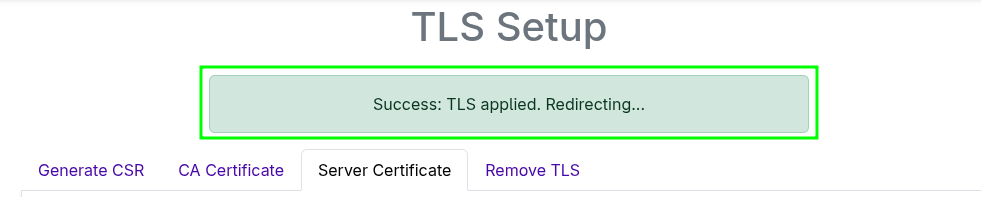
•A notification will briefly display the status, and the system will then attempt to automatically redirect you to the secured address. •If the redirect does not succeed, close the browser tab and open a new one, then navigate to the secured address using HTTPS.
•The Server Certificate tab will now display useful details about the applied certificate.
Remove TLS
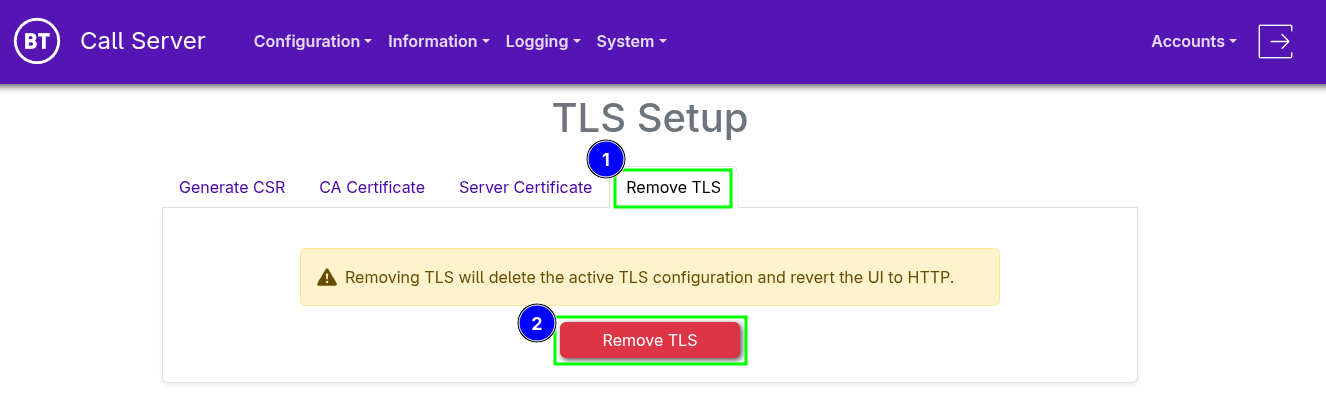
This option allows you to remove all active certificates and restore the system to a non-TLS (HTTP) state.
•From the navigation tabs, select Remove TLS. •Then click "Remove TLS" to completely disable TLS and revert the UI to HTTP. •You may need to clear your browser history and cache to successfully access the system over HTTP again.
|