BT Call Server Scripted Upgrade


BT Call Server Scripted Upgrade |
|
| Solution Integration > PBXs > BT Call Server > Upgrading |
BT Call Server Scripted Upgrade
Upgrades are supported on both OVA and Standard Server deployments, as long as the above criteria are met.
Download the latest package file from the BT Extranet (eg. BTCallServer-Package-Build-xx.zip), then extract the zip file. Copy the “BTCallServer-4.x.x.tar.gz” and “upgrade.sh” files to the server.
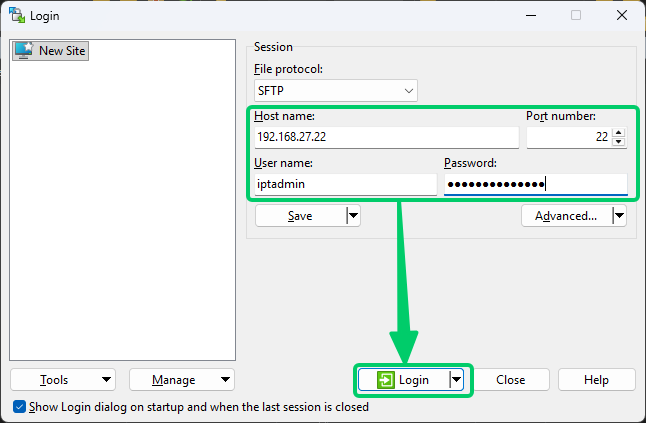
One method we use is a tool called WinSCP (https://winscp.net/eng/download.php) Download the latest version of WinSCP and install it. Open WinSCP once installed and provide connection details to the Linux OS (Use the “iptadmin” user)
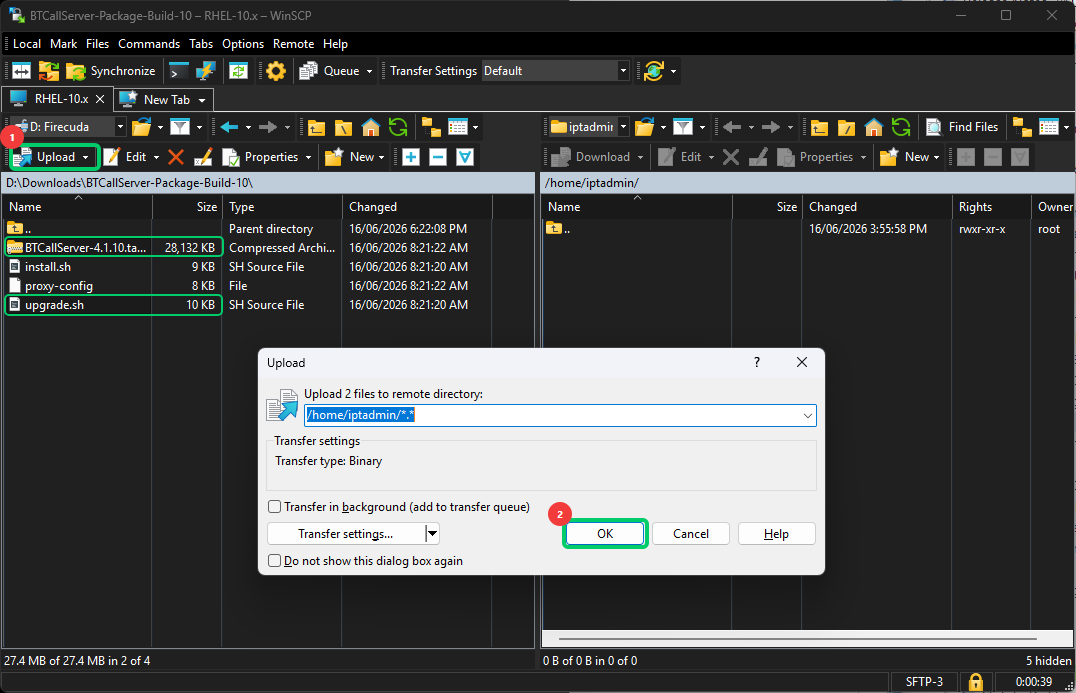
Browse your local PC on the left and select both the supplied files (as seen below) Then click on “Upload” and Select “OK” (Confirm the upload path is /home/iptadmin )
Once the files have been copied to the system, you can disconnect and close WinSCP. The files should now be in the “iptadmin” user home directory /home/iptadmin
Using any terminal connection application (eg PuTTY), connect to the Linux OS using the “iptadmin” user to connect.
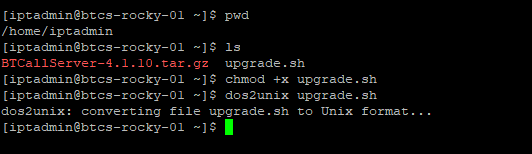
You will be in the /home/iptadmin directory by default once connected. Now make the “upgrade.sh” script executable and ensure it is converted to unix format (Unix format is only done as a precaution, the file is usually already in the correct format)
chmod +x upgrade.sh dos2unix upgrade.sh
Once you are ready to kick off the upgrade, run the following:
sudo ./upgrade.sh
This will start the upgrade of the BT Call Server. This process can take some time to complete.
Once the upgrade is complete you should see the below at the end. There is also an “Upgrade-Log-[date|time].log” generated when the script is run. (The log file is output to the same path as the script file) If there are any problems with the upgrade you can check the log for possible reasons.
Once the BT Call Server upgrade is complete, reboot the system with the below command.
sudo reboot
The scripted upgrade is now complete.
|